How to Implement Account Verification and Login by Phone in Laravel
Time to read:
April 12, 2019
Written by

At times, you might want to create an app that uses a phone number/password pair as a means of authentication, as opposed to the normal email/password pair. In some other cases, you are not necessarily using phone numbers as a means of authentication, but having a phone number is critical to your app. In such situations, it is very important you verify that the phone numbers your users provide are valid and functional. One way to do this is to give them a call and tell them a code that they will have to provide to your app. If you use Gmail, then you are probably familiar with the voice call verification it uses. In this article, I will be showing you how to achieve that using Laravel and Twilio’s excellent service. Let’s get to it.
Technical Requirements
For this tutorial we’ll assume the following:
- You use Laravel valet (You can use any development environment though).
- You have MySQL installed on your machine.
- You have a global installation of Composer.
- You have Ngrok set up (You won’t use this if you are using Valet).
- You have a Twilio account.
- You have a verified number (If you are in trial mode).
- You have a voice-enabled Twilio phone number
Create and Setup a New Laravel App
We are going to create a fresh installation of Laravel in our valet "parked" directory. We do this by running the following command:
This is assuming we have already installed the Laravel installer. If you don't have that, you can check the Laravel official documentation for direction on that. Alternatively, you can install a fresh Laravel app using Composer. Run the following command in your terminal window:
Next up, we need to create a .env file in which we can store all the configurations our app needs. Run the following command in your terminal:
This command creates the .env using the .env.example as a template. Open the .env file and add the database credentials for database name, username and password.
Create a database and set the credentials of that database in the just created .env file.

If you completed all of these steps correctly, you should see your new app in the browser by running valet link from your terminal. In my case, I named the folder "twilio" and specified a .devs extension, so my URL is twilio.devs.
Set Up the Authentication Routes and View
After setting up the database credentials, we can now set up authentication using the artisan command. Laravel provides quick scaffolding of all the routes and views we need for authentication using this simple command. With this one command, we can install a layout view, registration and login views, as well as routes for all authentication endpoints!
After running this command, run the migration.
And when you check your database, you should see the tables created by the make:auth artisan command. If you refresh the app, you will also notice some authentication links automatically added to the interface now.
Set Up Twilio
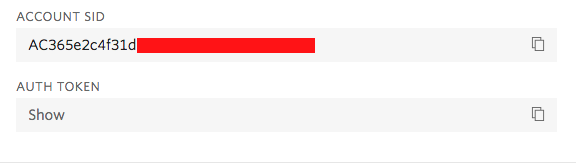
The next thing we are going to do is to add our Twilio credentials to the .env file. Visit your Twilio dashboard and copy your Account SID and Auth Token.
Install Twilio’s SDK Using Composer
Next up, we install The Twilio PHP Helper Library. This will help us talk to Twilio's API from our code. Run the following command in your terminal:
Tying Everything Together
This is the point where we start doing the actual work of making sure our app calls the user upon registration, and to make sure the user can also login with his phone number. We would not want our users to be unable to log in after registration.
Modifying our User Model
Now that we have everything set up, we need to start tweaking our app to accept a phone number upon registration instead of email. First, we will change the users table migration file generated for us, when we ran the php artisan make:auth command like so:
The above code changes the email field to phone. It also adds a verification_code field to the user table that stores the code that will be told to the users when they are called. a phone_verified_at field is also added to the user's table to store when the user's phone number is verified.
We also need to make some changes to the app/User.php model. The following code ensures that the phone, name, and password fields are mass assignable. You can read more about mass assignment in the Laravel documentation:
Still, in app/User.php file, let's add a couple of methods to help us in the verification process. Add the following methods:
The hasVerifiedPhone method just checks to see if the phone number of the user is verified. The markPhoneAsVerified verifies the phone number of the user by setting the phone_verified_at field of the user to the current timestamp.
Modifying our Authentication Controllers
Like I mentioned earlier, we would not want a situation where a user registers but is unable to log in simply because our app expects an email for authentication. Let's make sure that does not happen. Open app/Http/Controllers/Auth/LoginController.php and add the following method:
This method returns the login username to be used by the controller. It is basically saying "This is the field in the database you should look up as the username when authenticating a user".
Next, we edit app/Http/Controllers/Auth/RegisterController.php and change the validator and create methods like so:
The above methods just make sure we validate and store the user input properly during registration. Nothing fancy here.
Modifying our Authentication Views
Now we need to start working on what our users will actually interact with: The authentication views. We need to edit the registration and login views to expect phone numbers instead of email. Open the resources/views/auth/register.blade.php and edit the portion asking for email to the following:
Also, open the resources/views/auth/login.blade.php and edit the portion asking for email to the following:
We have successfully tweaked our app to accept phone numbers during authentication. Well done!
Middleware, Controller, and Route for Verification
At this point, we need to protect our routes from users with unverified accounts. We do so by creating a middleware that we apply to the routes we need to protect. We also need to create the necessary controller and routes for verification. Let's get to it.
Create a Middleware
Laravel makes it very easy to create a middleware. Just switch to your terminal and run the artisan command:
Open the middleware and update the following code to the handle method:
Now we need to register the middleware so that the application knows about it. Open the app/Http/Kernel.php and add this to the $routeMiddleware array.
Lets apply the middleware to the home route. Open up routes/web.php and edit it like so:
Now any user that visits the home route without verifying their phone number will be redirected to the route we specified in the middleware.
Add Necessary Routes
Open routes/web.php and add the following code it:
As you can see from the above routes, we are routing traffic to a PhoneVerificationController that we don’t have yet. Let's quickly create that using artisan. Run the following command:
Open that controller and add the following code to it:
In the show method, we are saying "If the user has a verified phone, simply redirect the user to the home route" else, return a view notifying them to provide a verification code. In the verify method, we are verifying a user. Notice how we use the hasVerifiedPhone method we created earlier in app/User.php. Let’s now create a view where users can provide their verification code.
Create a file at resources/views/verifyphone.blade.php and add the following code to it:
Calling the User
We have everything all set up. We now need to hook into the registration flow and call the user. Laravel provides a nice hook for us to do that. In app/Http/Controllers/Auth/RegisterController.php, after successful registration, Laravel calls a method registered. This means we can override this method to call the user after successful registration. Open app/Http/Controllers/Auth/RegisterController.php and add the method:
In this method we call the callToVerify method on the user that we are yet to define. After that, we redirect the user to the home route. Let’s quickly define that method. Open app/User.php and add the following code:
This is where we actually call the user and disclose the verification code. We first generate a random 6 digit code and store it to the user. After that, we create a client to help us talk to Twilio's API using the credentials we stored in .env earlier.
At this point, it is paramount to understand how Twilio's Programmable Voice API works. The create method accepts 3 parameters:
- The phone number to be called. For us, this will be the user's phone number. If you are in trial mode, this has to be a verified phone number.
- The second parameter is the phone number making the call. This has to be a voice-enabled Twilio phone number created in your console. If you don't currently own a Twilio phone number with Voice functionality, you'll need to purchase or create one for testing.
- The 3rd parameter is the most interesting part of Twilio's programmable voice API to me. The 3rd parameter is a URL to an XML file that must return a valid TwiML (Twilio Markup Language) or a URL to your application that Twilio makes an HTTP request to, asking for instructions on how to handle the call. This has to be a live URL because Twilio is going to send an HTTP request back to it. This is where Ngrok comes to play. It will help us get a live URL to our application.
Let's define the route and a method on PhoneVerificationController.php. Open routes/web.php and edit it like this:
Open PhoneVerificationController.php and edit it like so:
One important thing we need to do next is to disable CSRF checks on the route Twilio will be making an HTTP request to. This is very important. If we don't disable it, Laravel will not allow access and Twilio will not be able to know how to handle the call. To do that, let's edit app/Http/Middleware/VerifyCsrfToken.php like so:
At this point when we register a user, we will receive a call from Twilio. Everything works fine but I noticed something we need to fix. Twilio programmable voice tries to read the code out as a word instead of spelling out each letter. For example, if the code is qwerty, Twilio tries to pronounce it as a word, as expected. But that is not what we need. We need it to say each letter separately. That means we need to return it like q.w.e.r.t.y, this way, the code will not be read as a word. Edit PhoneVerificationController.php once again like so:
Run the Migration
Because we updated the user's migration table, we need to update the columns to include the changes we made. Run the following command to refresh the tables:
And that is it!
Testing
To test,
- Run
valet shareand copy the ngrok URL. - In the
app/User.phpat thecallToVerify()method, replace "your-ngrok-url" with the URL you copied above. - Visit your website and register with a phone number.
- Input the code you heard during the call in the view you are directed to after registration.
NOTE: When registering, Phone numbers should be formatted with a '+' and country code e.g., +16175551212 (E.164 format).
Conclusion
Believe it or not, This is all it takes to achieve phone verification using Twilio's Programmable voice, Twilio TwiML™ and Laravel. Awesome!
Written By:
Name: Victor Abbah Nkoms
Twitter: twitter.com/veekthoven
Email: veekthoven@gmail.com
Github: github.com/veekthoven

Related Resources
Twilio Docs
From APIs to SDKs to sample apps
API reference documentation, SDKs, helper libraries, quickstarts, and tutorials for your language and platform.
Resource Center
The latest ebooks, industry reports, and webinars
Learn from customer engagement experts to improve your own communication.
Ahoy
Twilio's developer community hub
Best practices, code samples, and inspiration to build communications and digital engagement experiences.