Python Image Recognition with ImageAI and Twilio MMS
Time to read:

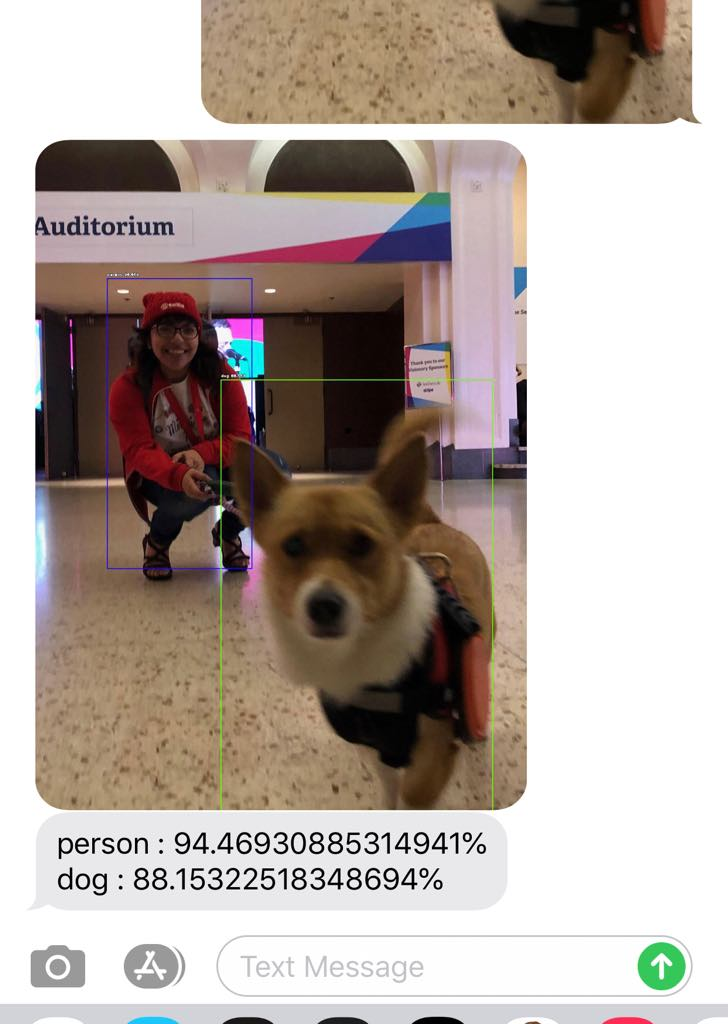
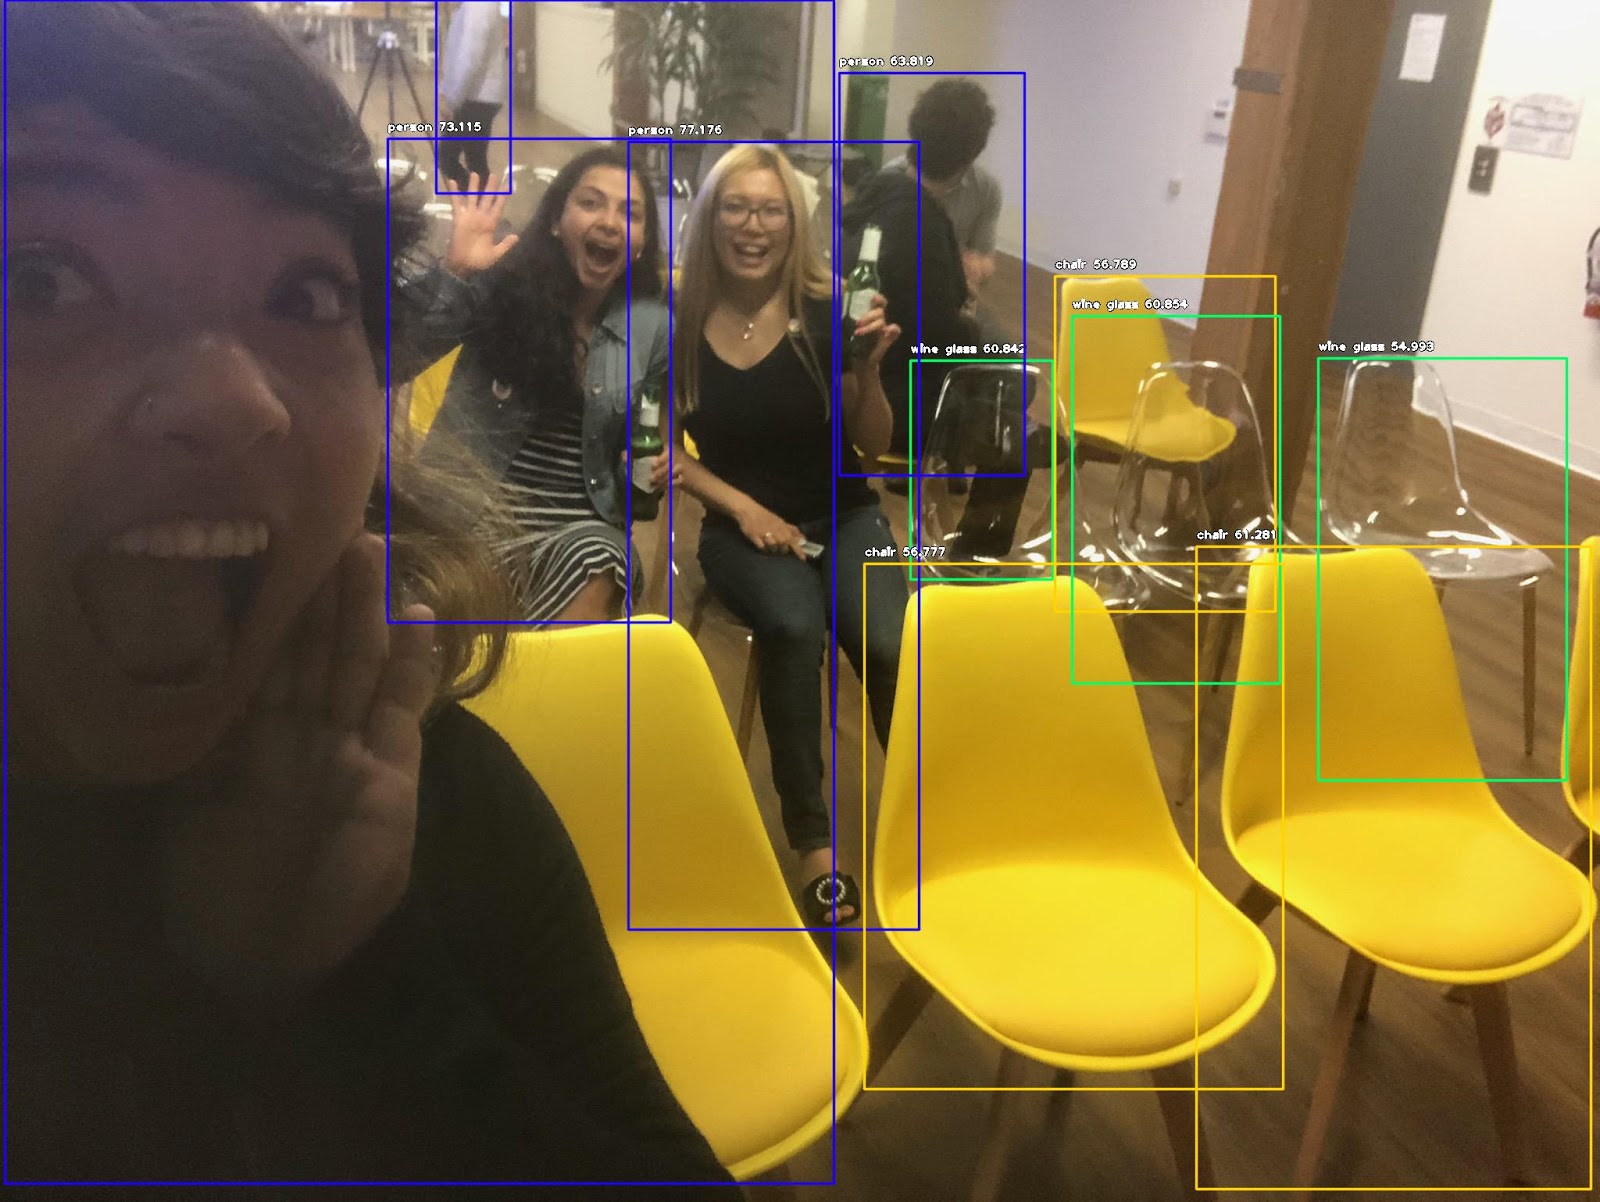
Can a computer identify what's in an image? Development libraries like ImageAI make normally-complex Machine Learning tasks including object detection easier. This blog post will show how to build an image classification application using Python, Flask, and ImageAI. This Python image recognition application will receive inbound images with Twilio MMS and respond with a modified image segmented into detected objects and the model's detection confidence percentages.
What is Python Image Recognition?
Python image recognition is the process through which artificial intelligence and machine learning technologies detect objects within an image and create corresponding categorizations for the images based on those objects. Image recognition software generally works by analyzing the individual pixels in an image and looking for patterns to help determine what objects are present. This deep learning allows the software to recognize objects over and over again in new images.
Building an app that utilizes this type of image classification, like the one we’ll build in this tutorial using Twilio MMS, Python, Flask and ImageAI, can be relatively straightforward. Let’s dive into everything you need to know before we get started.
Getting Started With Python Image Recognition
Prerequisites
- A Twilio account - sign up for a free one here
- A Twilio phone number with SMS capabilities - configure one here
- Set up your Python and Flask developer environment - Make sure you have Python 3 downloaded as well as ngrok.
- OpenCV, TensorFlow >= 1.4.0, and Keras 2.x
- ImageAI, an open source Python machine learning library for image prediction, object detection, video detection and object tracking, and similar machine learning tasks
- RetinaNet model for object detection supported by ImageAI. Download it here and save it into the project folder that will house your code. You can also use other models which may be faster but less accurate if you wish for faster results
Setup
Activate a virtual environment in Python 3 and on the command line, run pip install Flask twilio and pip install -U tensorflow keras opencv-python imageai.
Your Flask app will need to be visible from the web so Twilio can send requests to it. Ngrok lets us do this. With it installed, run the following command in your terminal in the directory your code is in. Run ngrok http 5000 in a new terminal tab.
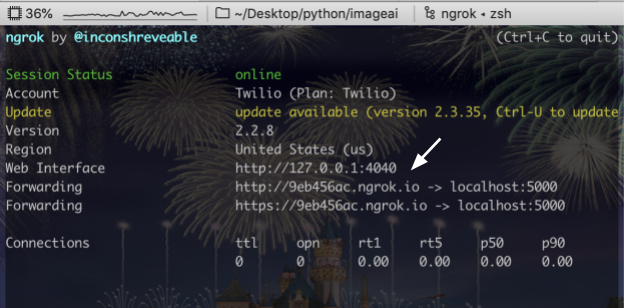
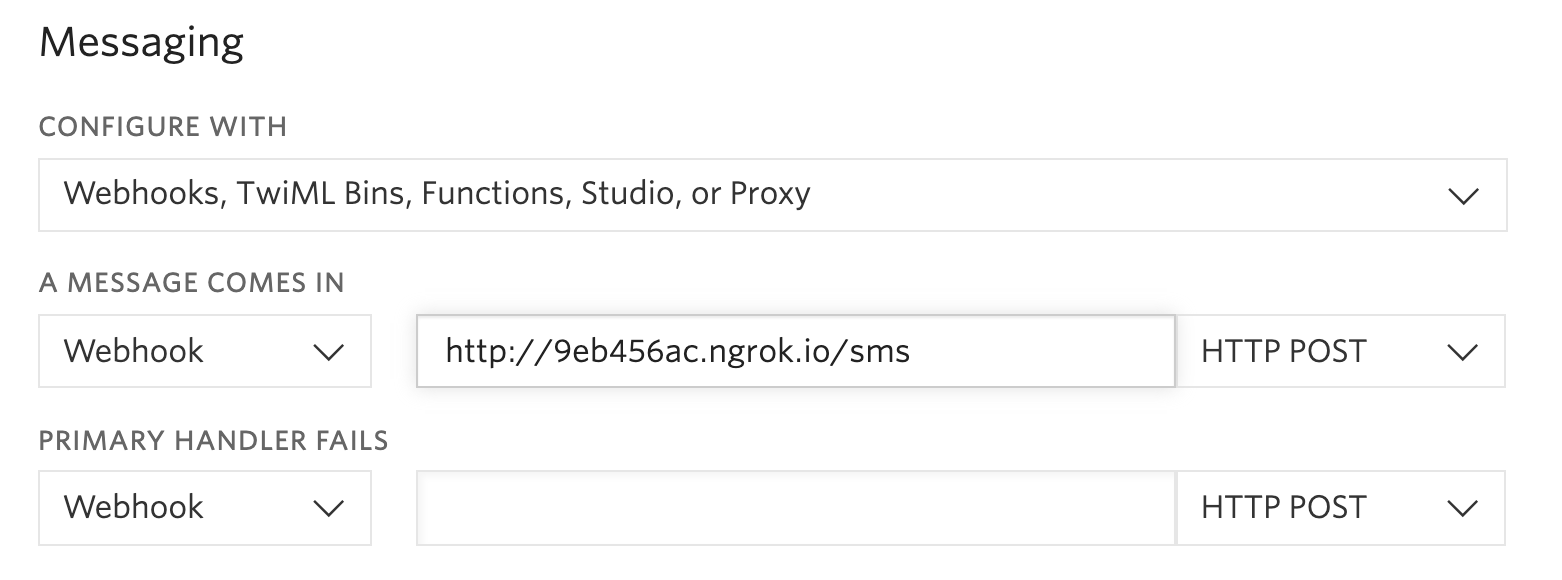
You should see the screen above. Grab that ngrok URL to configure your Twilio number.
Build the Object-Detecting Flask App
Make a directory called imageai and in it, create a file called object_detection.py. At the top of the file be sure to import the following necessary libraries, create a variable with the path to our Python file, and make a Flask app and route to handle inbound MMS/SMS.
Right beneath that we'll create a MessagingResponse object for our outbound Twilio message. This will contain the objects the model detected and how confident the model is about them, as well as the modified image. We'll also make a new instance of the ObjectDetection class, set the model type to RetinaNet (a high-density detector which takes longer than other models but is more accurate) and the path to where we downloaded it, and finally load the model. ImageAI supports other models like YOLOv3 and TinyYOLOv3 (You Only Look Once) which offer moderate accuracy but faster detection speeds. There are other RetinaNet implementations for Keras, PyTorch, and more for most of your development needs!
Check if an inbound message is an image with Twilio MMS
This is the complete code for the sms() function.
Now we check that the 'NumMedia' property isn't zero is how to check that an inbound message is an image. Next we make a string called filename with the MessageSid to distinguish between each inbound image. Then we open the file, write the content of Twilio’s image to it, and pass the image to detector.detectObjectsFromImage to perform object detection on the inbound image, save the output image under the same filename, and returns an array of dictionaries, each of which corresponds to how many objects are detected.
Looping through the array of dictionaries, we find, print out, and create a response string with the objects detected and the percentage probability of the detections.
Finally we return the string and the new image, and handle what happens if the inbound message was not an image.
This is the complete code for the sms() function.
We still need to make that route. Twilio returns a URL to the image, not the actual image itself.
Send a Local Image with Twilio
We need a second route called output to help deliver the image we saved containing the objects detected by the model. This URL retrieves that new image and then we finally run our Flask app.
On the command line open a new tab separate from the one running ngrok. In the folder housing your code, run
export FLASK_APP=objectdetection

export FLASK_ENV=development

flask run  --without-threads
and text your Twilio number an image. You should see something like this:
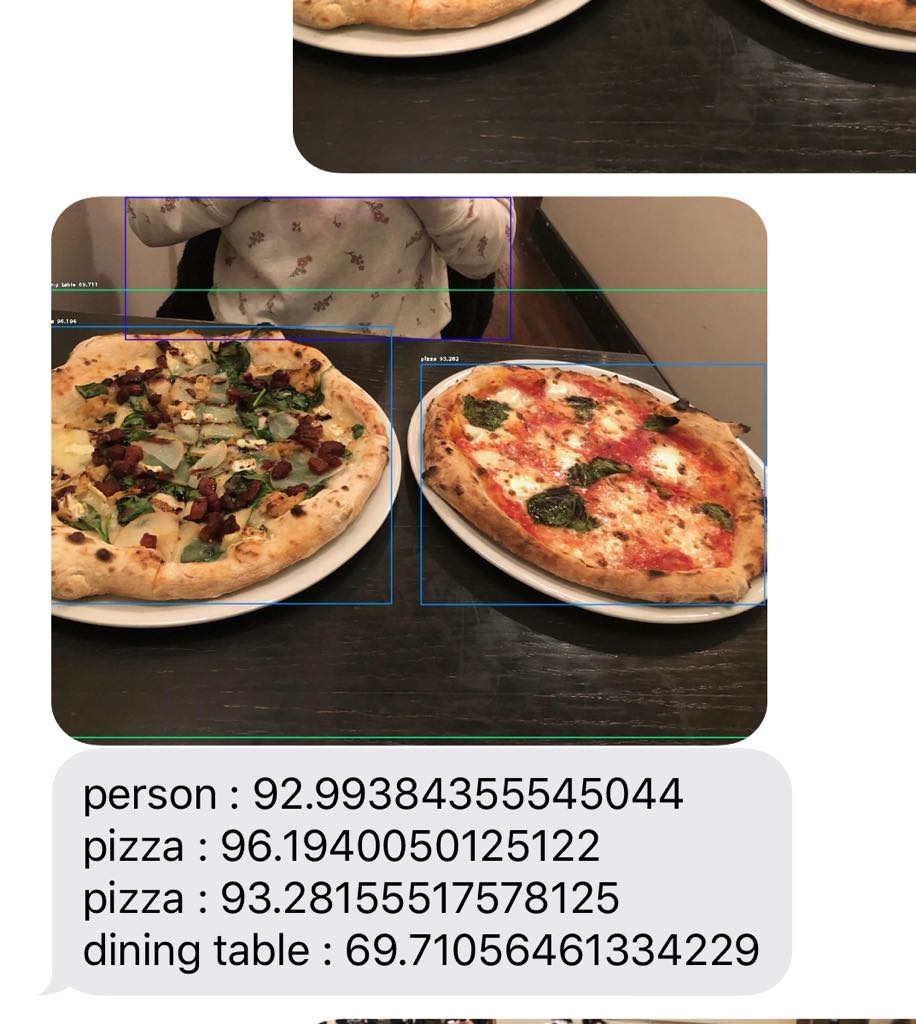
Congratulations! Your Python image recognition application is up and running.
What's Next
You could use a custom model or other ones like YOLO and Tiny-YOLO which are faster but less accurate, only taking one forward pass through the network and using fully connected layers instead of convoluted ones. This means they're better-suited for real-time object detection. Some different use cases of object detection include autonomous driving, recognizing characters, facial detection, activity recognition, digital watermarking, and more. Let me know in the comments or online what you're building.
- GitHub: elizabethsiegle
- Twitter: @lizziepika
- email: lsiegle@twilio.com
Related Posts
Related Resources
Twilio Docs
From APIs to SDKs to sample apps
API reference documentation, SDKs, helper libraries, quickstarts, and tutorials for your language and platform.
Resource Center
The latest ebooks, industry reports, and webinars
Learn from customer engagement experts to improve your own communication.
Ahoy
Twilio's developer community hub
Best practices, code samples, and inspiration to build communications and digital engagement experiences.


