How to embed Twilio Voice in a Retool app for outbound calling
Time to read:

Customer-facing teams often find themselves in the unenviable position of needing to manage customer data and customer communications in separate tools. Twilio Voice makes it easy to add telephony to your applications using SDKs and APIs. Twilio Voice is frequently used to add telephony to consumer-facing applications, and why should internal applications be any different?
In this tutorial, you’ll use the Twilio Voice JS SDK to add outbound voice calling capabilities to a lead management application built in Retool. Retool is a development platform for internal tools. Together, Twilio Voice and Retool provide a powerful and easy-to-use toolkit to build custom voice-enabled internal applications.

Prerequisites
In order to complete this tutorial, you will need the following:
- A Twilio account. If you haven't signed up yet, sign up for a free Twilio trial.
- A Twilio phone number. Learn how to buy a Twilio phone number here.
- A Retool account. If you haven’t signed up yet, sign up for a free-forever Retool account.
- A high-level understanding of Retool. If this is your first time using Retool, check out our 5-minute quickstart for an orientation.
Twilio Setup
Before you can start building in Retool, you’ll need to do some pre-work in the Twilio Console.
1. Create a TwiML App
A TwiML Application tells Twilio how to handle the calls you'll make from your Retool app. Create a TwiML Application following these steps. Specify a name for your TwiML App and note the TwiML App SID for later. Leave all other settings blank, you'll fill them in later on!
2. Create an API Key
Create an API Key and note the key's SID and Secret for later. The API Key will authenticate and authorize you to interact with Twilio APIs.
3. Create a Twilio Service
A Twilio Service is a container for the serverless functions which makes it possible for your Retool app to get a voice access token, and for outbound calls to be routed correctly. Create a Twilio Service following these steps.
4. Set Twilio Service environment variables
In your new Twilio Service, set the following environment variables:
| Key | Value |
|---|---|
| TWIML_APPLICATION_SID | The TwiML App SID you noted in step one |
| API_KEY_SID | The API Key SID you noted in step two |
| API_KEY_SECRET | The API Key Secret you noted in step two |
| CALLER_ID | The phone number you obtained when you set up your Twilio account. Make sure to include a + and the country code at the beginning! |
Learn how to set environment variables for your Twilio Service here.
5. Configure Twilio Service dependencies
The serverless functions running in Twilio need access to a few software libraries to function properly. Import the following NPM modules:
| Module | Version |
|---|---|
| lodash | 4.17.11 |
| @twilio/runtime-handler | 1.2.3 |
| twilio | ^3.77.3 |
| xmldom | 0.1.27 |
| util | 0.11.0 |
Learn how to import NPM modules and manage node.js dependencies in your Twilio Service here.
6. Create a Twilio Function to issue voice tokens
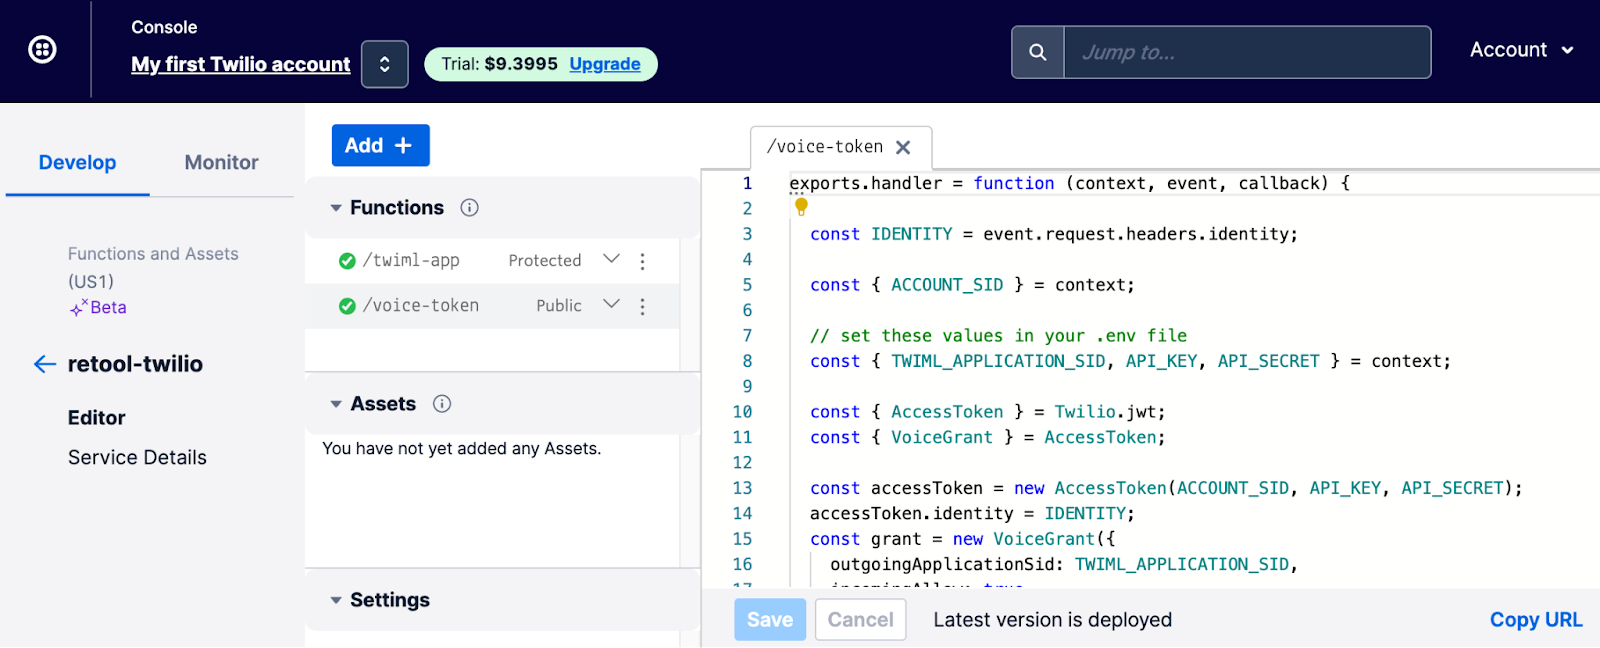
In order for the embedded Twilio dialer to authenticate with Twilio's services, it needs a valid access token. To create a function for issuing voice tokens:
- Add a function named /voice-token.
- Set the visibility of the function to Public.
- Copy and paste the contents of voice-token.js into the function and save.
- Copy the URL for this function for later use.

7. Create a function to route outbound calls
In order for Twilio to know what to do when it receives a call from your app, you need a call routing app. To create a call routing function:
- Add another function and name it /twiml-app.
- Set the function visibility to Protected.
- Copy and paste the contents of twiml-app.js into the function and save.
- Copy the URL for this function for later use.
8. Deploy your Twilio Service
Publish your Twilio Functions by clicking Deploy All. This finalizes all the changes you've made.
9. Finish configuring your TwiML App
Remember that empty TwiML App we created in step one? Edit the app settings and provide the full URL for your /twiml-app function as the value of the Voice Configuration Request URL. Specify a Request Method of HTTP POST and save your changes.
This step connects inbound requests from your Retool app to the call routing function.
Retool setup
Now that your Twilio account is set up, let's set up the Retool app.
1. Create a Retool REST API Resource to retrieve voice tokens
In order for your Retool app to authenticate with Twilio, you'll need to get a valid voice token. You’ll configure a REST API resource in your Retool project to query the voice token Twilio Function from your app.
To set this up:
- Navigate to the /resources page in your Retool instance and click "Create new > Resource."
- Select REST API as the resource type.
- Name the resource “Twilio Voice Token”.
- Specify the Base URL of your /voice-token Twilio Function as noted in step six of the Twilio setup.
- Specify a header with a key of
identityand a value of{{current_user.email}}. This is used to pass the email address of the Retool user to Twilio for use in the token identity. - Save your changes.
2. Import the Retool app code
First, download twilio-dialer-retool-app.json from the Retool app exchange. To import the app code, navigate to the Retool main page and click Create new and select From JSON. Upload the JSON file containing the app code, and name the app.
You may need to connect the getVoiceToken Resource Query to the REST API Resource you created previously. To do this, edit the Retool app and:
- Open the bottom panel to view the getVoiceToken Resource Query.
- Pick “Twilio Voice Token” from the Resource dropdown.
- Save the Resource Query.
3. Explore the Retool app
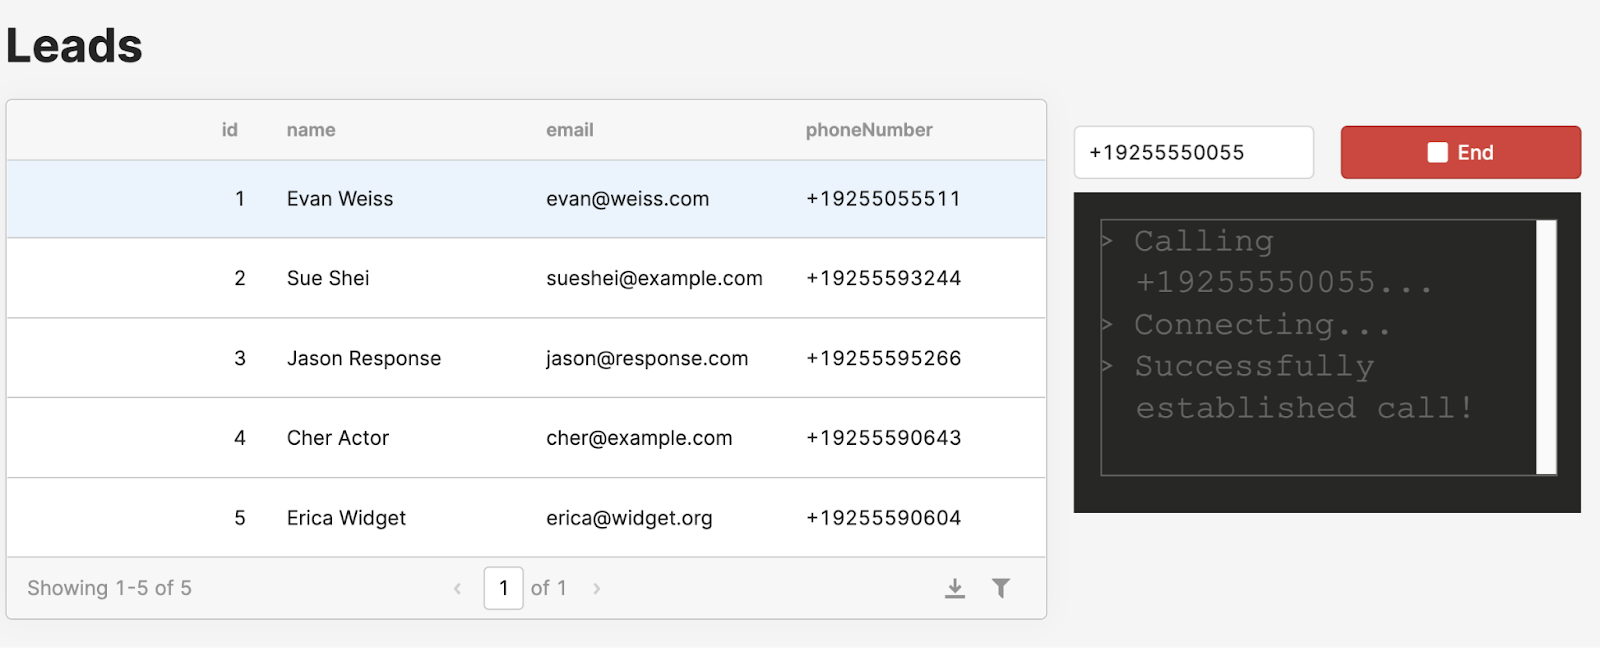
If everything is working as expected, you should now be able to place outbound calls from the Retool app! The app is set up with a hard-coded table of "leads" to simulate a simple call center app. You can edit the contents of the leads table directly, or simply type your phone number in the field to try calling yourself. Click the Preview button on the top right to try out the application.
4. Learn about how the custom component works
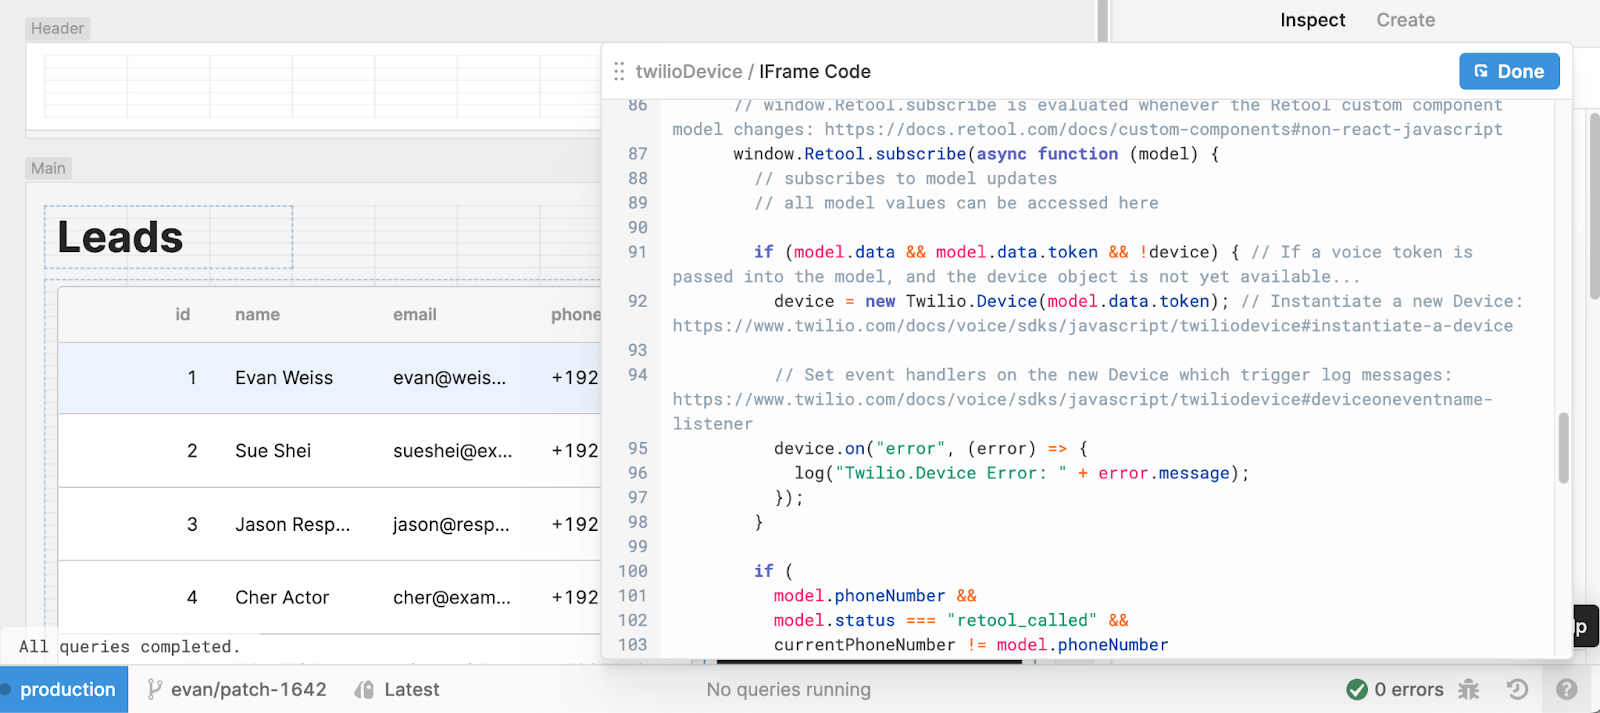
The Twilio Dialer component has been built as a Retool custom component. You can view the code used in the Twilio Dialer component in Retool by clicking on the twilioDevice component and inspecting the IFrame Code field. You can also find the same code at retool-custom-component.html for easy reading!

Also, take 18 minutes to check out our video walkthrough of how this app is put together!
Wrap up
We hope you enjoyed this introduction to Retool, and have a better understanding of how to use Retool Custom Components to extend the functionality of your internal tools. To learn more, check out Retool University!
Evan Weiss is a Sales Engineer at Retool, where he enjoys teaching customers about how to build custom internal software. You can find him at evan[at]retool.com, as well as on LinkedIn and Twitter.
Related Posts
Related Resources
Twilio Docs
From APIs to SDKs to sample apps
API reference documentation, SDKs, helper libraries, quickstarts, and tutorials for your language and platform.
Resource Center
The latest ebooks, industry reports, and webinars
Learn from customer engagement experts to improve your own communication.
Ahoy
Twilio's developer community hub
Best practices, code samples, and inspiration to build communications and digital engagement experiences.


