Deploy your React Application with the Twilio Serverless Toolkit
Time to read:

When you are ready to deploy your React application you are faced with the problem of selecting a hosting platform. Here you have a variety of options, many of them requiring you to set up servers or containers.
In this short tutorial I want to introduce you to the Twilio Runtime, a serverless hosting platform that when paired with the Twilio Serverless Toolkit makes deploying your React application as easy as typing yarn deploy on your terminal.
Requirements
To work on this tutorial you will need the following items:
- A Twilio account. If you are new to Twilio click here to create a free account now and receive $10 credit if you later decide to upgrade to a paid account. You can review the features and limitations of a free Twilio account.
- A Node.js version that is compatible with Twilio Functions. Currently (October 2021), version 12 is used. You can download a Node.js installer from the Node.js website.
- The Yarn package manager. Installation instructions are on the Yarn website.
- If you plan to follow this tutorial on a Windows computer, the use of the Windows Subsystem for Linux or a similar Unix compatibility layer is required.
Prepare your React application
To follow this tutorial you’ll need a React application to deploy to the cloud. For this you can create a brand new application with create-react-app. In your terminal, navigate to a suitable parent directory and then run the following commands:
You should now be able to run the React application locally with the following command:
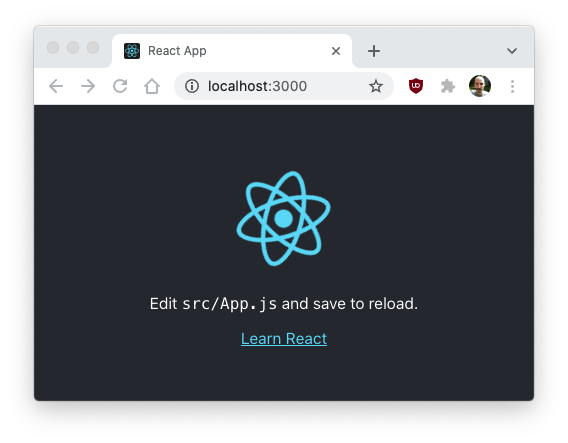
After a few seconds a new tab in your browser will show the familiar React starter application:

If you decide to use your own React application instead of a brand new one, make sure that you can build your application using yarn build (or alternatively npm run build), as you are going to use this command as part of the serverless deployment.
You are not going to use the local development version of the React application anymore in this tutorial, so you can stop it with Ctrl-C after you verify that the application is running.
Add Twilio Serverless to the project
In this section you are going to add Twilio Serverless support to the React project.
Install the Twilio CLI
The Twilio Serverless Toolkit is distributed as a plugin to the Twilio CLI, so the next step is installing the CLI. You can find detailed installation instructions on the Twilio CLI Quickstart page of the documentation, but if you want the short version, you can just run the following command:
Install the Twilio Serverless Toolkit
Once the Twilio CLI is installed, you have to add the Twilio Serverless Toolkit to it, which is installed as a plugin. The detailed installation instructions are in the documentation, but the actual command is this:
Connect the CLI to your Twilio account
The Twilio CLI will need to make API calls to Twilio, so it needs to be able to authenticate on your behalf. You can run the following command to link the Twilio CLI to your Twilio account:
You will need to enter your Twilio Account SID and Auth Token. You can find these in the Twilio Console. You will also be asked to enter a profile name under which the credentials will be stored. You can use default or any name of your choice.
Create a Twilio Serverless project
In this step you are going to add the project files required by the Twilio Serverless Toolkit in a subdirectory of the React project. Run the following command from the React project directory:
After the command completes, you are going to have a new serverless subdirectory, with some files and subdirectories of its own.
The serverless/assets subdirectory is the default location where the static assets to be deployed are to be copied. In this tutorial, the Serverless Toolkit will be configured to use the build directory of the React project as the assets folder, so the assets subdirectory is not used. You can just leave it there, or delete it if you prefer.
The serverless/functions subdirectory is not going to be used in this tutorial, but it can sometimes be very useful, as it provides a location where back end code for the project can be defined as part of the deployment. Having the option to create a serverless back end is one of the features of the Twilio Runtime that sets it apart from other serverless options such as GitHub Pages, which are limited to static assets.
Deploy the project to the cloud
To deploy the React application two things need to happen:
- The React project needs to be built. In most cases this is done by running
yarn build, which in turn runs the commandreact-scripts build, as configured in your package.json file. - The Twilio Serverless Toolkit’s
deploycommand must be issued, using the build directory generated in step 1 as the source of the static assets to deploy.
To make the deployment experience as convenient as possible, you are going to define a yarn deploy command in the package.json file that runs these two actions back to back. Open package.json in your favorite text editor, and locate the scripts section, which should look more or less like this:
Right after the definition of the build command, add the deploy command as follows:
The deploy command runs two commands, separated by &&. The first command is the build command defined by React. This ensures that the React project is up to date when the deployment takes place. If you use a non-standard build command, make sure to enter it here.
The actual deployment command is in the second part. This is the twilio serverless:deploy command with a few options:
--service-name react-twilio-serverlessprovides a name for the deployment. This name is going to be used in the URL that the Twilio Runtime will assign to the deployed project. Feel free to use a different name if you like.--cwd serverlesstells the toolkit that the top-level directory for the Twilio Serverless Toolkit project is in the serverless subdirectory.--assets-folder ../buildconfigures the location of the static assets as the build directory generated by the React build process. This directory is given as a relative path starting from the serverless directory.
If you don’t like to have such a long command line, the deployment options can also be given in a config file. In that case, find the file named .twilioserverlessrc in the serverless subdirectory and set your options there.
Are you ready to deploy? Just run the newly created command:
After a few seconds, the output of the command will give you the public URLs assigned to all the assets of your React application. Find the index.html file in this list:
You can use this URL to access your React application from anywhere in the world!
Default index page
When you test your new deployment, you will notice that you have to explicitly include the index.html page in the URL. Most platforms implement a default for the filename portion of the URL, so that it can be omitted when it is index.html.
The Twilio Runtime has a strange and hacky way to do this. The default page has to be uploaded with the path assets/index.html and then it will be served from the root URL. Adding this directory and default page can be incorporated into the deploy command. Here is the updated scripts section in package.json:
This new version of the deploy command adds mkdir build/assets and cp build/index.html build/assets right before the project is deployed. And with this small change, you can now access your React application on the root URL of your assigned domain.
Upgrading your deployment
As you continue to work with your React application you will make changes, and will need to upgrade the deployed version. To refresh this deployment, just run the yarn deploy command again, and all the assets will be re-uploaded.
You may have noticed that the subdomain assigned to your deployed project ends with a -dev suffix. Twilio Runtime deployments can have multiple environments, with dev used as the default. Using environments you can create a sophisticated production deployment workflow where for example, a build is deployed to the dev environment for initial testing, promoted to a staging environment for more intensive testing, and finally promoted again to the prod environment for public use. The Twilio Serverless Toolkit includes a promote option to enable these advanced workflows.
To keep your local project linked to your deployment, you can add all the files in the serverless subdirectory to your project’s source control. The file that links the local project to the deployed version is in the file named .twiliodeployinfo. Note that this file is created after your first deployment.
Limitations of the Twilio Runtime platform
The Twilio Runtime and Serverless Toolkit provide a very convenient way to deploy your JavaScript front ends to the cloud, without having to maintain a server. The service, however, has some missing features you should be aware of. These are likely to be added to the service in the near future.
The most important limitation, in my opinion, is the lack of support for custom domains. The domain name under which your application is deployed is determined by Twilio, and is always a subdomain of twil.io. Until this is implemented, the only way to use a custom URL for your deployment is to connect a reverse proxy server in front of the Twilio deployed application. If you have access to a host, then you can manually configure Nginx with your own domain and SSL certificate on it, and have it forward all requests to the URL assigned by the Twilio Runtime. If you prefer to stay in the serverless realm, then a Cloudflare worker is a good option.
If your application uses client-side routing, then you have to configure your router to put the route in the fragment portion of the URL, because the Twilio Runtime will not be able to process routes that are part of the URL path correctly at this time. When using React-Router, this is done by using the HashRouter component.
Conclusion
I hope you found the Twilio Runtime a viable option for the deployment of your front end projects. This is a powerful serverless platform that also gives you the option to implement a Node.js back end for your application. Consult the Twilio Runtime documentation to learn about all of its features and the front end deployment guide if you want to learn more about front end deployment options.
I can’t wait to see what you deploy with the Twilio Runtime!
Miguel Grinberg is a Principal Software Engineer for Technical Content at Twilio. Reach out to him at mgrinberg [at] twilio [dot] com if you have a cool project you’d like to share on this blog!
Related Posts
Related Resources
Twilio Docs
From APIs to SDKs to sample apps
API reference documentation, SDKs, helper libraries, quickstarts, and tutorials for your language and platform.
Resource Center
The latest ebooks, industry reports, and webinars
Learn from customer engagement experts to improve your own communication.
Ahoy
Twilio's developer community hub
Best practices, code samples, and inspiration to build communications and digital engagement experiences.


