Create an SMS chatbot using C#, Amazon Lex, and Twilio SMS
Time to read:
There is a tough competition in the business world to acquire and retain customers. One key step to achieve this goal is to keep your customers happy with your customer support. Having an automated chatbot helps your business provide a faster and more accessible customer support to your customers. In this article, you will learn how to build a chatbot using C#, AWS Lambda, Amazon Lex, Amazon DynamoDB, and Twilio SMS.
Prerequisites
You'll need the following things in this tutorial:
- A free Twilio account
- A Twilio Phone Number with SMS capability
- A free AWS account
- AWS CLI
- An OS that supports .NET (Windows/macOS/Linux)
- .NET 6.0 SDK (As of this writing the latest .NET version AWS Lambda supports is .NET 6)
- A code editor or IDE (Recommended: Visual Studio Code with the C# plugin, Visual Studio, or JetBrains Rider)
- Git CLI
- Bash shell
What is Amazon Lex?
Amazon Lex is an artificial intelligence service that allows developers to create voice or text-based conversational interfaces. This service powers Amazon's own Alexa.
Lex provides automatic speech recognition and natural language understanding technologies. It takes the user's input, runs it through a Natural Language Processing (NLP) engine and determines the user's intent. The value of this is the user does not need to remember a set of commands to interact with your bot. They can talk to the bot just like they would to a human being.
This project uses several AWS services: Lex, Lambda and DynamoDB. To follow along, you will need an IAM user setup in your development environment. Proceed to the next section for the IAM setup. If you already have it configured, you can skip the next section and move on to the Project Overview.
If you created a new AWS account, this project shouldn't cost you anything, as all these services have free tiers. If you are on an older account, it shouldn't cost too much. Still, I recommend checking the pricing pages of the services anyway: Amazon Lex Pricing, AWS Lambda Pricing and Amazon DynamoDB pricing.
Set up AWS IAM User
You will need credentials to deploy your application to AWS from the command line. To create the credentials, follow the steps below:
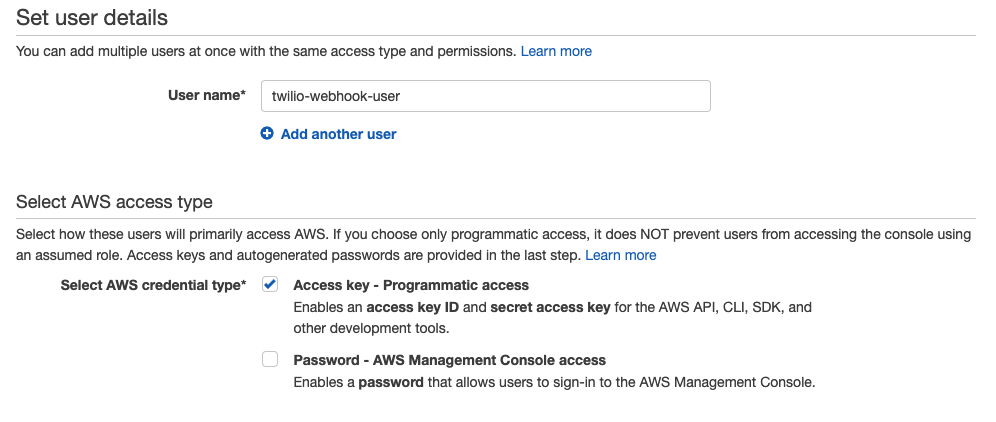
First, go to the AWS IAM Users Dashboard and click the Add users button.
Enter the user name, such as twilio-webhook-user and tick the Access key - Programmatic access checkbox:
Click the Next: Permissions button at the bottom right.
Then, select Attach existing policies directly and select AdministratorAccess:

Click the Next: Tags button at the bottom right. Tags are optional (and quite valuable information), and it’s a good practice to add descriptive tags to the resources you create. Since this is a demo project, you can skip this step and click the Next: Review button at the bottom.
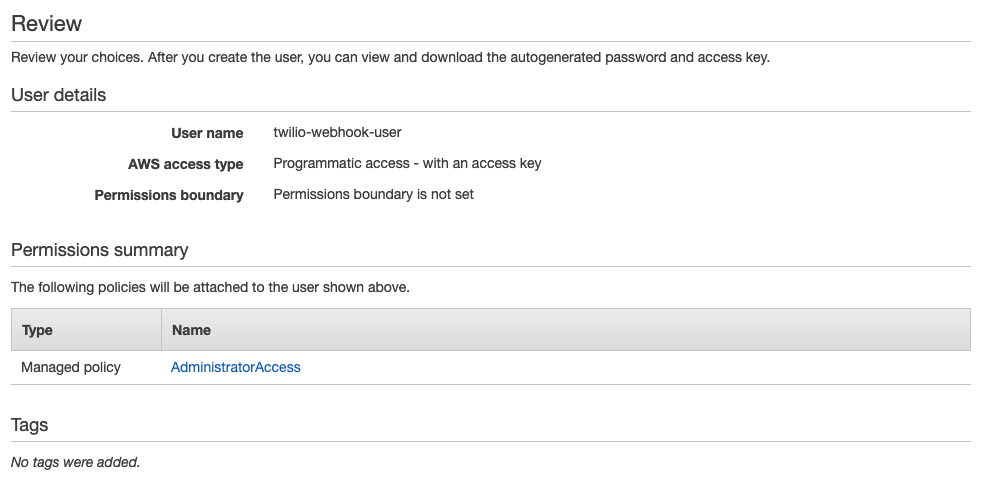
Confirm your selection on the review page. It should look like this:
Then, click the Create user button.
In the final step of the user creation process, you should see your credentials for the first and the last time.
Now, open a terminal window and run the following command:
You should see a prompt for AWS Access Key ID. Copy and paste your access key ID and press enter.
Then, copy and paste your secret access key and press enter.

When prompted, type us-east-1 as the default region name and press enter.
As the default output format, type json and press enter.
To confirm you have configured your AWS profile correctly, run the following command:
The output should look like this:

Now that you have set up your AWS credentials, you can move on to the demo project.
Project Overview
The application you will implement is an imaginary online stock broker customer service. It will accept requests like buy, sell, show portfolio, etc.
Take a look at this diagram of the application flow:

- Customer sends an SMS to customer service (which is a Twilio Phone Number).
- Twilio receives the message and invokes the Amazon Lex callback.
- Amazon Lex identifies the user's intent and calls the corresponding Lambda function.
- The Lambda function executes the application logic based on the request, gets the customer info from the DynamoDB database, and prepares the response.
- Lex sends the response to Twilio using the Twilio SMS integration.
- Twilio delivers the response message to the customer's phone.
Without further ado, let's get the demo application and start exploring the existing code.
Set up the Demo Project
The focus of this article is developing a chatbot using Amazon Lex and Twilio SMS. To save time, the fundamental business logic of the fictional stock broker is implemented in the starter project.
Clone the project to get started:
Open the solution (src/StockBrokerBot/StockBrokerBot.sln) in your IDE and take a look at the project structure. The StockBrokerBot.Core project looks like this:
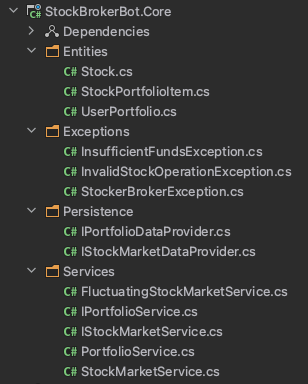
The main functionality is in 2 services: IPortfolioService and IStockMarketService.
IPortfolioService shows the behavior of the service:
It supports 3 operations: Get portfolio, buy stocks, and sell stocks.
The core library includes one implementation of the portfolio service called PortfolioService. It depends on a stock market service and a portfolio data provider:
PortfolioService performs validations during buy and sell operations (user has sufficient funds to buy, or shares available to sell, etc.)
IStockMarketService is responsible for fetching the current stock price:
There are 2 different stock market service implementations: StockMarketService, and FluctuatingStockMarketService.
StockMarketService simply fetches the stock price from its data provider. FluctuatingStockMarketService is meant to "spice things up" a little bit. It calculates a random price by adding a small price swing within 2%. You can, of course, change this rate to create higher swings. This way, you will get a new price every time. So you can buy low and sell high and make some imaginary profits!
The starter project also includes a demo console application. The demo application uses JSON files to persist user portfolios and stock prices. In the actual chatbot, you will use DynamoDB tables. The demo project uses the FluctuatingStockMarketService. You can replace it with StockMarketService to get more consistent results.
UserPortfolio and Stock entities are already annotated to be used as DynamoDB entities:
Open a terminal, navigate to the demo project, and run the application by running:
You should see the results that look like this:
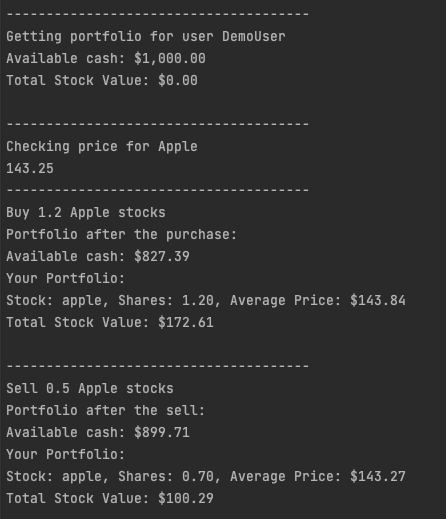
Take some time to look into the core library and the consuming demo application. There is also a Lambda function project in the solution called StockBrokerBot.ChatbotLambda, but it's empty at the moment. You will implement it while following this article.
When you are more familiar with the project, move on to the next section to create the chatbot.
Create the Chatbot with Amazon Lex
To start implementing your bot, go to Lex Console and click Create bot.

In the settings, leave the Create a blank bot option selected.
In the Bot name field, enter StockBrokerBot.
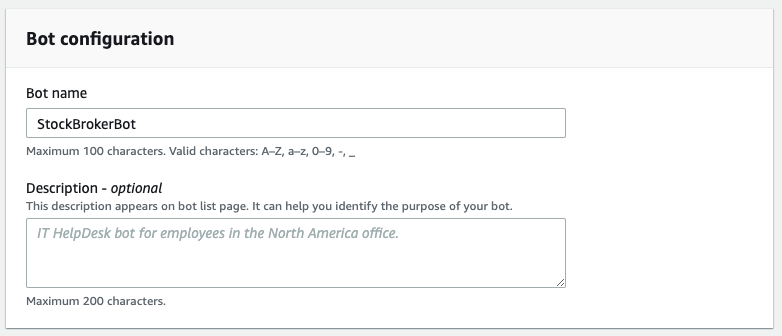
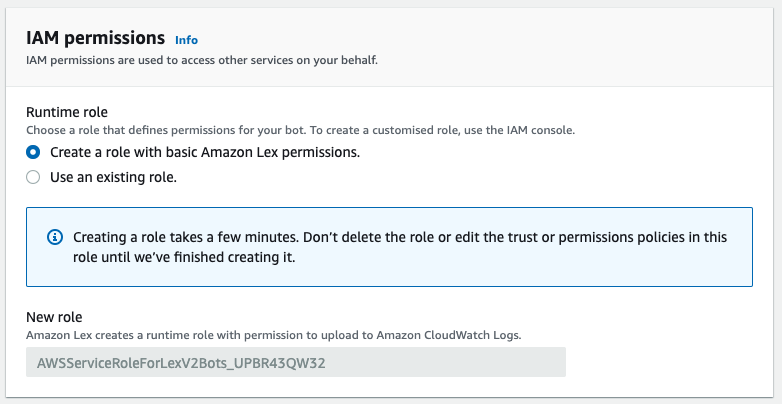
In IAM permissions, select Create a role with basic Amazon Lex permissions.
Select No in the COPPA section and click Next.
In the Add languages step, leave the default language (English (US)). You can choose to support multiple languages and even assign a different voice to each language. In this article, you will use a single language and text interaction only. Click the Voice interaction dropdown, scroll to the bottom and select None. This is only a text-based application option.
Click Done to create your bot.
Your bot has now been created, and Lex redirects you to create your first intent. An intent is an action your bot takes to fulfil a user's request.
In the Intent name field, enter CheckStockPrice.
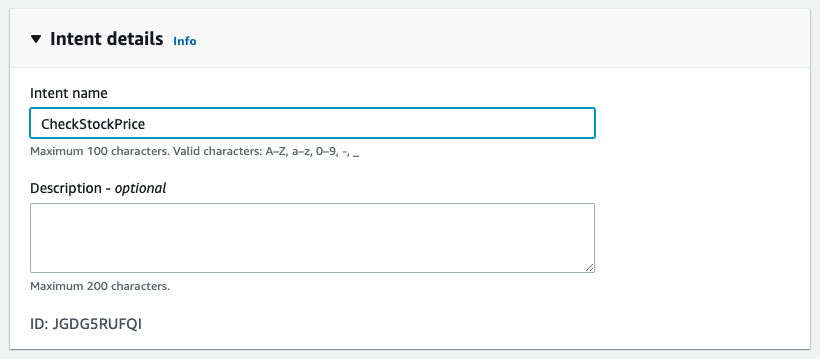
Leave Contexts blank and scroll to Sample utterances.
An utterance is a phrase that corresponds to this intent. In conversations, we use many different phrases to express the same thing. For example, if you have a Hello intent, sample utterances can be "Hello", "Hi", "Hey" etc.
Click Plain Text and paste the following utterances in the field:
In the above text block, you can see many occurrences of {stockName}. This is what is called a slot. It's essentially a placeholder for a piece of data you need Lex to extract for you and pass it on to your code. If you recall the core library introduced earlier in the article, GetStockPrice method requires the stock name. A user might express their intention in a lot of different ways. Extracting this data is Lex's responsibility so that, as the bot developer, you can focus on your bot's business logic.
Scroll down to the Slots section.
As discussed above, you're using a slot in your utterances, but it's not defined yet. Lex needs to know the type and whether or not it's mandatory. Lex performs much better if you train what kind of data it's looking for. In the stock name example, there is a finite set of company names, so you will create your own data type to train the model better. Skip adding a slot for now. You'll revisit this part very soon.
Click the Save intent button and the Back to intents list link on the left pane.
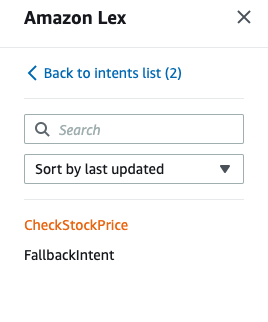
On the left menu, click Slot types which is right under Intents.
Click Add slot type and select Add blank slot type.

Enter StockName in the Slot type name field.
In the Slot value resolution, leave the Expand values option selected. You can also choose to restrict the slot values, but then you will need to enter every stock name that your service supports. It almost becomes a lookup table. Lex is smart enough to identify similar values based on your training set. The more comprehensive your training set is, the better results you will get.
Enter Apple, Alphabet, Microsoft, Tesla, and Twilio as stock names and click Save slot type.
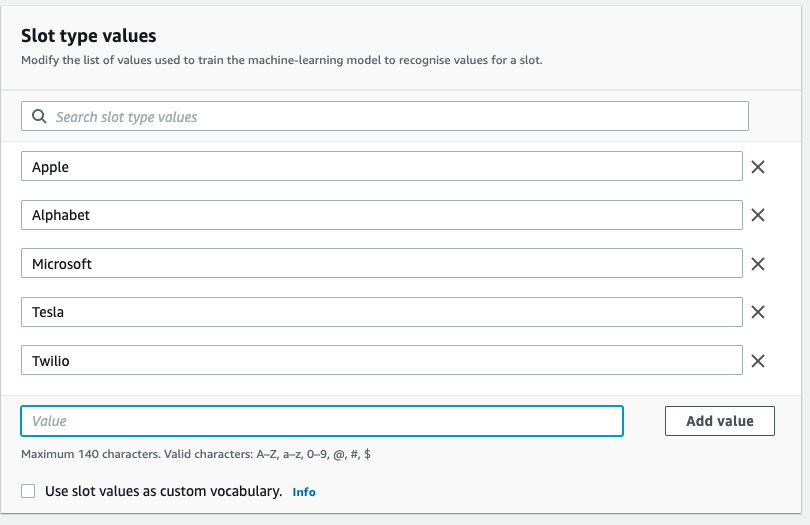
Click the Slot types link on the left, then Intents, and finally, click on the CheckStockPrice intent to get back to intent settings.
Scroll down to the Slots section and click Add slot.
Leave Required for this intent checkbox ticked.
Enter stockName in the Name field and select StockName in the Slot type list.
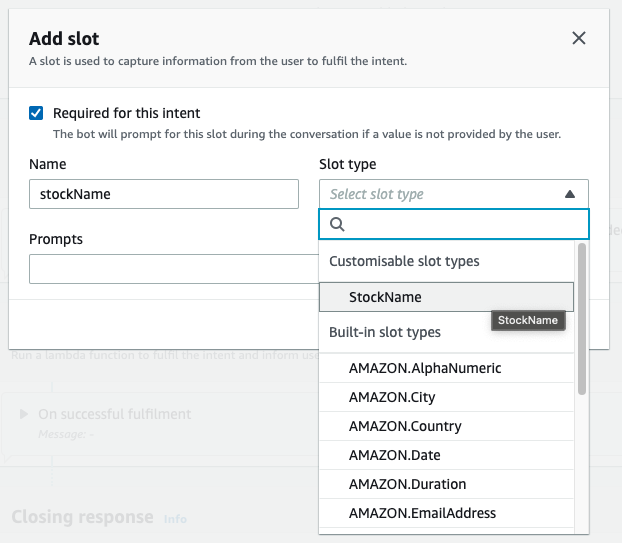
In the Prompts field, enter What is the name of the stock?
This is a very useful feature. You don't have to worry about asking the user for the stock name if it's missing. Lex will automatically ask the user and fill in the missing values, so you can rest assured that it will always deliver the required values to your bot's backend. You'll see this in practice while testing the bot later on.
Click Add to close the dialog and then click Save Intent.
Now focus on the top of the screen.

You should see the version you're looking at (Draft version), the language (English (US)) and a label next to it that says "Not built".
Click the Build button for Lex to build the machine learning (ML) model for your bot. You cannot test your bot without creating the ML model first. When the build is complete, you will see a notification on your screen.

Click the Test button.
In the bottom field (with the Type a message placeholder), enter "What is the price of Apple?" and press enter.
You should see a message that says "Intent CheckStockPrice is fulfilled"
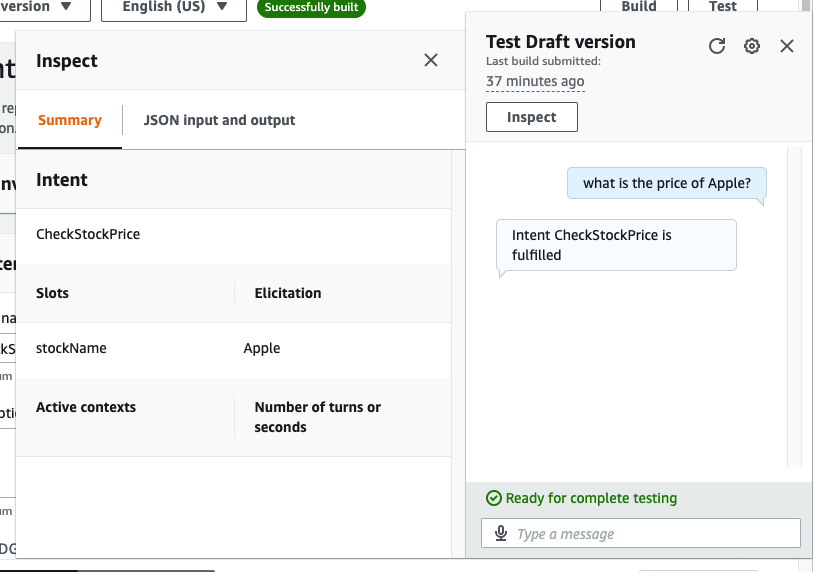
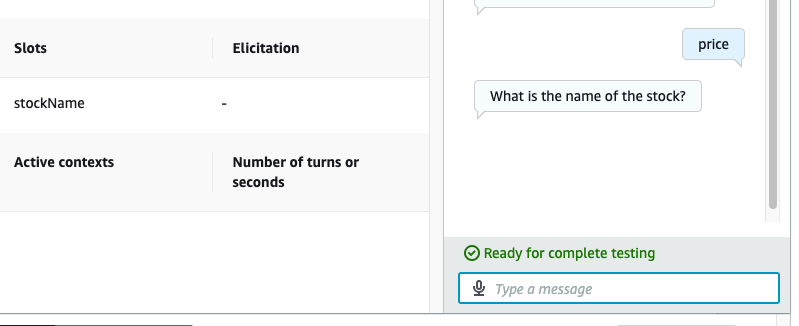
Click the Inspect button to see more details. You can see the stockName slot has Apple as the value. If you recall, you made the stockName a required slot. To test what happens if a user enters a message without providing sufficient information, enter "price" as the message and press enter.
You should see Lex now asks the name of the stock explicitly. The question it asks is the prompt message you entered when you created the slot type.
Just to emphasize how it works, it's not directly looking up the utterances and matching strings to determine the intent. For example, you can express the same intent by entering "show the price of Tesla stock", and you should still see the intent is fulfilled message even though it's not part of the utterance list. If the expected intent is not fulfilled, you can modify your utterances, rebuild, and retest the model.
After the intent is recognized, what Lex will do with it is determined by the Fulfillment settings. By default, fulfillment is not active. Scroll down to the Fulfillment section and click the Active radio button. Lex invokes the Lambda function associated with your bot by default. You can confirm this behavior by expanding the parameters and clicking the Advanced options button.
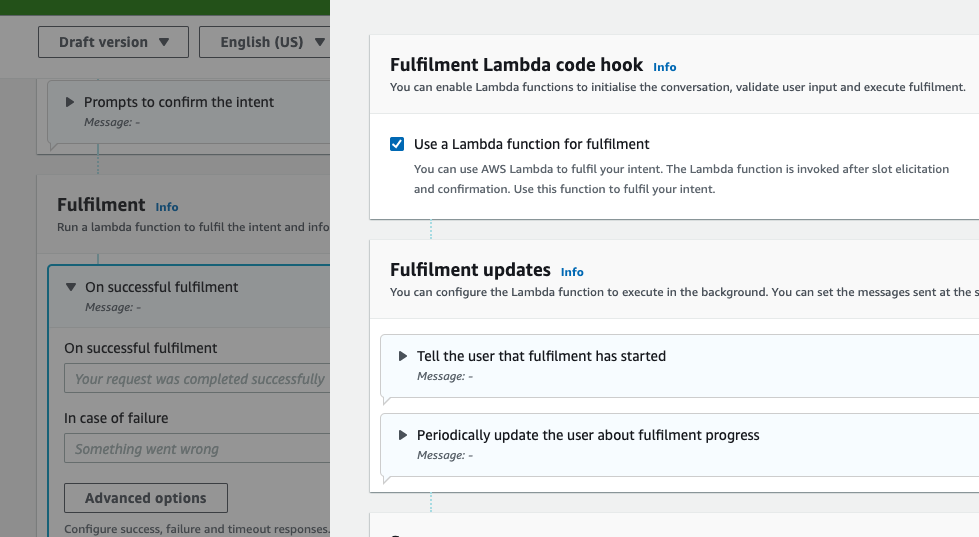
Set the Fulfillment to active and ensure the Use a Lambda function for fulfillment option is ticked.
Click Save Intent and then click the Back to intents list link on the left.
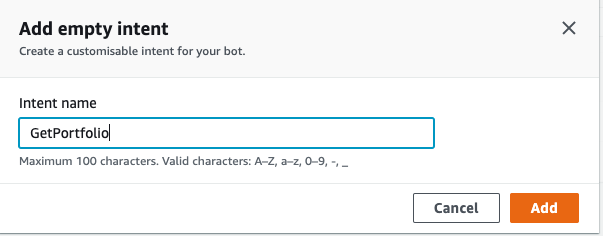
Click the Add Intent button. It will show you two options: Add empty intent and Use built-in intent.
Select Add empty intent.
Enter GetPortfolio as intent name in the dialog and click Add.
In the Sample utterances section, switch to Plain Text view and paste the following utterances:
In the Fulfillment section, set the Active option to true.
Click the Save intent button and Back to intents list link on the left.
Click Add intent again and set the intent name to BuyStocks. Update the utterances with the ones below as you did before:
In the Slots section, click the Add slot button.
In the Add slot dialog, set Required for this intent to true, enter stockName as the name, select StockName as slot type and "What is the name of the stock?" as the prompt.
Click Add.
Click the Add slot button again.
This time, set the name to numberOfShares, slot type to AMAZON.Number and the prompt to "How many shares?".
Click Add again to save the second slot.
In the Fulfilment section, set the Active option to true.
Click the Save intent button and Back to intents list link on the left.
Click Add intent for one last time and set the intent name to SellStocks. Update the utterances with the ones below as you did before:
SellStocks intent is very similar to the BuyStocks intent. Create the same slot types as the BuyStocks intent as described above.
In the Fulfilment section, set the Active option to true.
Click the Save Intent button.
Now that all the intents have been described, click the Build button to rebuild the model.
After a show while, you should get a Successfully built notification:
Dismiss the notification and click the Bot: StockBrokerBot link in the breadcrumb.
In the left menu, under your bot there is a Bot versions link, and under it the Draft version which you've been working on.
Click Bot versions, and then click Create version.
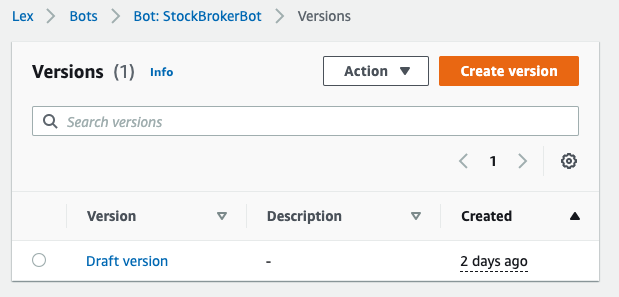
In the Description field, enter a description such as "Initial version with four intents" and click Create button at the bottom of the page.
You don't assign version numbers, they are auto-incrementing integers. After you've created the version, it should appear in the version list:

A version is essentially a read-only snapshot of your bot. You cannot modify a version after you've published it.
Now, take a look at another important concept: Aliases.
Click Aliases link on the left menu. It should show the default TestBotAlias:

Click the Create alias button.
Enter Live as Alias name.
In the Associate with a version section, choose Version 1. The language comes already enabled, so leave it like that.
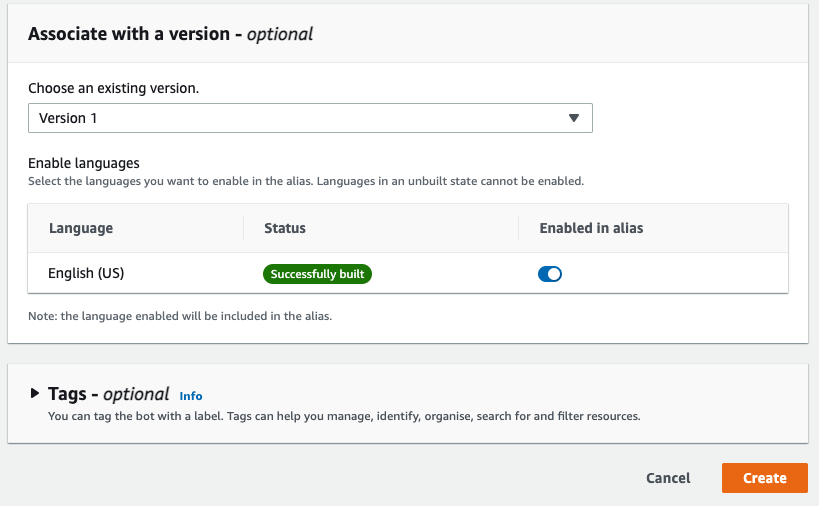
Click the Create button.
You should see the alias is successfully created and shown in the list:
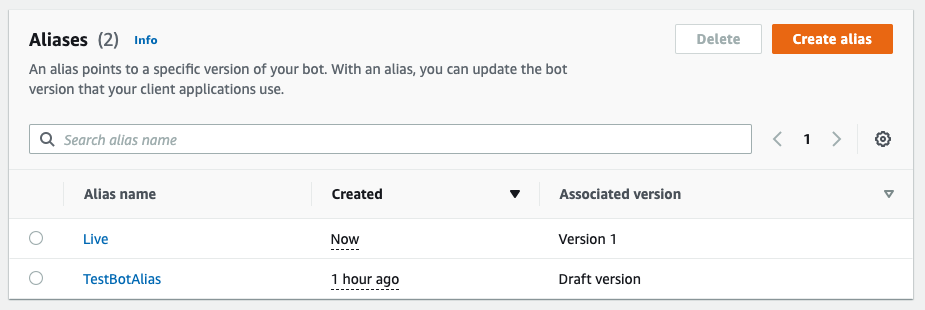
Now Version 1 of your bot has been published.
You will assign a Lambda function to your bot, but first, move on to the next section to create the backend of your bot.
Create the Backend
Open a terminal and navigate to the directory that will be the root of your project.
You will need the Amazon Lambda Tools .NET tool to deploy the function via the command line. You can install it by running the command below:
As shown in the demo project, you will need two data sources: one to store users' portfolios and the other to store stock prices. (The following scripts can be found in the Setup/InfrastructureSetup.sh file in the ChatbotLambda project.)
To create the user portfolio table, run the following command:
The script above creates a DynamoDB table with the UserId partition key, which you will use to query and fetch the users' records.
To keep things simple, the account creation process is omitted. To create the account, add your user's portfolio directly to the database by running the following command (replace { YOUR PHONE NUMBER WITH COUNTRY CODE } with your actual phone number before you run):
This scripts creates you an account with no stocks and $1000 available cash.
Since the customers will come to your chatbot via SMS, UserId is used as the unique customer id. In a more complex scenario, you would have a different unique id to identify users. Twilio sends the phone number with the county code so you create your record in the same format for convenience.
Similarly, to create the stock prices table, run the following command:
Then, run the following to add some stock prices:
Now that the database is ready, prepare the IAM roles and policies that your Lambda function will need. The easiest way to set those up is to run the following commands when you're in the root of the cloned project:
LambdaBasicRole.json contains the role for the Lambda function by assuming Lambda service role. Then you attach AWS-managed AWSLambdaBasicExecutionRole policy that grants access to CloudWatch logs. Then, you attach the custom policy specified in LambdaDynamoDBAccessPolicy.json file that grants permissions to access the two DynamoDB tables you created earlier.
Enough with the infrastructure stuff; now it's time to write some code!
Your Lambda function will receive events from the Amazon Lex service and will use the Amazon DynamoDB service to read/write data. In your terminal, navigate to the root of the Lambda project (src/StockBrokerBot/StockBrokerBot.ChatbotLambda) and run the following commands to add the necessary NuGet packages to your project:
In the Lambda project, create a new directory called IntentProcessors, and under it, a file called AbstractIntentProcessor.cs and set its contents as shown below:
The abstract class leaves the Process method abstract to be implemented by the inheriting intent processors. It also contains the constants and Close method, which is shared among all the intent processors, so they are placed in the base class to avoid repetition.
In the demo application, you used two JSON-based data providers to manage user portfolio and stock price data. This approach doesn't work with Lambda functions, as the JSON files will be gone when the function returns. Every time a new copy will be created from scratch, which doesn't work for databases.
To persist data, you will need DynamoDB providers. Similar to the demo console application, create a directory named Persistence and, under it, create a new file called PortfolioDynamoDBDataProvider.cs.
Update the code as shown below:
Create another file called StockMarketDynamoDBDataProvider.cs and update the code:
Now you can implement your first concrete intent processor. Create a new file under the IntentProcessors directory called CheckStockPriceIntentProcessor.cs with the following code:
Lex sends the stockName in the slots dictionary. After getting that value, you pass it on to the StockMarketService, format the output, and send it back to Lex to deliver to the user.
Next, implement the get user portfolio intent. Create a file named GetPortfolioIntentProcessor.cs under the IntentProcessors directory and update the code to:
Twilio sends the user's phone number to Lex and it sends it to your Lambda function in the SessionId field. You use it to fetch the user portfolio and send it back to the user.
Next, create a new intent processor under the IntentProcessors directory called BuyStocksIntentProcessor.cs with the following code:
And implement the final intent for selling stocks by creating a new file called SellStocksIntentProcessor.cs under the IntentProcessors directory.
Update the code as shown below:
Most of the business logic is defined in the core library so what these intents do is to collect data from the user (via Lex and Twilio) and call the corresponding method of the services.
Finally, update your Function.cs as shown below to tie them all together:
Now you invoke the correct processor based on the intent name specified in the LexV2Event object.
Now deploy your function to AWS by running the following command in the terminal:
You have created your bot and backend separately. Now it's the time to bring them together by pointing your bot to your Lambda function, which you will do in the next section.
Connect your Chatbot to Lambda
Go to the Lex Console. Click Bots, then click StockBrokerBot. Click Aliases link, andon the Aliases page, click the Live alias.
In the languages section, click the English (US) link.
Now you should see a page that allows you to select a Lambda function and version of the function. In the Source list, select StockBrokerBot Lambda function and in the Lambda function version or alias list $LATEST should be automatically selected.
Click the Save button.
Now when a request comes to Live alias, Lex will identify the intent and invoke your Lambda function. It will pass all the slot values and user info in a LexV2Event structure that your Lambda expects.
Almost everything is wired up. What's left is to allow users to interact with your bot via SMS. Proceed to the next section to integrate with Twilio SMS.
Connect your Chatbot to Twilio
On the left menu, right under Aliases, there is a link to Channel integrations. Click that to list the existing integrations.
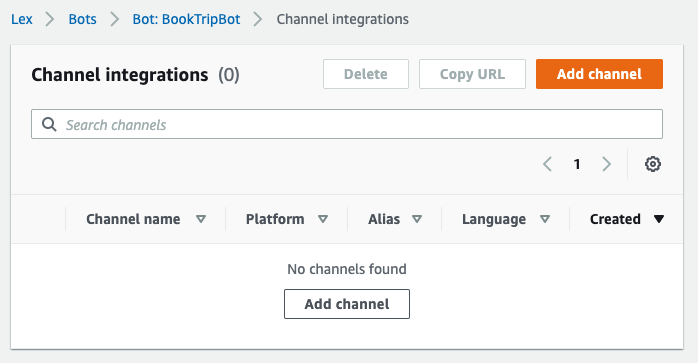
Click the Add channel button.
Amazon Lex supports 3 integration platforms: Facebook, Slack and Twilio SMS.
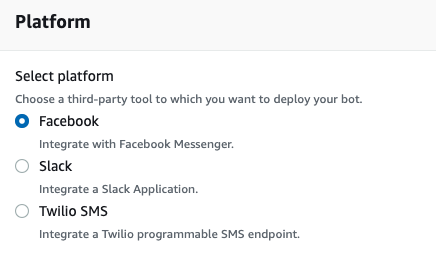
Select Twilio SMS.
In the Integration configuration section, enter TwilioIntegration as the name, select Live in the Alias list and English (US) in the language list.
In the Additional configuration section, you will need your Twilio Account SID and Authentication token.
Open the Twilio Console. On the main page, you should see the Account Info section.
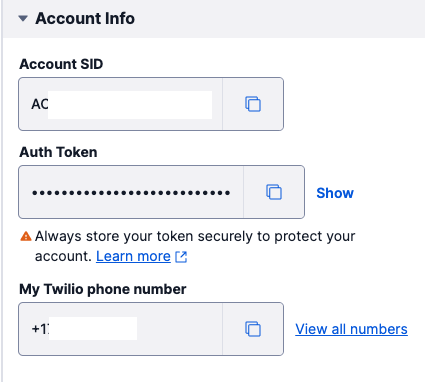
Copy your Account SID and Auth Token values and paste them in the corresponding inputs in the AWS console.
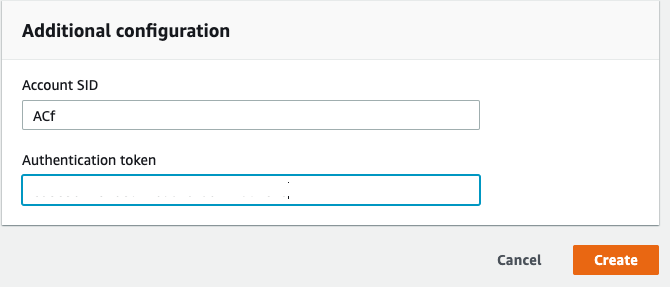
Click the Create button.
The Twilio SMS integration should now appear in the list.
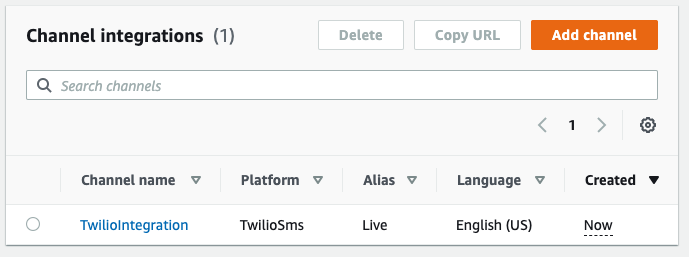
Click the channel name to view the details.
Scroll down to the Callback URL section.
You should see an auto-generated webhook URL that Lex expects Twilio to post data to.

To complete the integration, copy the link and go to the Twilio console. Select your account, and then click Phone Numbers → Manage → Active Numbers on the left pane. (If Phone Numbers isn't on the left pane, click Explore Products and then on Phone Numbers.)
Click the phone number you want to use for your project and scroll down to the Messaging section.
In the "A MESSAGE COMES IN" section, select Webhook and paste the callback URL into the input field. Select HTTP POST in the next dropdown.

Click the Save button at the bottom of the screen.
Test your chatbot via SMS
Finally, it's time to test your chatbot.
From your phone, send an SMS to your Twilio Phone Number with the following message: check price. You should get a response asking for the stock name. Send the name of one of the stocks in your database such as Tesla. It also understands the stock name directly as it's in your utterance list. So you can simplify it by sending the stock name directly and you should still get an answer.
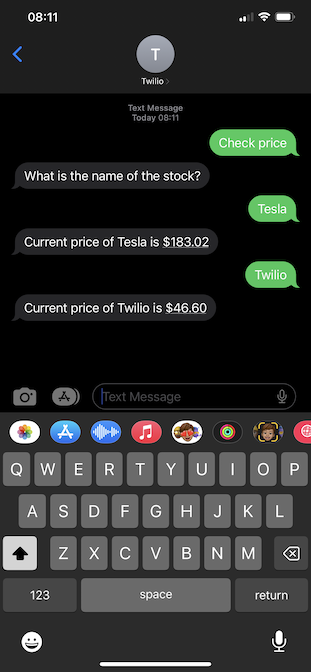
Now send the following message "buy shares" and your bot should reply by asking the stock name first and then the number of shares. You should see your updated portfolio after the stocks have been bought for you.
You can play around with different utterances and intents.
Conclusion
In this tutorial, you learned how to implement your chatbot from scratch using C#. You also used the Twilio SMS integration with your Amazon Lex chatbot to allow users to interact with your bot via SMS.
A chatbot can be very useful to automate some processes saving time and money for your business. It's also beneficial for the users as they can use your system outside of business hours.
If you'd like to keep learning, I recommend taking a look at these articles:
- Create an SMS chatbot using Amazon Lex and Twilio SMS
- 13 Undeniable Benefits of Chatbots (Plus Challenges)
- Schedule surprise messages with Twilio SMS for a mystical date
Volkan Paksoy is a software developer with more than 15 years of experience, focusing mainly on C# and AWS. He’s a home lab and self-hosting fan who loves to spend his personal time developing hobby projects with Raspberry Pi, Arduino, LEGO and everything in-between. You can follow his personal blogs on software development at devpower.co.uk and cloudinternals.net.
Related Posts
Related Resources
Twilio Docs
From APIs to SDKs to sample apps
API reference documentation, SDKs, helper libraries, quickstarts, and tutorials for your language and platform.
Resource Center
The latest ebooks, industry reports, and webinars
Learn from customer engagement experts to improve your own communication.
Ahoy
Twilio's developer community hub
Best practices, code samples, and inspiration to build communications and digital engagement experiences.


