Create a Cold War-Era Numbers Station with Twilio Voice and Python Flask

November 29, 2021
Written by
Mark Lewin
Contributor
Opinions expressed by Twilio contributors are their own
Reviewed by

Create a Cold War-Era Numbers Station with Twilio Voice and Python Flask

Put on your fedora and dark glasses, because you’re about to become a Cold War-era numbers station operator!

What is a numbers station, I hear you ask? A numbers station is a radio station in the shortwave frequency band that periodically reads out a sequence of numbers, popularly believed to be a secret code for intelligence officers listening for encrypted information. Numbers stations appeared during World War I and are likely to have become much more prevalent during the Cold War.

In the past, the numbers were often spoken in what sounded like a creepy voice, probably due to the poor radio transmission quality available at the time. You can listen to a few recent examples of numbers station transmissions on the Crypto Museum's website. Some numbers stations survive to this very day.

Since many people enjoy cracking secret codes, I thought it would be fun to show you how to create your own numbers station to bamboozle your friends with. In this tutorial, you’ll learn how to build a Python Flask application that will encrypt a message of your choice into a string of numbers. You’ll then use the Twilio Voice API via the Python helper library to accept an incoming call and read out the coded message to the caller in as creepy a voice as you can manage.

Then, enlist some willing friends to act as secret agents who must use their ingenuity to crack the code and decrypt the message. Since the cipher we’ll be using is based on the telephone keypad, you can tell them that the solution to the code is literally in the palm of their hand!

Prerequisites

A quick note about hosting and webhooks

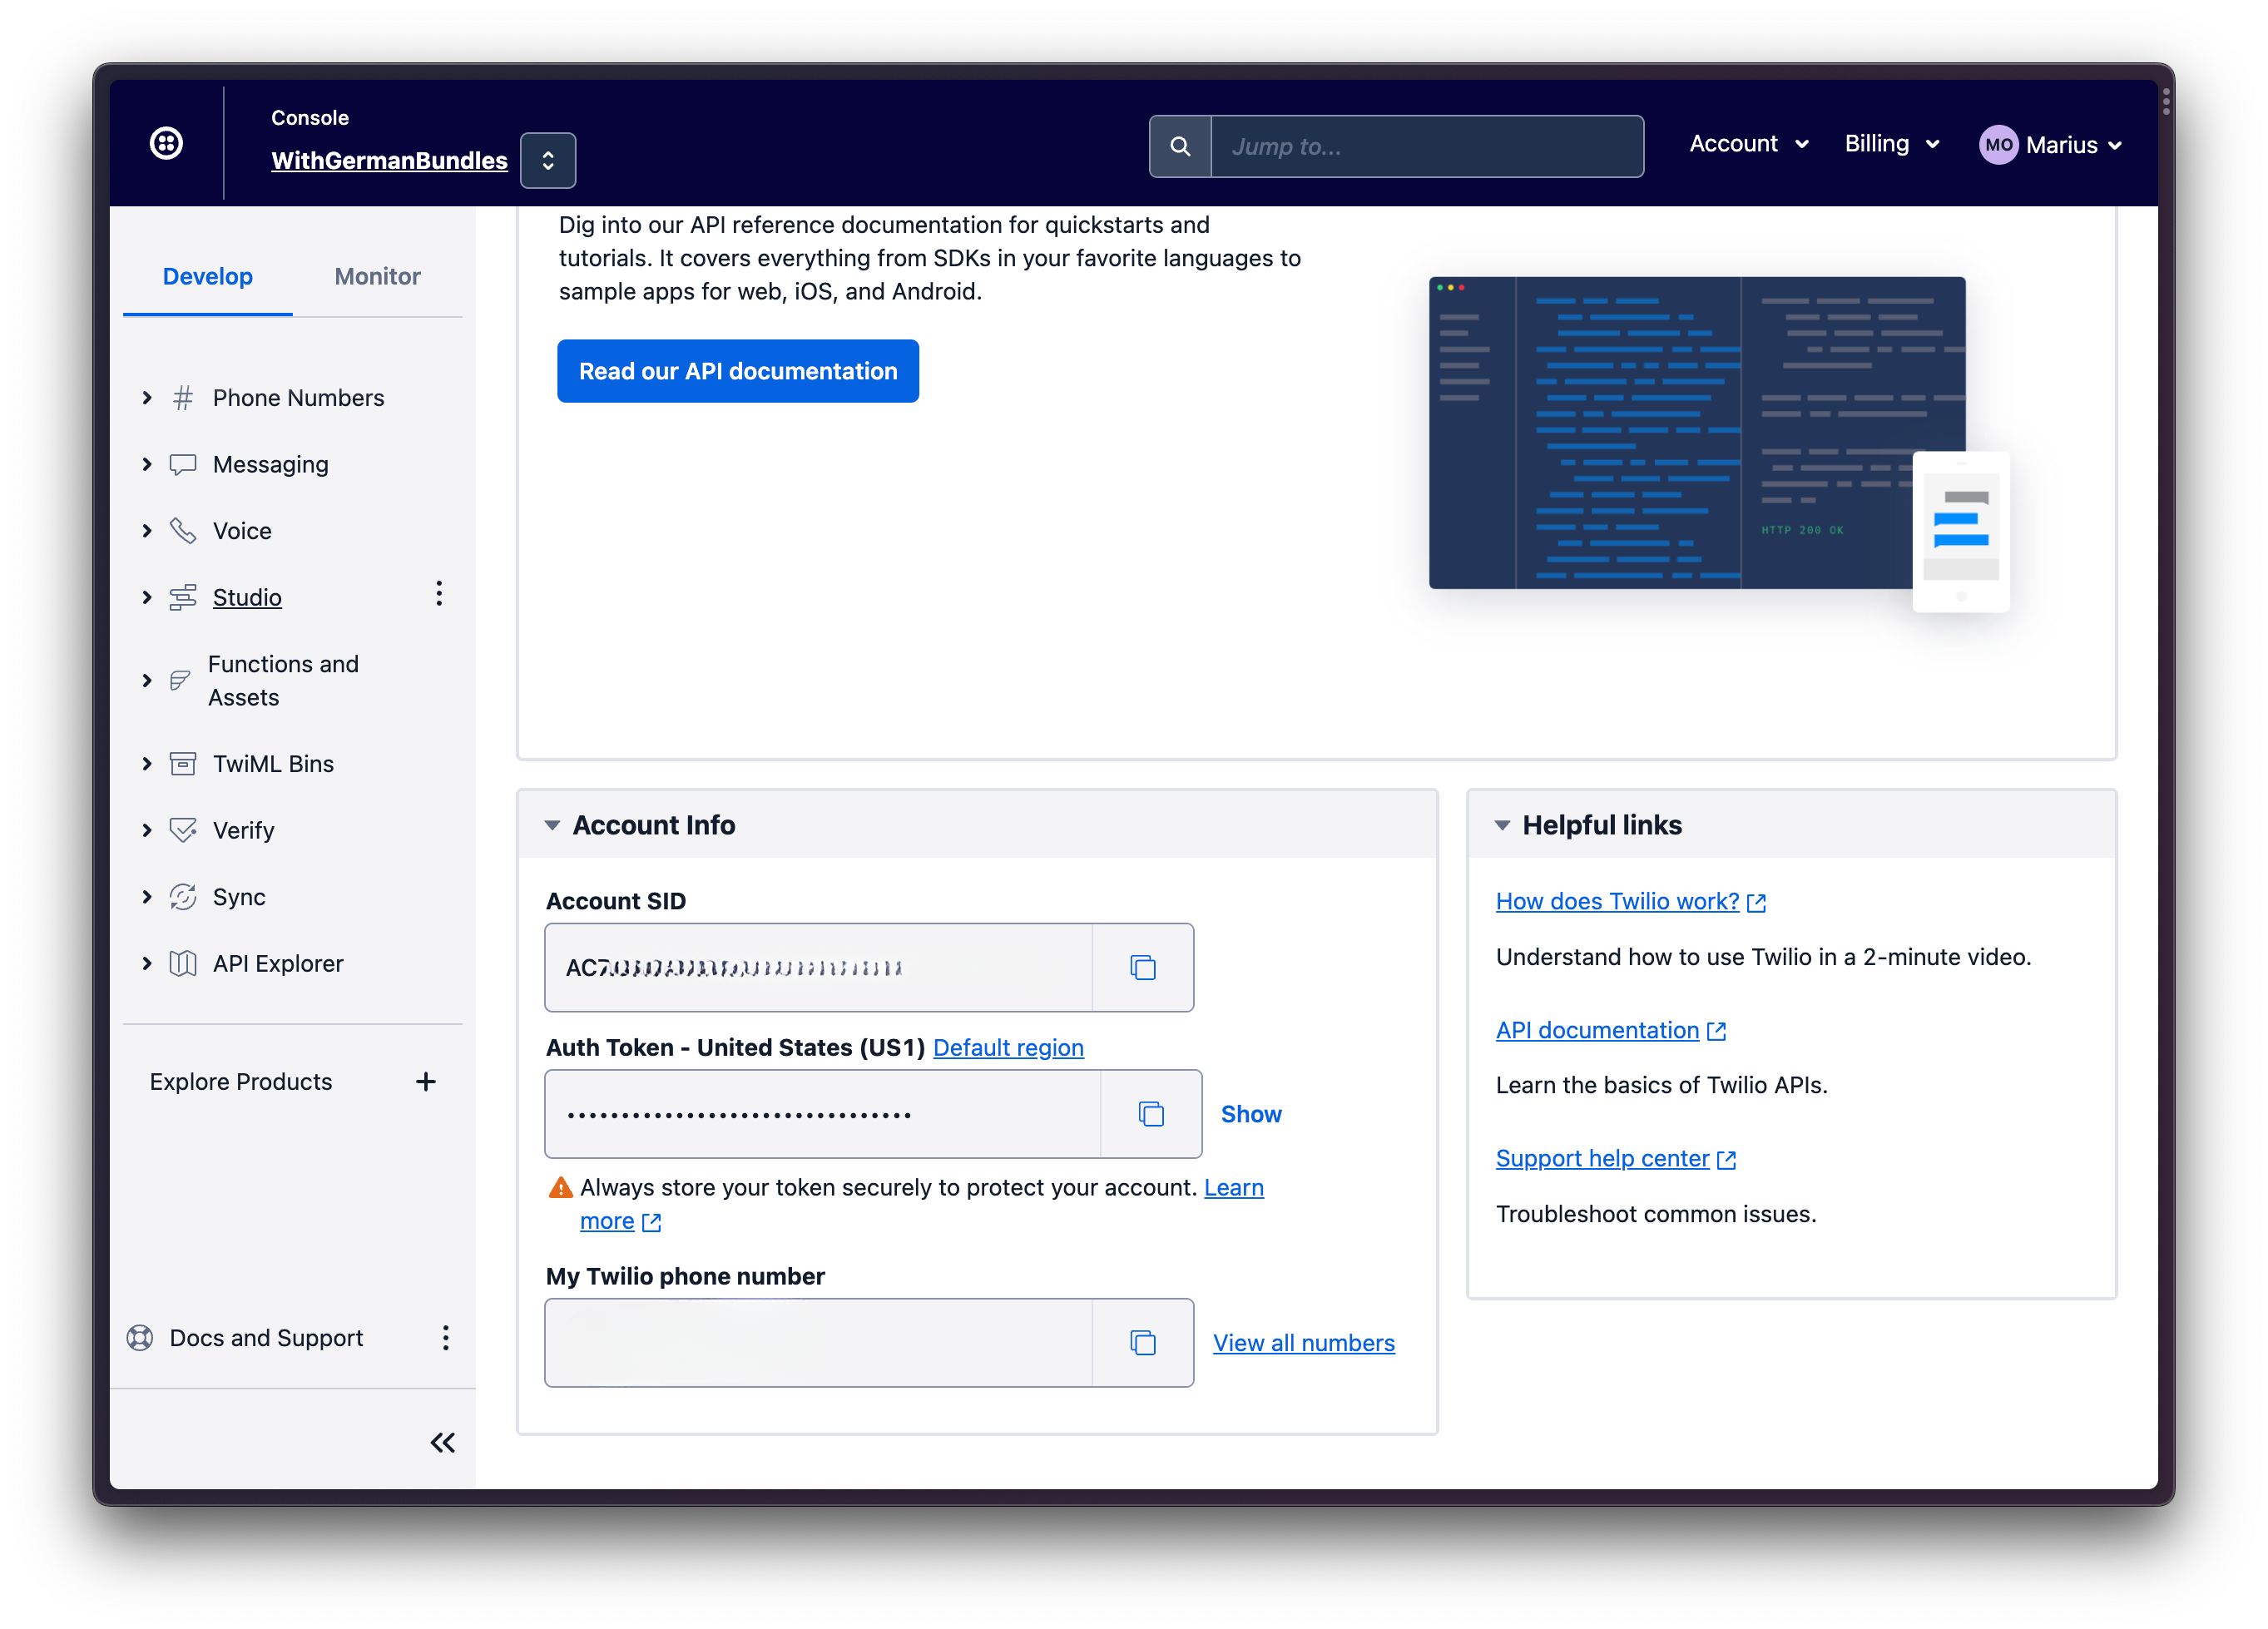
Because you are going to be accepting incoming calls to your Twilio number, you’ll need to tell the Twilio platform where to find the code that will run in response to that incoming call. This bit of code is called a webhook. Webhooks are what the Twilio APIs (and many others) use to notify an application about events it has registered an interest in.

Flask is a powerful, lightweight and extremely flexible framework for building web apps. There is some complexity when using Flask to build Twilio applications when the applications respond to inbound voice calls or messaging: the URLs you register as webhooks must be available on the public internet. Serving the Flask app locally won’t work, because Twilio won’t be able to reach it to tell you about an inbound voice or messaging event.

There are a couple of ways around this. One is to use a tool such as ngrok, which creates a secure tunnel from the public internet to your locally-running app. This allows external APIs to make requests to your webhooks that are running on your machine. I love ngrok, but unless you use it often enough to warrant paying for an account, you might find the free tier a bit frustrating. This is because every time you restart ngrok, the URLs it provides to access those secure channels change.

Instead of using ngrok, we’re going to host our application on the public internet using Glitch, which allows you to do a number of cool things:

  1. Host your apps at a non-changing, publicly-available URL
  2. Integrate with GitHub
  3. Reuse (“remix”) apps created by other users

Glitch is not without its limitations at the free tier —your applications time out after they’re not used for a while—but it’s great for prototyping projects like the one we’re building here.

Create your project in Glitch

If you don’t already have a Glitch account, you can sign up for one here.

You’ll start by “remixing” a simple starter app that I’ve created. Visit https://glitch.com/edit/#!/ml-template-flask-app and you’ll see a purple dialog box in the upper right-hand corner inviting you to “Remix to Edit” the project:

A screenshot showing the Glitch dashboard

Click the Remix to Edit button and Glitch will make a copy of the project that you can edit and work on as your own. Glitch will assign your remixed project a unique, randomized name, which you can see in the top-left hand corner of the page (and change if you want). Click the project name to see some options for interacting with the new project:

A screenshot of the Glitch dashboard showing the app name

The unique, randomized project name acts as a subdomain for the Glitch URL, which you can use to share your running project. More importantly for our purposes, this URL provides Twilio with a way to access your endpoints over the public internet. The full URL to your application is in the format of https://<your-project-name>.glitch.me. So, in the example above, the URL is https://five-salt-ceres.glitch.me.

You can change the project name if you wish and that will also change the URL. But, be aware: if your project name is longer than 50 characters it will be truncated. This might cause problems later on.

Inspect your new Glitch project

Let’s see what we have here, by looking at the list of files in the file explorer on the left-hand side of the page.

  • README.md - The file you’re looking at right now, which tells you all about your project. You can edit this (like everything else) directly in Glitch. Click the Markdown button to toggle between markdown and HTML.
  • assets - A directory where you can store static site elements, such as images and CSS files.
  • .env - A file in which to store private or sensitive configuration data. This is especially useful for storing API keys and secrets without making them accessible to any connected clients, which would be a security issue. We’re only receiving calls in this app, not sending them, so we don’t need to authenticate against the Twilio API. However, we will use this .env file to configure the message we want to encrypt. Glitch has a nice visual editor for configuring the contents of your .env file, which we’ll look at in a bit.
  • glitch.json - This file is used by Glitch to install your application’s dependencies and to run the server. You can leave this file alone for the purposes of this tutorial.
  • requirements.txt - You’ll add your app’s module dependencies in here and Glitch will install them for you.
  • server.py - This is where you’ll write your Python code. At the moment, it creates a new Flask app with only a single home route (/). When you visit https://<your-project-name>.glitch.me you will see the text “Hello World!” displayed in your browser. Glitch handily provides a preview of your app in the preview pane on the right-hand side of the page:

A screenshot showing the server file for the project in Glitch

The important thing to note is that you can write your app code in this environment and Glitch will automatically relaunch it and display the results. You get instant feedback which makes developing your web app that much easier!

Let’s start putting together our project. First, you’ll need a way to store the message you want to encrypt and then you’ll need a way to encrypt it.

Store the unencrypted message

Click .env in the file explorer and then delete the sample SECRET and MADE_WITH settings. Then click the Add a Variable button to create a new setting:

A screenshot of the .env file for the project in Glitch

For “Variable name”, enter ORIG_MESSAGE. For “Variable value”, enter a message, like "Sally is a double agent", or anything else that sounds suitably spy-ish. Note that you should not include quotes around the message, just the message itself. If there is already an ORIG_MESSAGE variable shown, simply update the value to be your own message.

Now, let’s reference that environment variable in your code. You can read environment variables from .env by using Python’s os module’s environ.get() method, passing in the name of the environment variable you want to retrieve the value of. In this case, it’s ORIG_MESSAGE. Replace the code currently in the server.py file with the following code:

import os
from flask import Flask
app = Flask(__name__)

orig_message=os.environ.get('ORIG_MESSAGE')

@app.route("/")
def hello():
  return orig_message

if __name__ == "__main__":
  app.run()

All being well, your unencrypted message will appear in the browser preview.

Encrypt your message

Now that you have a way to store and retrieve your original message, you’ll need a way to encrypt it. In this tutorial, we’ll use what’s known as the multi-tap cipher. This uses the telephone input technique that consists of writing a letter by repeating the corresponding key on the mobile phone keypad:

A telephone keypad

So, for instance, the word “Twilio” would be represented by the following sequence of digits:

8 9 444 555 444 666

Spaces in the message are represented by zeroes. So, the message “Twilio rocks” is encoded as follows:

8 9 444 555 444 666 0 777 666 222 55 7777

We’re going to write the code to do this in a new file called cipher.py. Create the new file by clicking the New File button in the file explorer. When the dropdown appears, type in the new file name as cipher.py, then click the Add This File button as shown below:

A screenshot showing how to add a new file in Glitch

Then, populate the new file with the following code:

keys = {
        '2': "abc", '3': "def",
        '4': "ghi", '5': "jkl", '6': "mno",
        '7': "pqrs", '8': "tuv", '9': "wxyz",
        '0': " "
}

def keypad_encode(text):
  orig_message = text.lower()

  keypad_strokes = []
  for i in orig_message:
    strokes = _to_stroke(i)
    if strokes:
      keypad_strokes.append(strokes)

  return " ".join(keypad_strokes)

def _to_stroke(char):
  for i in keys:
    if char in keys[i]:
      return i * (keys[i].find(char) + 1)
        # Discard any other chars
  return None
If you’re pasting code into the Glitch editor, you might see some indentation errors, because Glitch doesn’t like it when you mix tabs and spaces. Just delete any indentations in the affected code, redo them in the Glitch editor and you’ll be good to go.

This code represents the telephone keypad in a dictionary called keys. It defines a function called keypad_encode() that accepts the message that you want to encrypt. For each character in the message it calls another function called _to_stroke().

The to_stroke() function searches the keys dictionary for the character supplied to it. When it finds the character, it maps it to the key number on the phone keypad that represents that character. It then returns that key number one or more times, depending on the position of the character within the list of characters the key represents.

So, for example, the letter "p" is represented by a single press of the "7" key and therefore the function returns 7. But the letter "s" requires the 7 key to be pressed four times, so the function returns 7777.

Test your encryption code

Let’s incorporate the encryption code into the server.py file so we can see if it’s working as we expect.

In server.py, make the following changes on the highlighted lines to import the code in cipher.py, use that code to encrypt the plaintext message in the .env file, and then display it:

hl_lines="3,7,11"
import os
from flask import Flask
from cipher import keypad_encode
app = Flask(__name__)

orig_message=os.environ.get('ORIG_MESSAGE')
coded = keypad_encode(orig_message)

@app.route("/")
def hello():
  return orig_message + ": " + coded

if __name__ == "__main__":
  app.run()

Click the Refresh button in the browser preview, and, if everything is working correctly, you should see your original message and the encrypted version:

A screenshot showing the output of server.py in Glitch

Great! Your encryption function is working. Now you need to let people call your Twilio phone number so they have the numeric code read out to them.

Create your webhook

When Twilio receives a call at your Twilio phone number, it needs to know how to route that call to your application. For this, Twilio uses webhooks. A webhook is just a route within your Flask app that can accept a request from the Twilio platform. Let’s create one.

First, we need to import Twilio’s Python library. We can tell Glitch to do this by simply adding twilio to the list of required modules in requirements.txt:

A screenshot showing where to add the twilio Python library to requirements.txt in Glitch

Now we can import the modules that we need from the Twilio Python library into server.py. In this case, we’re going to use VoiceResponse and Say from twilio.twiml.voice_response:

import os
from flask import Flask
from cipher import keypad_encode
from twilio.twiml.voice_response import VoiceResponse, Say

In server.py, add a new /voice route that accepts both GET and POST requests and which responds by using the Say module to speak your encoded message. To do this, add the following code below your home route (the @app.route(“/”) code block):

@app.route("/voice", methods=['GET', 'POST'])
def voice():
  response = VoiceResponse()
  say = Say(coded, voice='Polly.Amy',language='en-GB')
  response.append(say)
  return str(response)

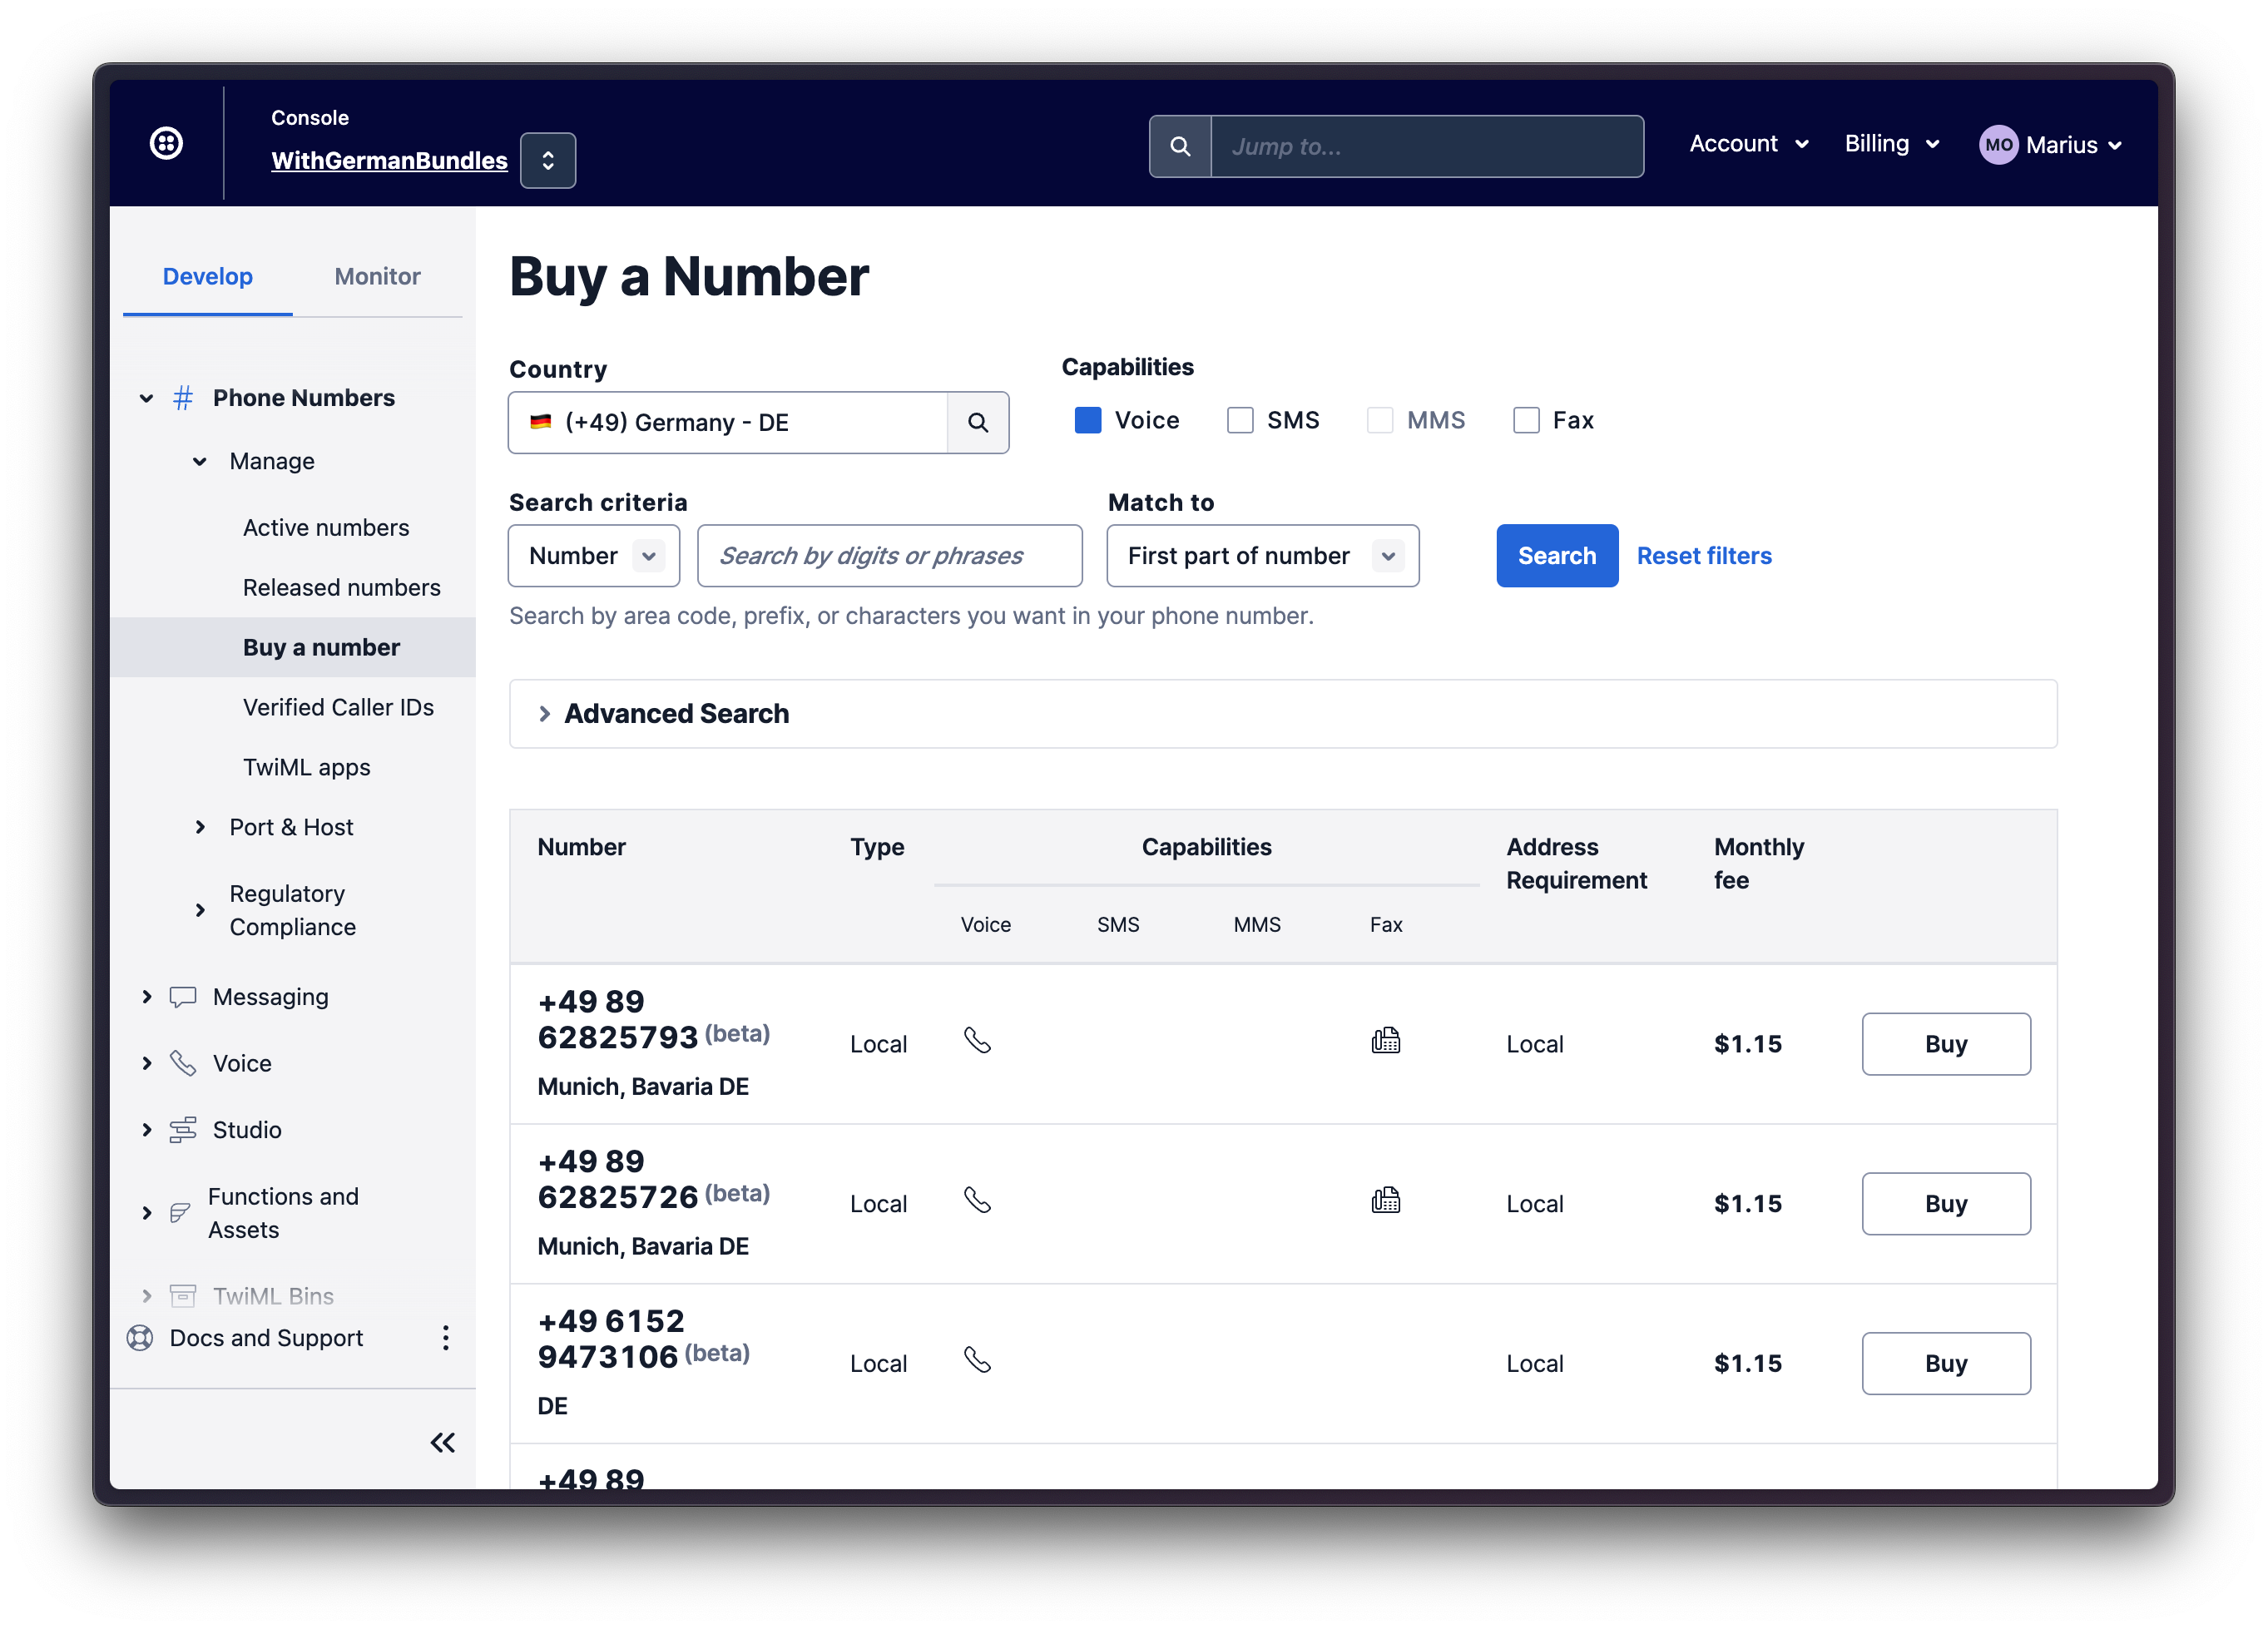
The next thing you'll need is a voice-capable Twilio phone number. If you don't currently own a Twilio phone number with voice call functionality, you'll need to purchase one. After navigating to the Buy a Number page, check the "Voice" box and then click the Search button.

A screenshot showing how to buy a number in the Twilio Console

You’ll then see a list of available phone numbers and their capabilities. Find a number that suits your fancy and click the Buy button to add it to your account.

Configure your webhook

For Twilio to know where in your code to send a call to when one comes through, you need to configure your Twilio phone number to call your webhook URL whenever a new message comes in.

Log in to Twilio.com and go to the Console's Numbers page.

Click on your voice-enabled phone number:

A screenshot of the Active Numbers tab in the Twilio Console

Find the Voice & Fax section. Make sure the "Accept Incoming" selection is set to "Voice Calls." The default "Configure With" selection is what you’ll need: Webhook, TwiML Bin, Function, Studio Flow, Proxy Service. (See screenshot below.)

In the A Call Comes In section, select "Webhook" and paste in the Glitch URL, appending your /voice route at the end of it as shown here:

A screenshot showing the Voice & Fax section in the Twilio Voice console

Click the Save button at the bottom of the page once you’ve made these changes.

A screenshot showing the Save button in the Twilio Console

Test your webhook

Call your Twilio number from a mobile device or landline, and you should hear a lot of numbers being read out to you. Hang up when you’ve heard enough!

Fine-tuning speech-to-text

Notice anything about the voice content?

First of all, it was fast. Way too fast to reasonably expect our friends to be able to scribble the numbers down accurately enough to decode the message. We need to slow it down.

Secondly, our text-to-speech reader turned that massive collection of digits into actual numbers, like “six-hundred eighty” instead of “six-eight-eight”. That’s not what we want.

Lastly, let’s not ignore the fact that it doesn’t sound in the least bit dissonant and creepy like a real numbers station. We have work to do!

If we were using the raw Twilio Voice HTTP API, we could do some pretty nifty stuff here by decorating the text with SSML tags. We could surround our numbers with <say-as interpret-as=’digits’> to have them read out as words rather than numbers: “three, two, one” instead of “three hundred and twenty one”. And we could adjust the volume, speaking rate, and pitch using <prosody>.

We can do those things with the Twilio Python helper library, too. While the library has methods that can modify text-to-speech using SSML, we can’t apply both <say-as> and <prosody> tags to the same piece of text. That would effectively involve indenting XML tags within the text that we want to read out, which the helper library does not support.

So, we can use the library either to read out the numbers as digits, or to change the speed and inflection of the reader’s voice, but not both.

Without using the Twilio Python library’s prosody() method, it will be difficult to change the speech characteristics. So we’ll use prosody() and work around the number/digits issue by converting the digits in our code to actual words and have Twilio read those instead.

First, add a global variable called numbers_spoken beneath the coded variable declaration at the top of server.py:

orig_message=os.environ.get('ORIG_MESSAGE')
coded = keypad_encode(orig_message)
numbers_spoken=['zero', 'one', 'two', 'three', 'four', 'five', 'six', 'seven', 'eight', 'nine']

Then, amend your /voice route handler in server.py by copy-pasting the following code block to replace the existing /voice function. We’ll break down what this code is doing in a moment:

@app.route("/voice", methods=['GET', 'POST'])
def voice():
  coded_ns = coded.replace(" ", "")
  coded_arr = list(coded_ns)
  numbers = []
  for x in coded_arr:
      numbers.append(numbers_spoken[int(x)])
    
  response = VoiceResponse()    
  say = Say('Attention', voice='Polly.Amy',language='en-GB')
  say.break_(strength='x-weak', time='100ms')
  for number in numbers:
      say.prosody(number, pitch='-10%', rate='30%', volume='-6dB')
      say.break_(strength='x-weak', time='500ms')
  response.append(say)
    
  return str(response)

Our coded string is a series of “letters” (or rather their keypad representation) separated by a space. We remove all the spaces and turn it into a list:

coded_ns = coded.replace(" ", "")
coded_arr = list(coded_ns)

Then, we loop through the coded_arr list, turning the digit representation of each number to its spoken equivalent in two steps as shown in the code block below:

  1. Looking up the index value of that number in the numbers_spoken list
  2. Storing the result in another list called numbers
numbers = []
for x in coded_arr:
  numbers.append(numbers_spoken[int(x)])

We can now “speak” that list of numbers. To do that, we create an instance of VoiceResponse called response and an instance of Say to build the text-to-speech that we want to return in the response. When using Say, you can choose between using man, woman, alice or Amazon Polly voices.

In the Say constructor, we pass in the text we want to begin the message with (“Attention”), the voice we want to say it with (“Polly.Amy”) and the language we want to say it in (“en-GB”, for British English).

response = VoiceResponse()    
say = Say('Attention', voice='Polly.Amy',language='en-GB')

After saying “Attention”, we add a 100ms pause, using the say.break() method:

say.break_(strength='x-weak', time='100ms')

And then we loop through our list of numbers and use the say.prosody() method on each to adjust the pitch, rate, and volume to make it sound a bit weird, like a real numbers station! We’ll add another short pause after each number to give our friends a chance to scribble the numbers down before attempting to decode the message:

for number in numbers:
  say.prosody(number, pitch='-10%', rate='30%', volume='-6dB')
  say.break_(strength='x-weak', time='500ms')

Finally, we add our instance of the Say class to the response we send back to Twilio. The caller will then hear our message!

Add audio to your message

There’s one last thing we will do before we invite our friends to decode the message: play a short tone before we start synthesizing the spoken text.

I’ve got one you can use here. It’s just a sequence of beeps, but it will do the job. If you want to use your own, then you need to make your sound file available via a public URL. The easiest way to do this is to host it using a new, beta service from Twilio called Assets.

Play your sound file to the caller by using the play() method of VoiceResponse, as follows:

@app.route("/voice", methods=['GET', 'POST'])
def voice():
  coded_ns = coded.replace(" ", "")
  coded_arr = list(coded_ns)
  numbers = []
  for x in coded_arr:
    numbers.append(numbers_spoken[int(x)])
  response = VoiceResponse()
  response.play('https://pearl-moose-1218.twil.io/assets/beeps.wav')

Try it out

Give your friends your Twilio number and ask them to call it. If everything is configured correctly they will hear your creepy Cold War-era message. Remember: if you want to give them a clue, tell them that the solution is in the palm of their hand!

Congratulations!

Nice job working through this tutorial. You just learned how to:

  • Use Glitch to host your web projects
  • Create a web server using Flask
  • Write a webhook that responds to an incoming call using Twilio Voice
  • Customize speech-to-text

Next Steps

To extend this tutorial, you could:

  • Change the voice. Pick a new Amazon Polly voice and play with the prosody() settings until it sounds good! Check out the docs.
  • Replace the keypad cipher with another encryption method. Al Sweigart has written a great book called Cracking Codes with Python—freely available online—which should give you some ideas.
  • Randomize the message that you send. Maybe by calling another API? The Jokes API could be a fun one to try!

Or, check out some of the other tutorials on the Twilio blog for ideas on what to build next:

I can’t wait to see what you build!

Author Bio

Mark Lewin is a freelance technical writer specializing in API documentation and developer education. When he’s not poring over OpenAPI documents he can be found treading the boards with his local amateur dramatics group or getting lost in the Northants/Oxfordshire region of the English countryside. He can be reached via: