How to Start Your First Java Spark App
Time to read:
Setting up a new project to hack together an idea shouldn't be a problem, especially with the help of the Spark framework. Not only does this lightweight framework allow developers to be more productive with minimal boilerplate, but explore REST APIs at the same time.
In this article, you will learn how to navigate a Java IDE to set up and build a Java Spark application.
Tutorial requirements
- Java Development Kit (JDK) version 8 or newer.
- IntelliJ IDEA for convenient and fast Java project development work. The community edition is sufficient for this tutorial.
Start a new Java project in IntelliJ
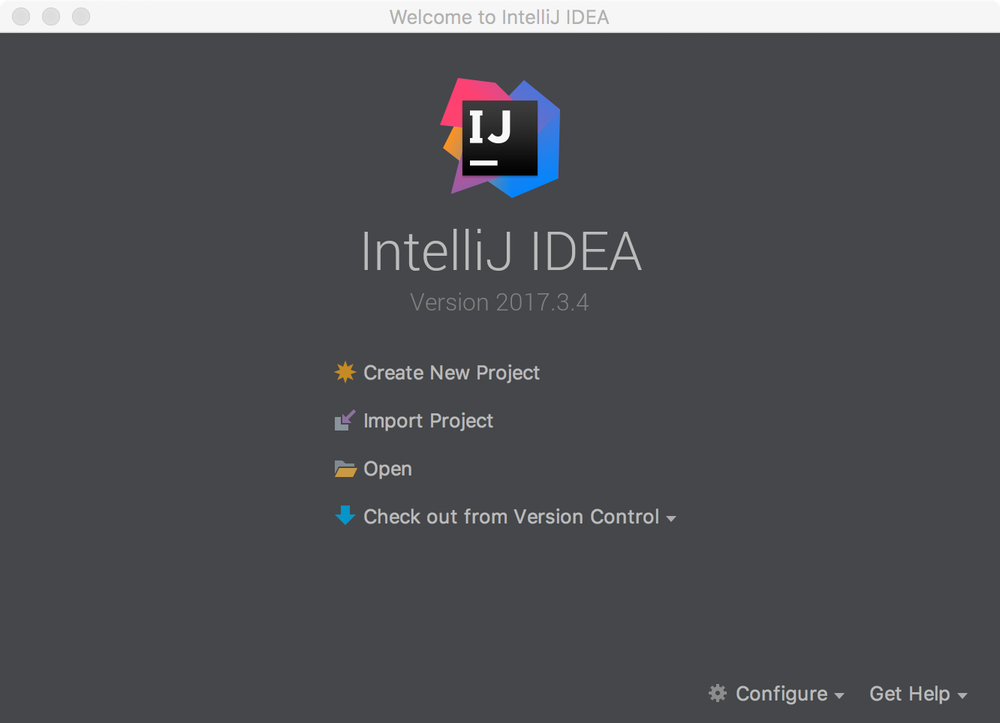
Open IntelliJ Idea and click on Create New Project.
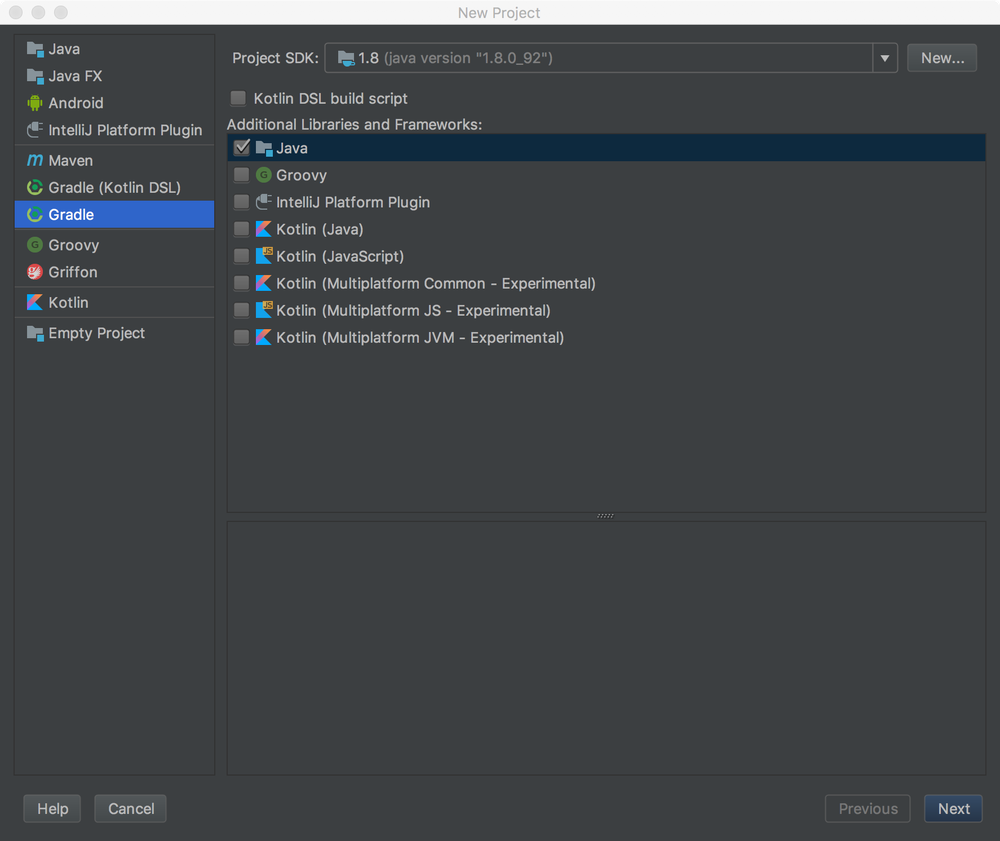
Choose Gradle on the left hand side and check Java in the box on the right hand side.
Give your project a name such as "FirstSparkApp" and click the Finish button.
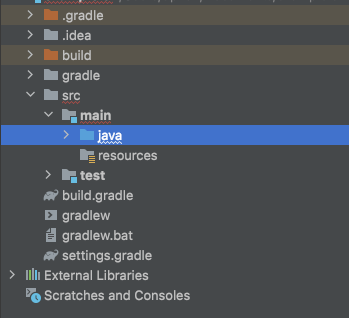
Your project directory structure should look like the following image:
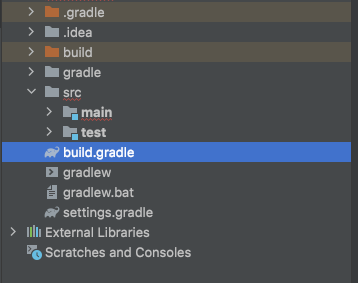
Open the build.gradle file in the IDE and add the following lines inside the dependencies block:
Create a Hello World Java class
Expand the main subfolder under the src folder at the root of the project directory. Notice the empty java folder.
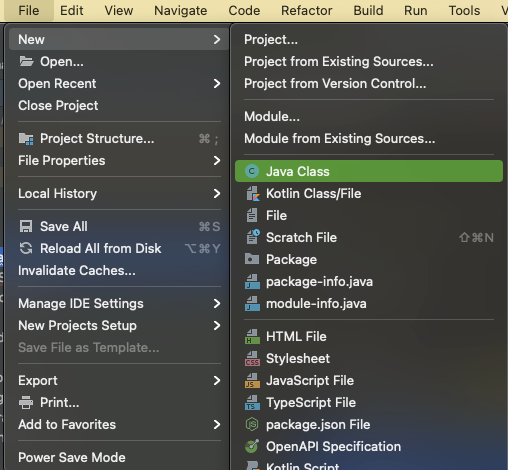
Click on the File at the top of the IDE window. Hover over the New option and select Java Class as seen in the image below. Clicking this option will prompt you to give the class a name. Go ahead and name it "HelloWorld'.
Open the file and copy and paste the following code to the file:
It is important to know that the filename must reflect the class name within the file. In the public HelloWorld class, a main method is invoked so that the code in the program starts once executed.
The Java Spark web application responds to all requests to the root URL "/" with a string message.
Feel free to change the string message, otherwise, go ahead and save the file.
Run the Java Spark application
Right click on the HelloWorld file in the project directory and find the option to Run 'HelloWorld.main()'. Wait a few seconds for the project to build and compile.
Spark automatically runs applications on port 4567 so head over to http://localhost:4567/ in your web browser to see the string message.

Change the port for the Spark application
If you prefer to change the port number from "4567", you have to define the new port number before creating the route mappings.
Find the red square button to stop running the HelloWorld app. This can be found in the left panel below the directory.

Go back to the HelloWorld.java file and add the highlighted line to the main function:
The port is redefined to 8080 but feel free to change it to another port.
Save the file and run it again. You should be able to see the same string message on http://localhost:8080/ now.
What's next for building Java Spark projects?
Congratulations on building your first Java Spark application! But don't stop here. Try to send an SMS with Spark or check out these articles:
- Create a standalone voicemail using Java and Twilio.
- Make a button that sends a WhatsApp message using Java.
- Allow the button to trigger a voice call with Java and Twilio.
- Explore projects with Java servlets.
- And so much more!
Let me know about the projects you're building with Java and Twilio by reaching out to me over email!
Diane Phan is a software developer on the Developer Voices team. She loves to help programmers tackle difficult challenges that might prevent them from bringing their projects to life. She can be reached at dphan [at] twilio.com or LinkedIn.
Related Posts
Related Resources
Twilio Docs
From APIs to SDKs to sample apps
API reference documentation, SDKs, helper libraries, quickstarts, and tutorials for your language and platform.
Resource Center
The latest ebooks, industry reports, and webinars
Learn from customer engagement experts to improve your own communication.
Ahoy
Twilio's developer community hub
Best practices, code samples, and inspiration to build communications and digital engagement experiences.


