Introducing TwilioQuest, a New Way to Learn Twilio
Time to read:
October 26, 2017
Written by

Sometimes a blank text editor window and that irritating blinking cursor are the biggest obstacles to starting your project. We here at Twilio most definitely agree – starting is the hardest part.

That’s why we’re so excited today to announce TwilioQuest!
TwilioQuest is an interactive, self-paced game to learn how to Twilio. You’ll master products like Twilio Voice and Messaging while earning experience points and loot. Read on to take the first step on your new adventure.
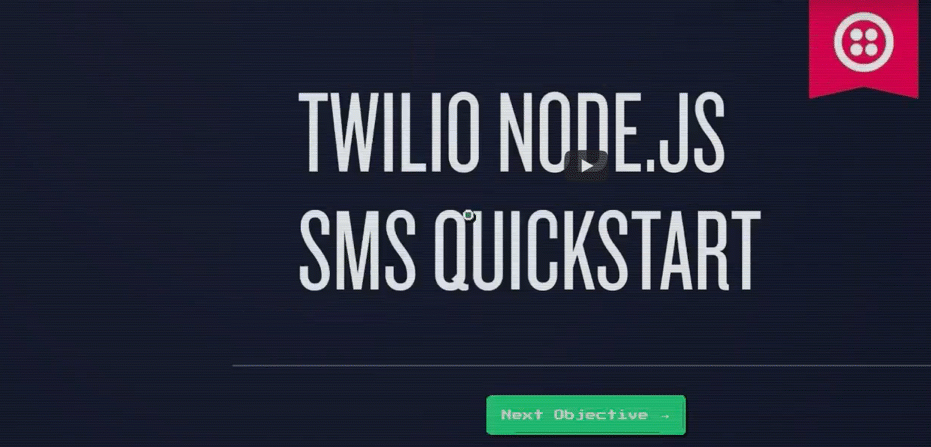
Prefer an introduction in video form? We’ve got you covered.
Get Started on Your TwilioQuest Journey
Before you can byte into TwilioQuest’s 8-bit goodness, you first need to create an account with Twilio or log into your existing account. Surf on over to TwilioQuest to get started.
Build Your TwilioQuest Character
Once you’re logged into your Twilio account and back in TwilioQuest, you will be presented with a character customization screen:
Ahoy, Traveler! What Shall We Call You?
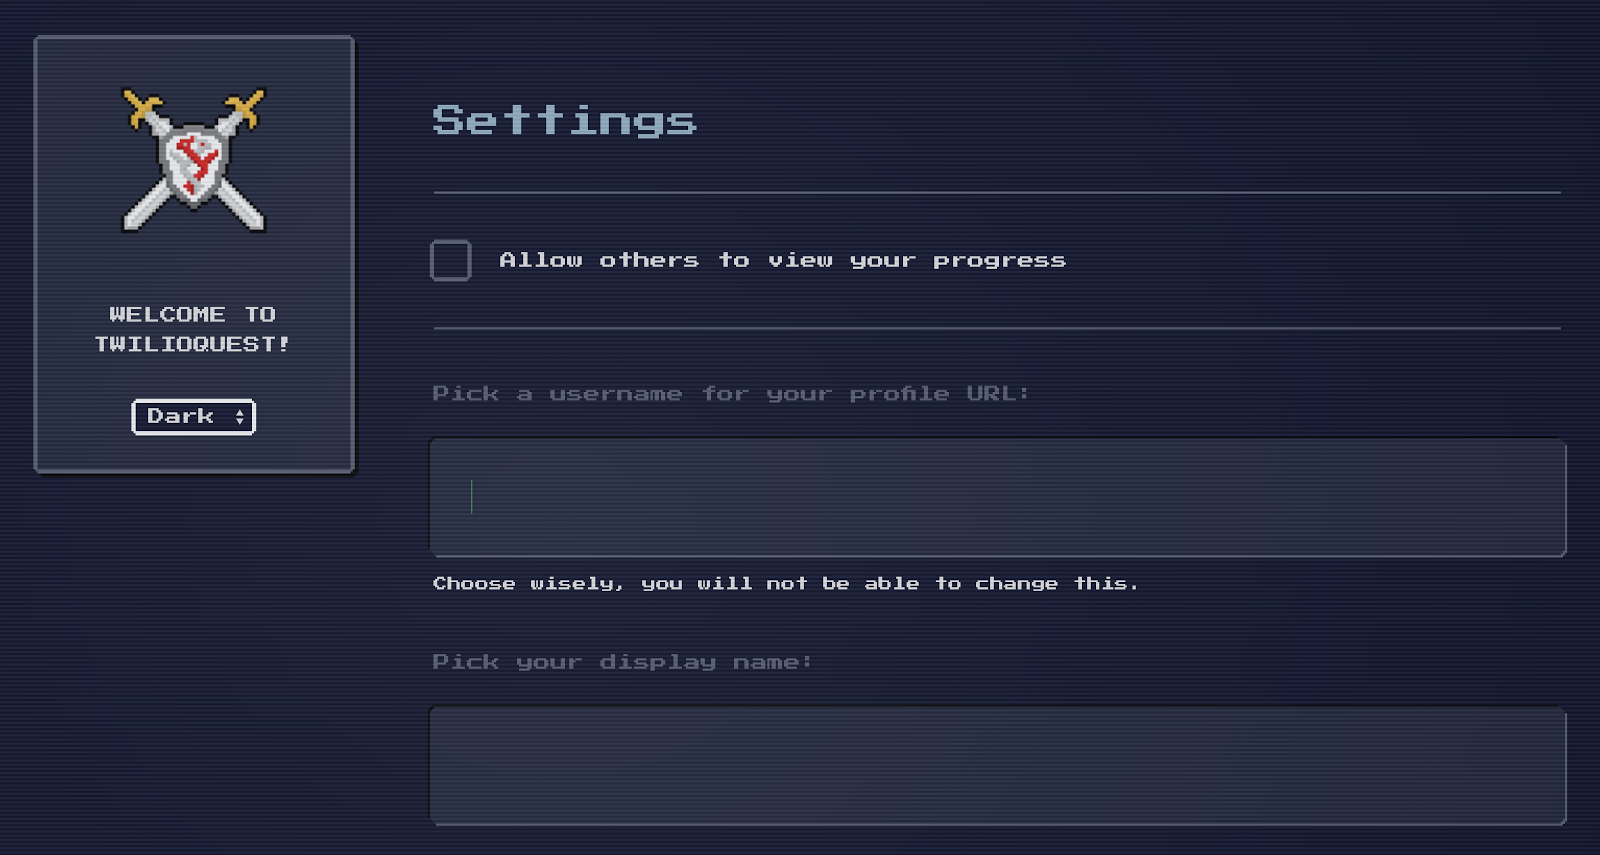
First, choose your preference on whether to show your progress publicly. We have a Twitter bot which celebrates your achievements and a shared scoreboard which will show all recently completed objectives (for you and your fellow Questers) if you opt-in.
Next, select a username and a display name. Your username is how we reference your character in your public profile URL (if you opt-in to ‘Show Progress’). Your display name will appear when we’re celebrating your achievements.
Pick a good name and steel yourself, hero – the next part is a metric ton of fun.
Produce Your Pixel Perfect Personification
Below the name entry fields, you’ll find an avatar selection screen where you can build your digital doppelgänger.
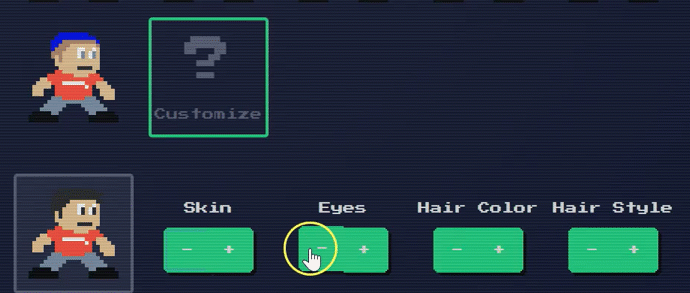
Have fun here, and explore all our options. We have over 1,400 customizations for your base character – and you haven’t even started finding items yet!
(And don’t worry, you can change your digital representation after the game has started – just click the ‘Settings’ link any time in-game).
Learn Twilio through Playing TwilioQuest Missions
When you’re done customizing your character and successfully enter the TwilioQuest arena, you’ll next be presented with a variety of Missions.
These Missions encompass most of Twilio’s products. We also include Add-ons and integration-specific mission lines for you to explore.
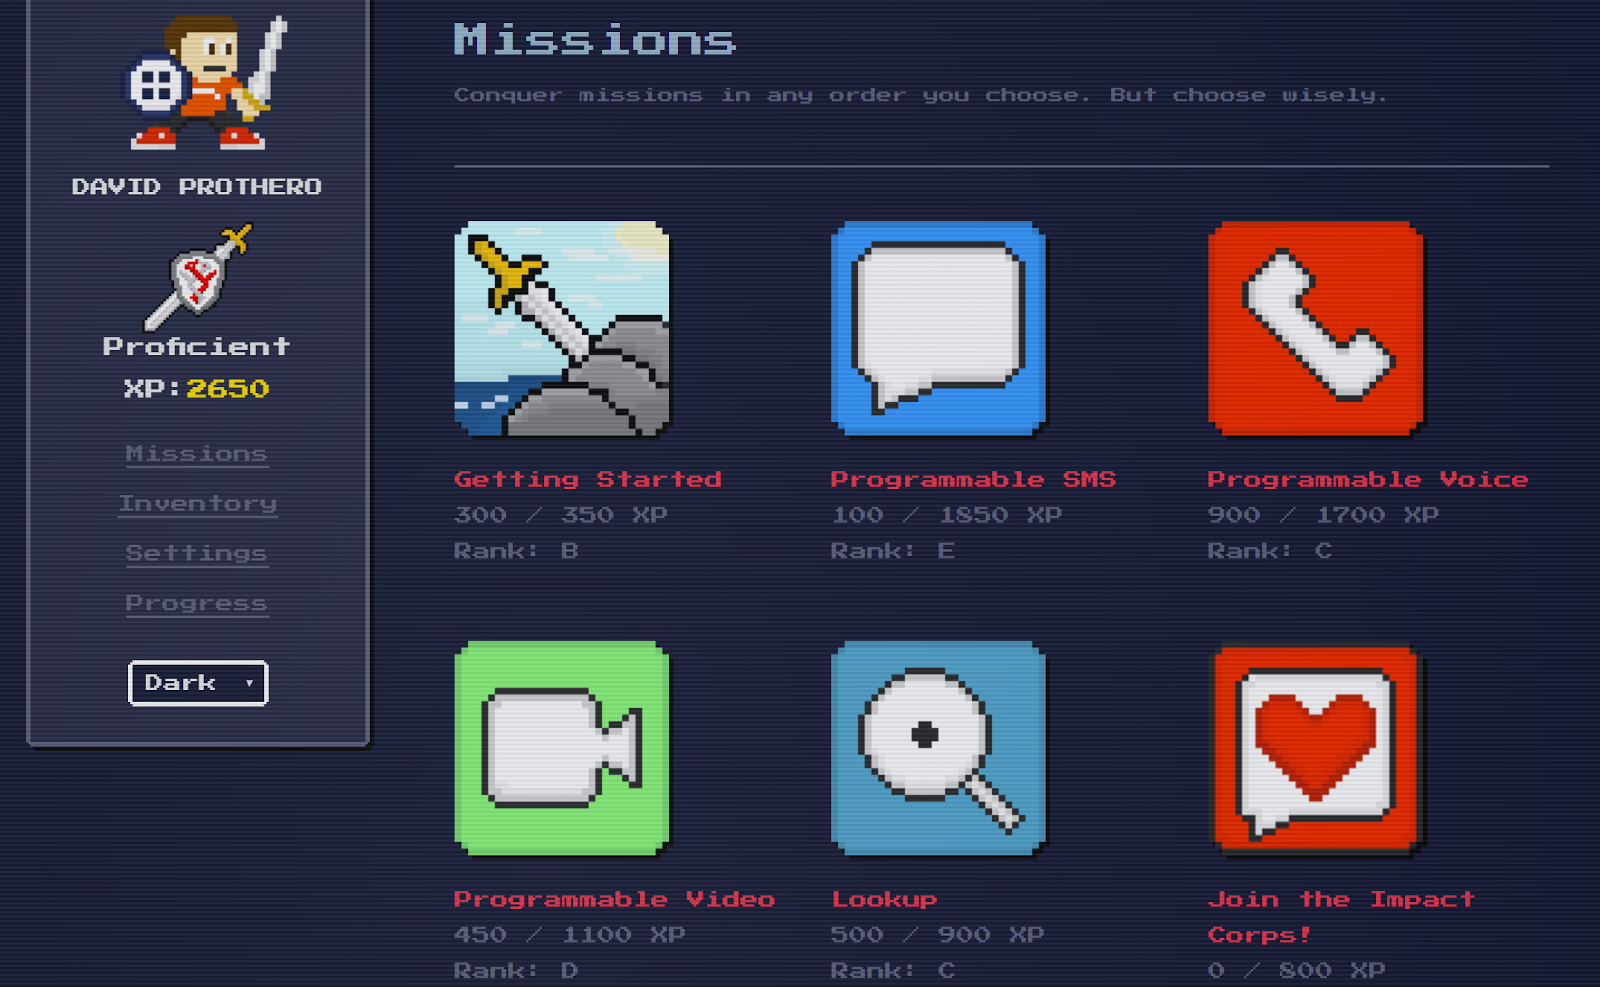
Begin with the ‘Getting Started’ mission – it’s the easiest way to orient yourself with the game mechanics and get a feel for the game.
Psst… it’s also an amazing way to score some quick points and rack up some loot! You can even earn a Twilio account credit if you complete the whole mission.
Beating Mission Objectives At-Home or In the Arena
Each mission is further divided into Mission Objectives. Every objective is a self-contained themed quest, setting you up with the background you need, completion criteria, hints, and links to resources that can help you beat the mission.
TwilioQuest has two fundamental type of missions: self-verified missions and in-person missions. In-person missions are for live, in-person Twilio events – if you’re playing along at home choose self-verified missions.
To be notified when Twilio will be near you, sign up for the TwilioQuest mailing list.
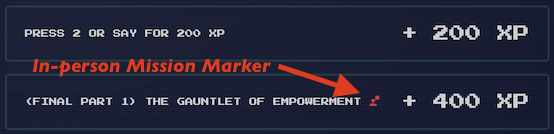
Self-verified mission completion criteria vary widely, but generally you will be prompted to enter a code, phone number, or otherwise signal to Twilio you’ve mastered a skill.
Mission sizes vary, but missions usually contain between 6 and 10 of these objectives and culminate with a capstone project to show off your new skills. Those final projects are often verified at live events, but feel free to complete them at your own pace and bring them in-person when you can.
It’s Not a Lonely Road – Getting Help on Your Journey
If you get stuck, don’t worry – your friendly Twilio NPCs are here to help! Always feel free to contact Twilio’s support, who are very well versed in the challenges you might face in-game.
Go Experience TwilioQuest Today!
Best of all, the arena is open for everyone today. If you have a Twilio account, you can get started as soon as you’re in the mood to Quest.
We know you’ll agree that playing Twilio as a game is an incredible way to pick up powerful skills and learn new features to boot (while earning boots). No matter where you are in your web development journey, we’ve got something for you – from saying “Hello, World!” to sending SMSes and building real-time Video applications for you and your fellow travelers. Have fun, learn Twilio, and play at your own pace while building the valuable experience you’ll need for your own communications applications.
Ready to try it? Of course you are – go play now, and start filling that text editor.
We can’t wait to see you in the game.
Related Resources
Twilio Docs
From APIs to SDKs to sample apps
API reference documentation, SDKs, helper libraries, quickstarts, and tutorials for your language and platform.
Resource Center
The latest ebooks, industry reports, and webinars
Learn from customer engagement experts to improve your own communication.
Ahoy
Twilio's developer community hub
Best practices, code samples, and inspiration to build communications and digital engagement experiences.