How to Build Your Own Fax Machine with Tessel, JavaScript and Twilio
Time to read:
This post is part of Twilio’s archive and may contain outdated information. We’re always building something new, so be sure to check out our latest posts for the most up-to-date insights.
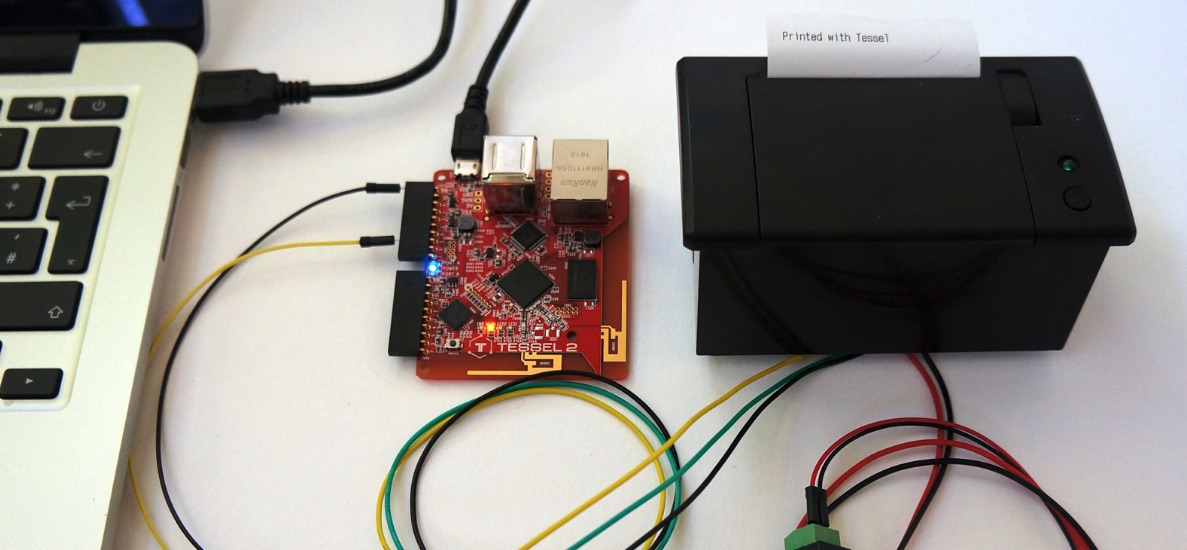
The death of fax has been greatly exaggerated! Twilio Programmable Fax allows you to work with faxes using the REST APIs that you are already familiar with as a developer. Instead of loading piles of paper sheets into a machine tray we can send and receive a fax in the cloud.
But… what about those beautiful physical fax machines? Remember the buzzing noise, the blinking lights and the minutes spent waiting for it to finish printing a page? While you could go out and buy a fax machine and get a landline, neither would be fun. We can instead build our own fax machine using JavaScript and some inexpensive Tessel hardware.
Things you’ll need
Our fax should be a physical device, a machine we can put on the shelf, on our desk or next to our copy machine. There are plenty of IoT microcontrollers that we could use but for this post we will use the open-source development board Tessel 2.
Why a Tessel? Two reasons. First, it runs JavaScript and supports npm with its massive number of modules we can use or re-assemble. Second it is an excellent platform for quick prototyping supporting Wifi, Ethernet, USB and serial ports out of the box so there are no additional modules needed.
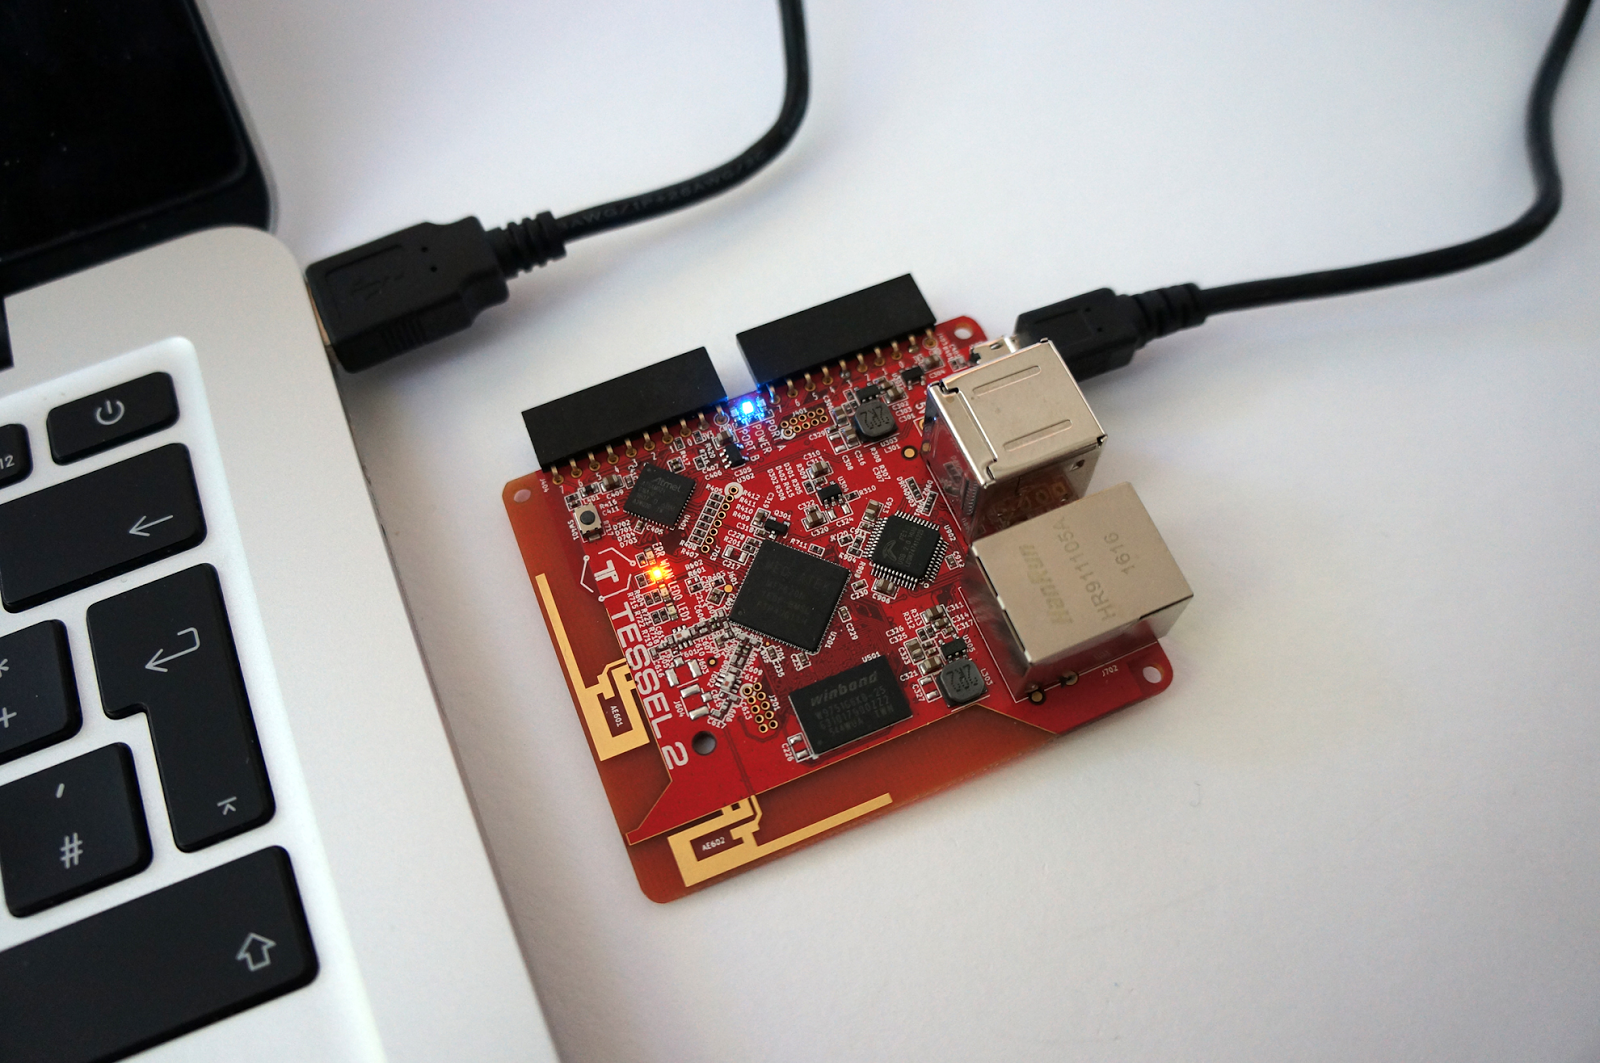
This is the board. Beside the networking and USB it comes with two module ports on the right side. With some additional setup those ports could be used to rig a way to send faxes. We’ll focus on receiving faxes for now.
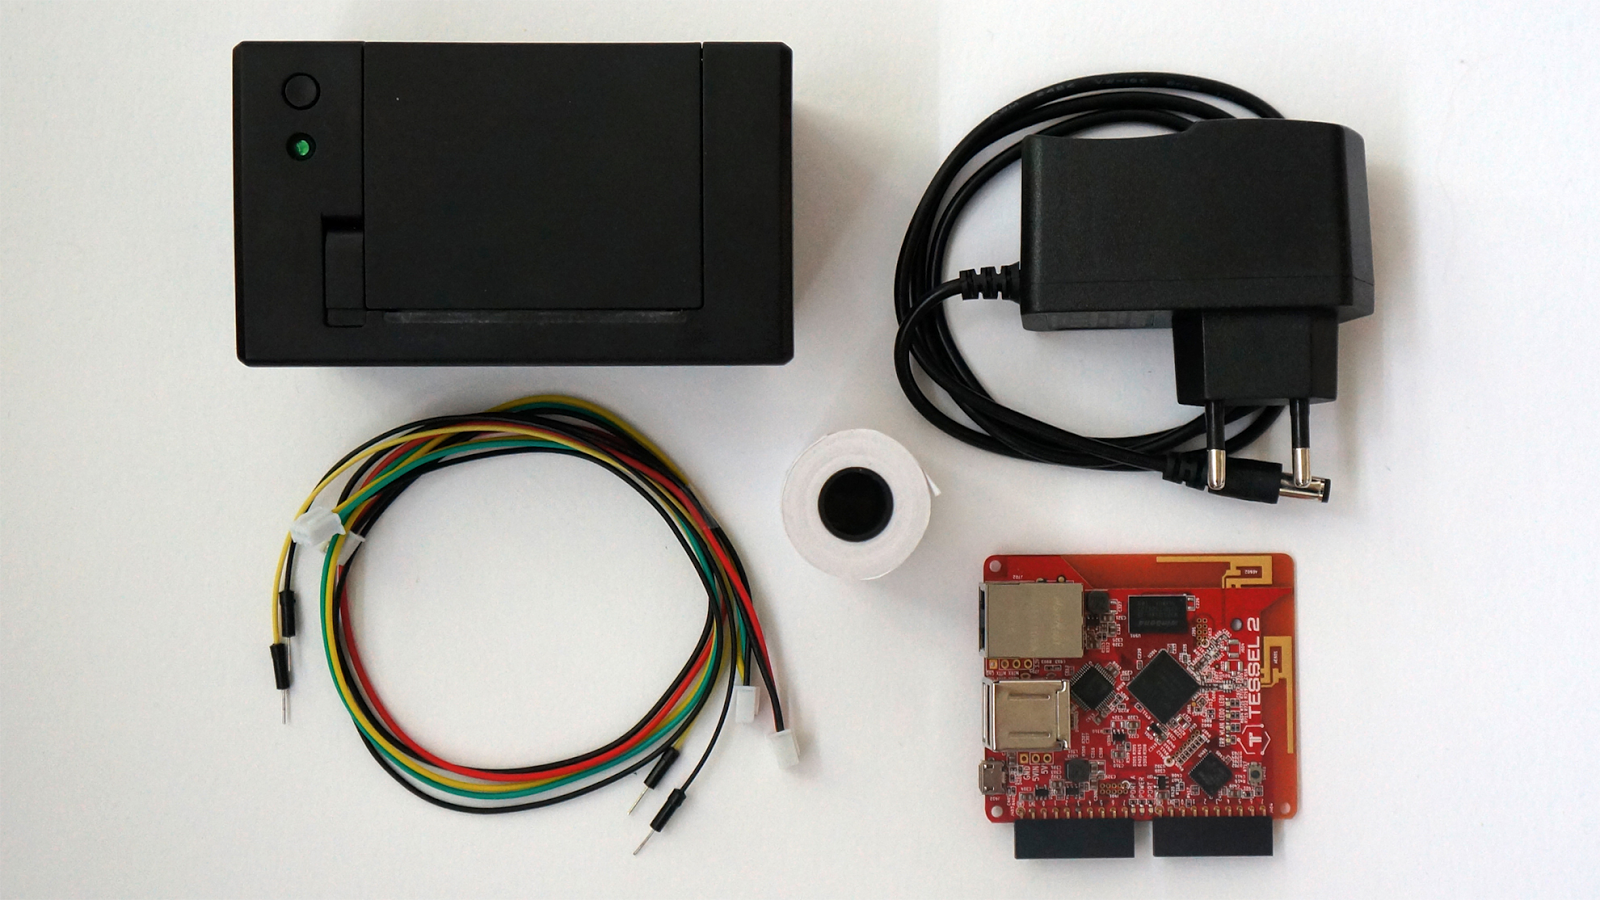
In addition to the Tessel the other hardware components we need are:
- a thermal printer – no fax without printer; I’m using an AdaFruit Mini Thermal Receipt Printer but other printers with a serial port should work with some code changes.
- a power supply for Tessel and the thermal printer. The printer requires its own a 5v – 9V, 2A power supply since the Tessel can’t power it. I use a separate power supply for the thermal printer and USB power supply to power Tessel.
- lots of thermal paper rolls
- jumper wires to connect the microcomputer with the printer.
Once you’ve gathered all of your hardware, the last three bits of prep you need to do are
- sign up for a Twilio account which you can do here for free.
- make sure you have a Node.js development environment set up including npm.
If this is your first time with Tessel follow the Tessel Installation Guide first. No worries, it is painless and shouldn’t take more than 15 minutes. Part of the getting started guide is a simple application which lets Tessel’s LEDs blink.
At a high level, Tessel development works like this:
Create a new Node.js project anywhere on your computer and add const tessel = require('tessel') to it. Connect the board to the USB port and run JavaScript files on the command line with:
In the background the code is now transferred into Tessel’s RAM and executed.
Setting up the Thermal Printer
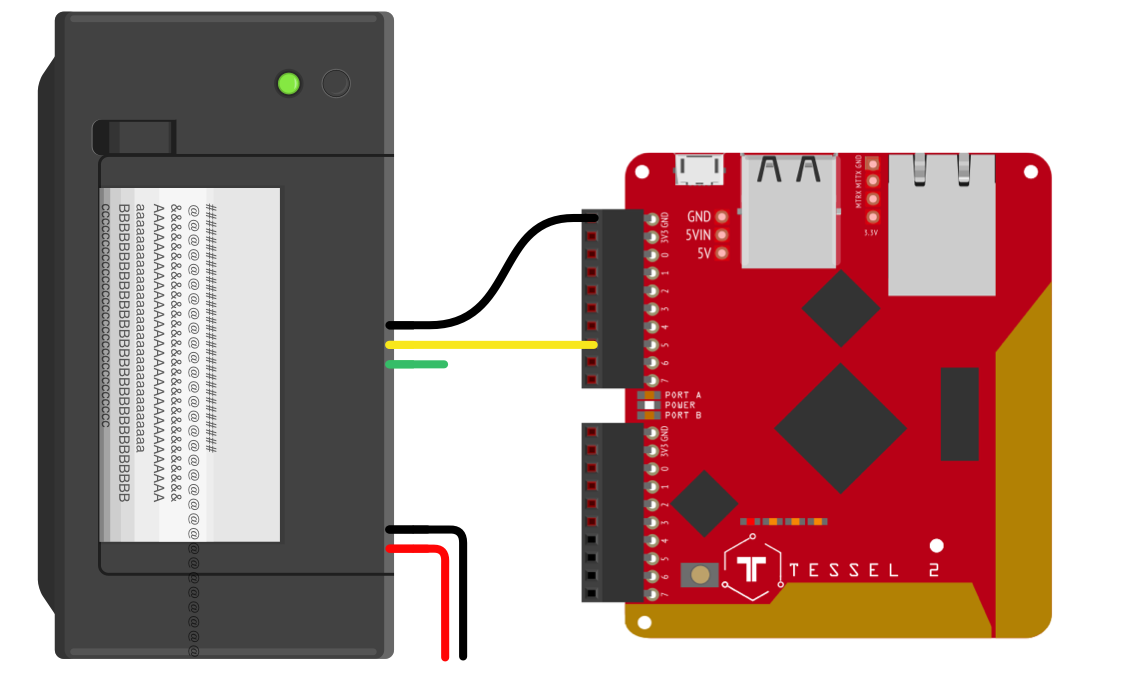
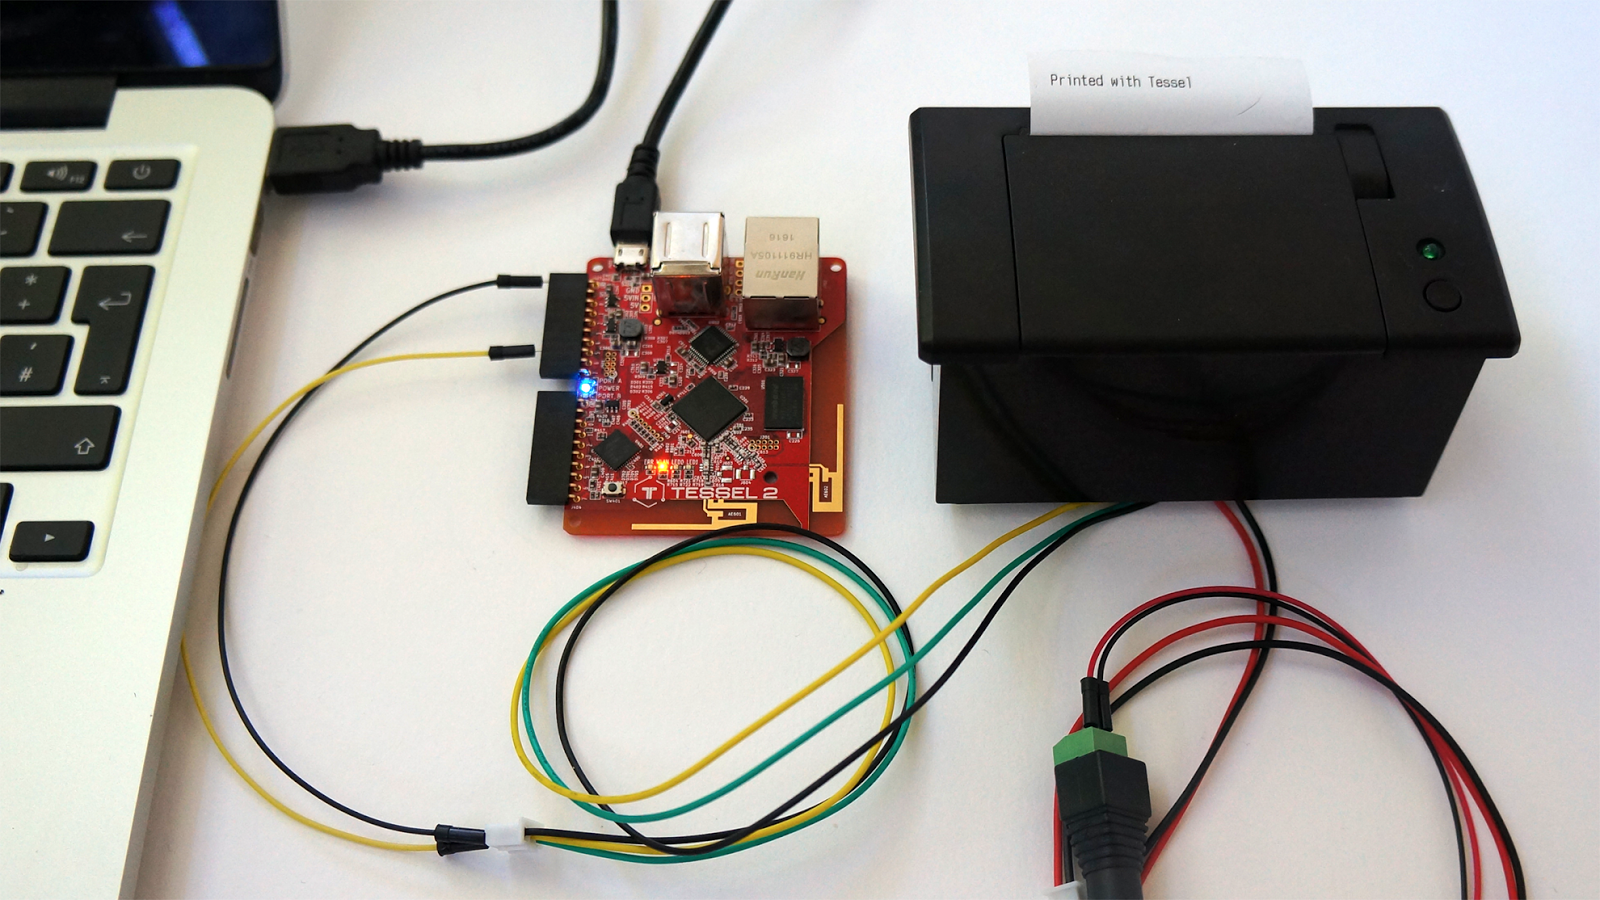
It’s time for maybe the hardest part for software people and the easiest thing for all Internet of Things experts, we now need to connect the printer to the Tessel. The printer has a serial port interface and the Tessel comes with a UART module, which stands for Universal Asynchronous Receiver/Transmitter and is just a fancy way of referring to a serial port.
A serial bus consists of just two wires – one for sending data and another for receiving. Hence serial devices should have two serial pins: the receiver, RX, and the transmitter, TX. In our setup we only send byte commands to our printer. So wiring Tessel’s TX (Transmitting) to the printers RX (Receiving) plus connecting GND is all we have to do.
Printing the first line
Now that our hardware is setup we can start writing some code. Start by cloning this template project and install the dependencies.
We do not want to have binary printer commands in our application code so the project contains a small library named Printer.js which converts commands like bold, line feed or print into binary commands.
First do a check and verify if we connected the wires properly. To do that we’ll use a simple test application named tessel-printer-test.js:
As you can see in the code, using the Printer object commands are converted to byte commands and sent to the serial port.
Deploy and run this code on the Tessel by running t2 run tessel-printer-test.js from the command-line. If all runs well our printer should print now.
Purchase and Configure Your Fax Number
Our Tessel can now print using the thermal printer, but how do we turn it into a fax machine. This is there Twilio comes in.
First we need a phone number from Twilio. The number must have fax capability, so be sure to check the fax checkbox while searching for a phone number.
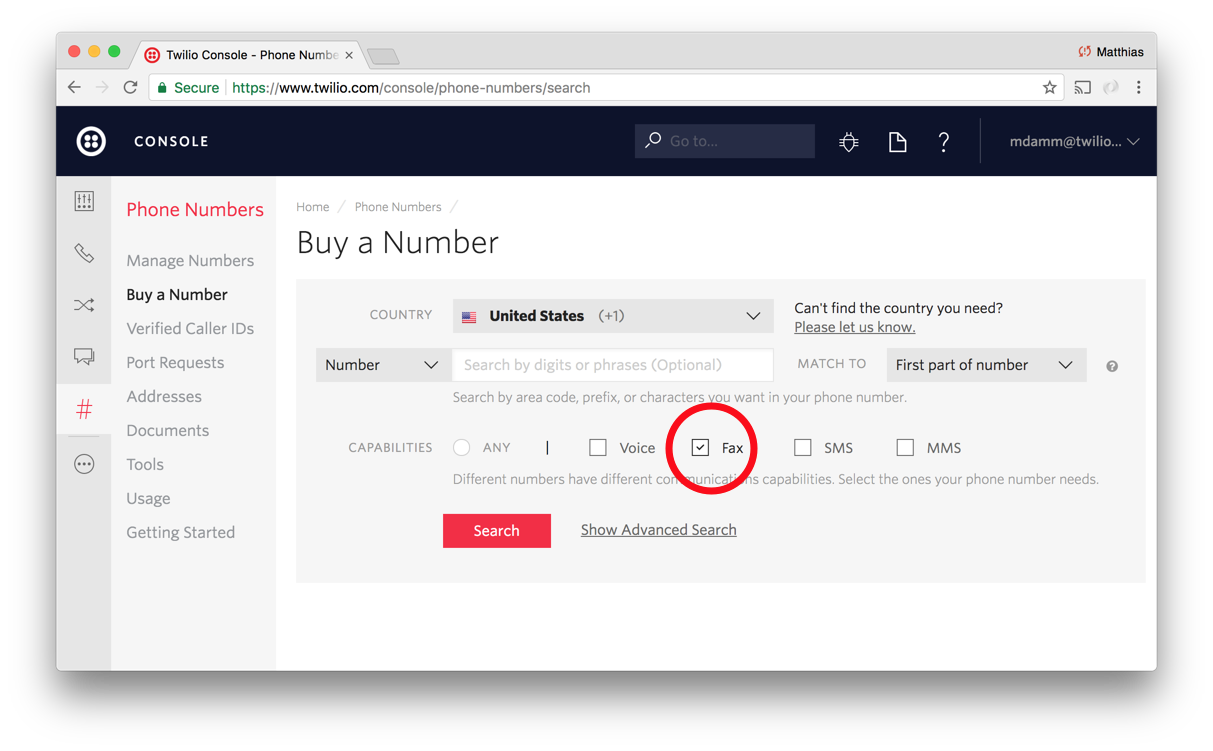
Once we have a fax enabled Twilio phone number we need to configure it to receive faxes. To do this, we’ll set up some static TwiML hosted on in a TwiML Bin. You could also host the file on your own server but using TwiML Bin frees you from having to manage and monitor a server and just let Twilio do that for you.
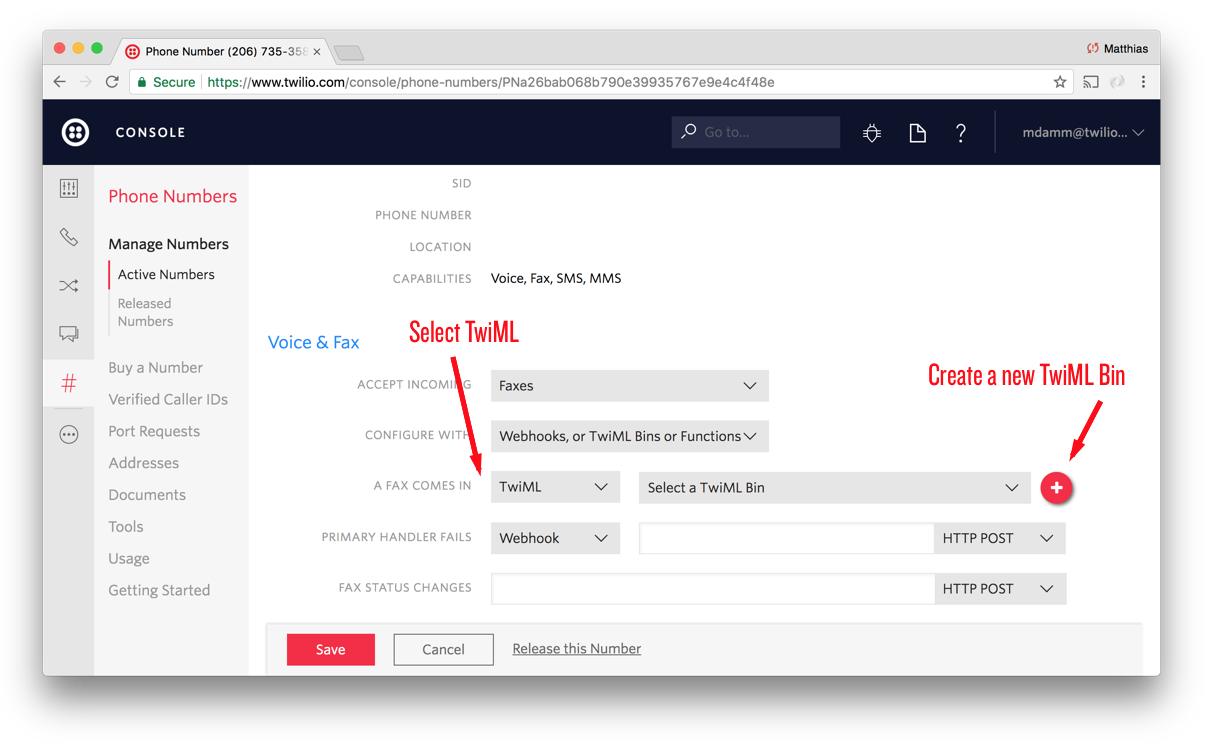
This is all we need, for every incoming fax request Twilio will fetch our TwiML, accept the incoming fax with the <Receive> verb and store the fax with additional meta data in the cloud.
Connect the Tessel with Twilio
Up until now we have Tessel connected to our printer and we configured the phone number on Twilio to receive all incoming faxes. In the following steps we want to setup the board to receive and print out faxes we received on Twilio.
Tessel 2 is a fast platform and we could directly let the board talk to the Twilio API, but having a tiny script running on a server has some advantages. First of all, we don’t need to manage access credentials on Tessel. Additionally, instead of exposing a webhook address to Twilio, we can poll the Twilio API periodically for new faxes. With this setup we don’t need a publicly available address for our server and we can host it on the local network if we like to.
Let’s walk through setting it all up. We add the server part to the same Node.js project we’ll use later for Tessel so basically we have one project, one part will run on the board, the other on a (local) server.
The app.js file in the root folder of the project contains all server code we need. We instantiate the Twilio Node helper library with API Keys we can create on the Twilio Console since it is very easy to revoke them later.
We set the API Key, Secret and Account SID as environment variables. One more value that needs to be set isprocess.env.TWILIO_FAX_NUMBER, which is the phone number we configured before.
Twilio Fax comes with a RESTful API. Thankfully we don’t have to deal with any fax specific technology or protocols, all faxes sent to our number are automatically stored and can be retrieved easily. First, using the helper library we request a list of fax resources from within the last hour. Then we filter that list for direction=incoming and check if status=received.
The second route /images/:id is requested by Tessel later to retrieve the fax image from Twilio, it’s important to note that we print out the first page only, but we could extend the code and iterate the list of attached media and process multi-page faxes if we want to. Twilio provides us the fax as a US Letter size (1728x2256px) TIFF formatted image. The thermal printer I’m using can only print 384 pixels per line, so before we send it to the printer we need to resize the TIFF. Additionally, we’ll convert the image from TIFF to PNG to have an easier time sending the picture data to the printer. To do that we’ll need to add a few packages to our project
Here is our list of modules we need for this step:
Once the TIFF is resized and converted to PNG it’s streamed as the response back to the client. We’re now ready to do final assembly of all of the parts of this application.
Putting it all together
Here’s what we have so far. All incoming faxes will be accepted by the TwiML we host on Twilio. We have created two services, one is requesting the Twilio RESTful API and returns a list of faxes, the other returns images in 384-pixel width. In a last step we program Tessel to periodically request our API and print all images received.
We need a home for the API code we’ve written, it does need any inbound connection from the internet, so you can just run it on your computer for now.
To start up the server run:
Next add the server’s address to tessel-printer-scheduler.js and store it. If you run the app.js on your local computer you can use a tool like ngrok to create an address for your server.
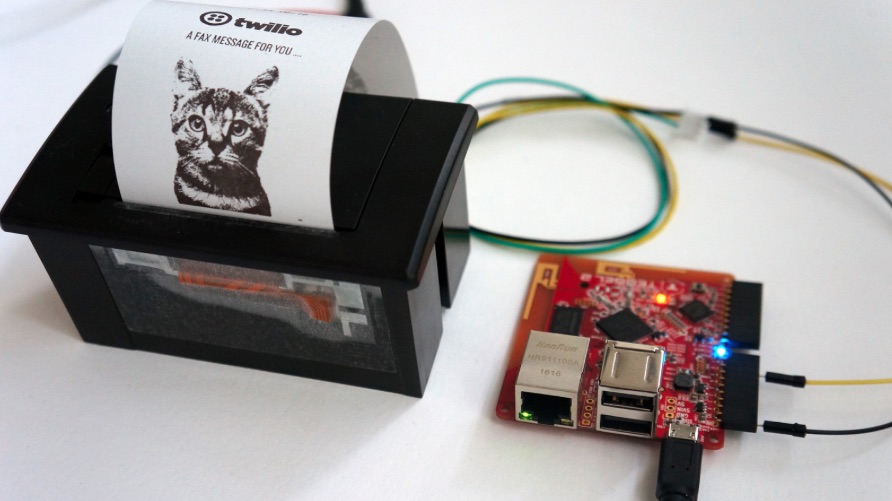
Three things are missing to get our fax machine ready to be shipped:
- A case for our device
- Connecting the Tessel to WiFi
- Permanently install the code on the device.
The case I’ll leave for another day, so skip to connecting the Tessel to the WiFi, which you can do using the following command:
This command will connect the device to our local WiFi network and save the access credentials. Upon next startup, it will attempt to reconnect automatically.
Next, install the code onto the device:
This command will transfer and store our code on Tessel; previously in this blog post we used run, which transferres code to RAM only, with push we permanently save it.
Afterwards we can remove the USB cable from the fax machine, that’s it, let’s wait for faxes.
If you want to test the entire setup and you have access to a fax machine, just send a fax to the number we configured earlier. In case you don’t have a physical fax machine available, you can easily send a fax with Twilio to your number.
Create a new file send-fax.js and place the following lines into it:
To send a fax with Twilio we basically set three mandatory parameters on the REST API, the from as the outgoing caller ID, you can use the same number configured to receive faxes or any other Twilio phone number. The to number, this is the fax number we configured before and the third parameter is the mediaUrl, this points to a PDF file Twilio will retrieve and send as fax media.
Replace the respective parameters, save the file and execute it by running:
Give it a little bit of time and your printer should be starting to print your fax!
Wrapping it up
So there you have it. Building your own fax machine is as simple as combining a few bits of hardware, a dash of Node and a pinch of Twilio into a tasty hack that will transport you right back to 1987!
Got any questions about using Twilio Fax or built anything cool with it? Drop me a note in the comments below, or much better, please fax comments to 1 (206) 735-3585.
Related Posts
Related Resources
Twilio Docs
From APIs to SDKs to sample apps
API reference documentation, SDKs, helper libraries, quickstarts, and tutorials for your language and platform.
Resource Center
The latest ebooks, industry reports, and webinars
Learn from customer engagement experts to improve your own communication.
Ahoy
Twilio's developer community hub
Best practices, code samples, and inspiration to build communications and digital engagement experiences.


