Build an SMS Panic Button with Twilio Functions
Time to read:
In an emergency such as an accident, an insecure situation, or a natural disaster, a successful response time is often measured in seconds. Communicating a call for help quickly is essential. If someone is unable to make a phone call or send a text message, a readily accessible panic button can enable them to make an urgent call for help discreetly and efficiently.
In this guide, we'll show you how to build an SMS Panic Button in a couple of steps using an IoT button and Twilio Functions.
Requirements
- A free Twilio account
- A Flic button (or any other button capable of sending an HTTP request)
How will this work?
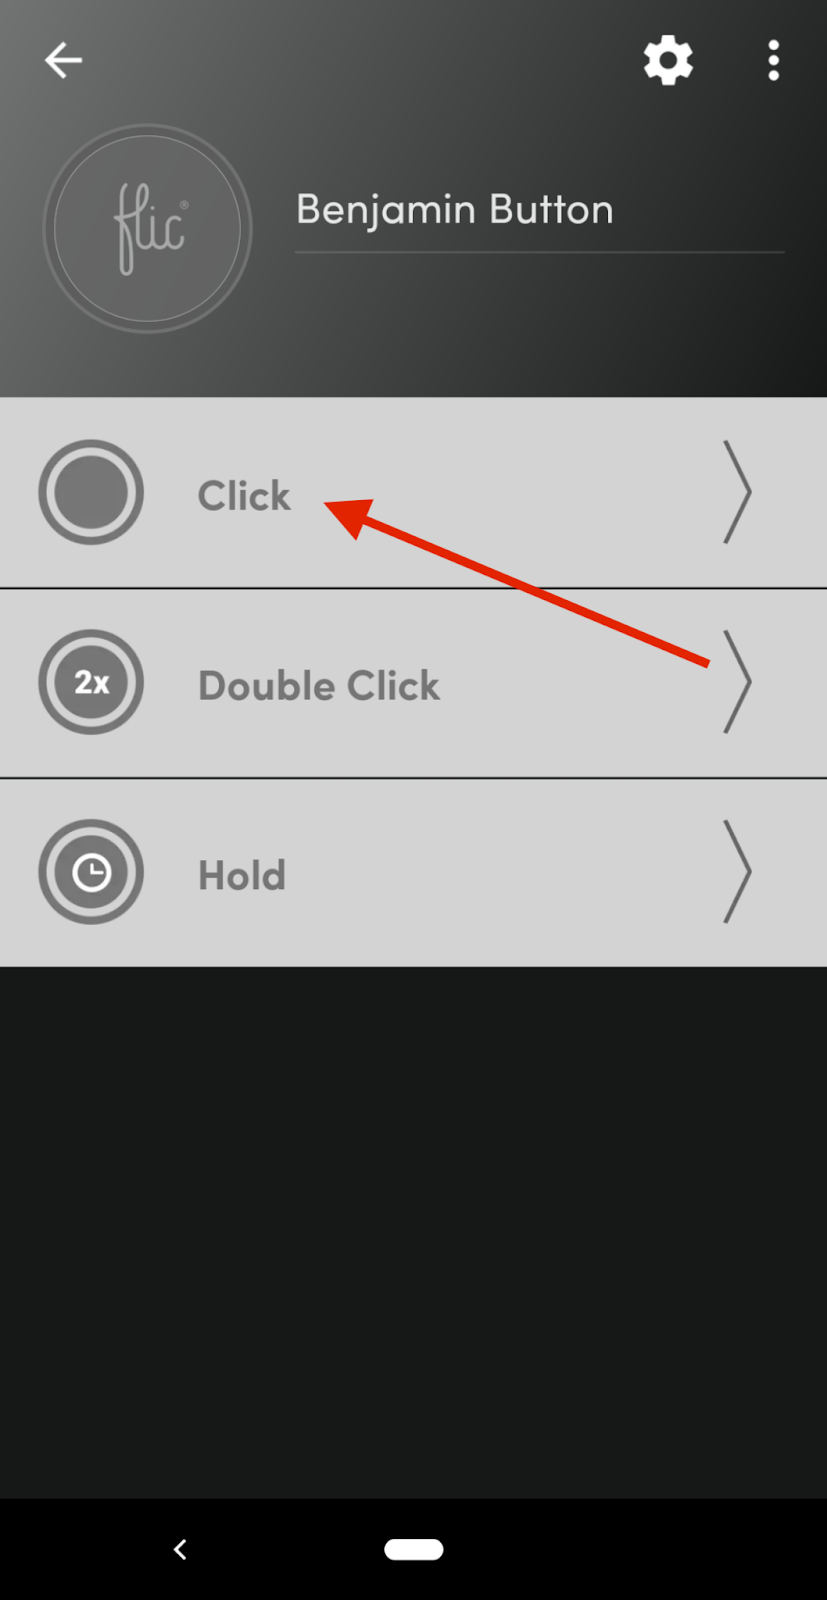
IoT buttons, such as Flic, offer the possibility to configure and trigger different actions depending on what we do with them. In this case, we can link different outcomes to these 3 different actions:
- A single press/click (the one we'll be using in this guide).
- A double press/click.
- A long press or hold.
On the other side, Twilio Functions allow you to send a request from any internet-connected device capable of sending outgoing HTTP requests, and from there interact with any Twilio API.
With these two pieces connected, we can build a flow that whenever we do a single click, sends an SMS to a preconfigured number.
What are we doing?
The logic of this entire flow works as follows:
- We'll create a Twilio Function that has a predefined phone number and sends a message whenever an HTTP request comes in.
- We'll configure our button to execute an outgoing HTTP request whenever someone executes a single button click.
- We'll link the outgoing HTTP request to the path of the Twilio Function we created in Step 1.
- We'll have an epic SMS panic button ready to go!
Creating your Twilio Function
Next, we’ll create a Twilio Function that receives the request after we click the Flic button and sends an SMS message to a list of numbers that we’ll define.
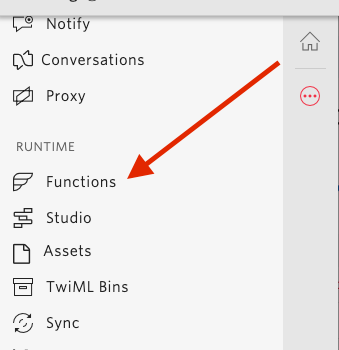
To do this, first go to the Manage Functions page in the Twilio Console, by accessing the Functions icon in the Runtime menu:
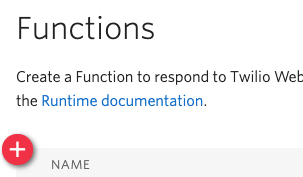
Now, create a new function, by clicking the red “Create new function” button:
Select “Blank” in the New Function wizard, and then click on “Create”:

Now, with your new function created, you’ll need to fill these two sections:
- Function name: It's a friendly name, and it can be whatever you want. In this case, we are using "SMS Panic Button" as the name.
- Path: It's the specific path for the URL associated with this function. It can also be whatever you want, but we recommend keeping it short, so it's easier to remember. In this case, we are using "/sms-panic-button". We are using this URL in the next section when we configure the action for the button.

Next, add this in the code section below:
For this code, you need to configure two parts:
- "your-number-here" (line 1): The destination number. Must be in e164 format (e.g: +1 1234567890)
- "One-of-your-twilio-numbers" (line 8): Your Twilio number that sends the messages. You can get a phone number or look at your existing ones in the Active Numbers section in the Twilio console.
Finally, click "Save" to deploy the function.
Setting up your Flic button
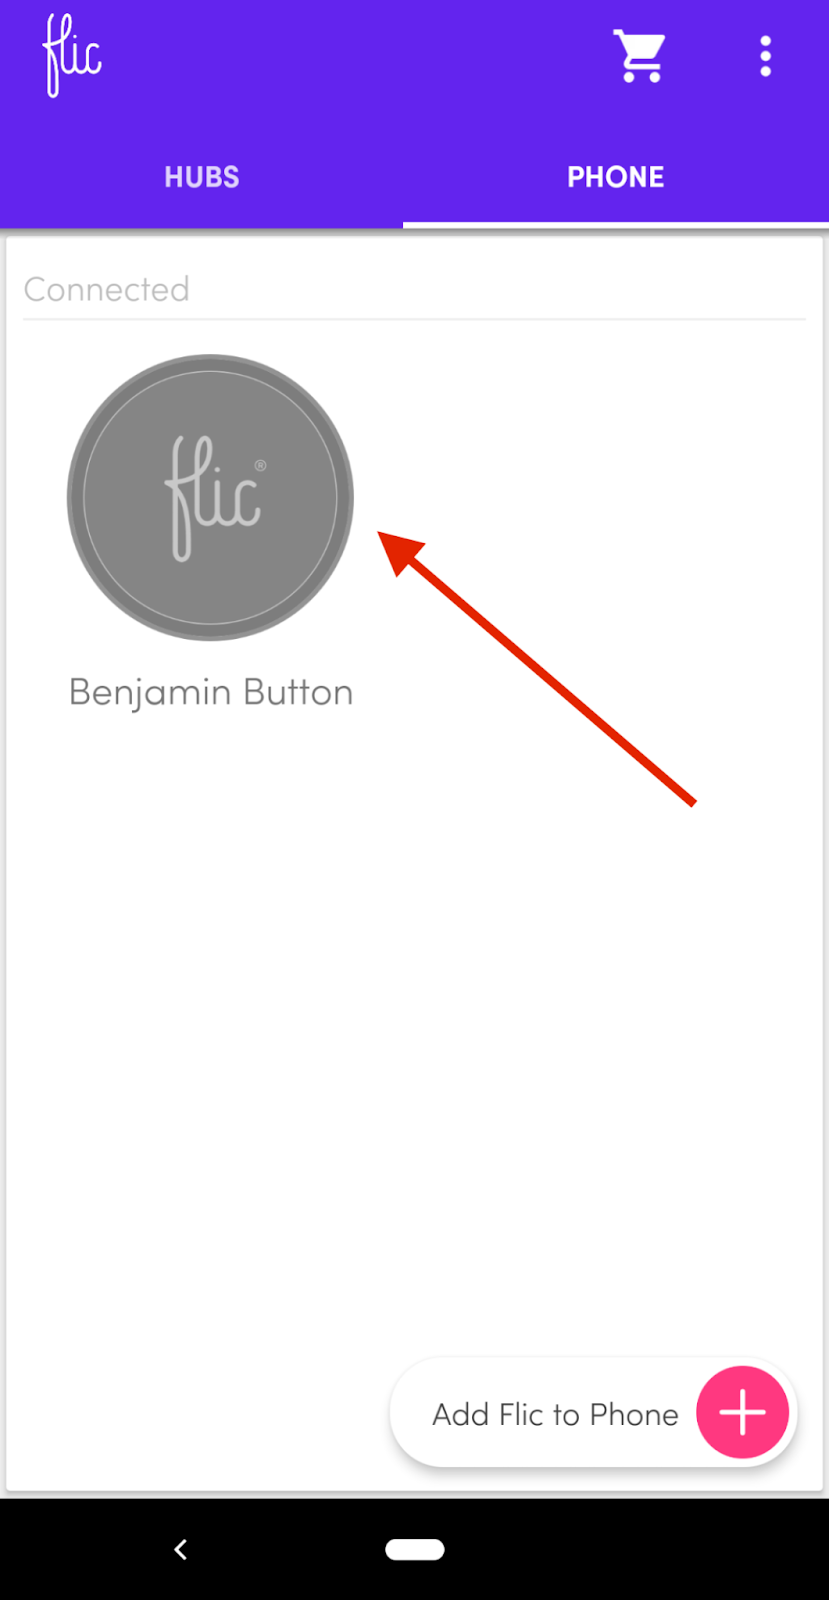
After getting your Flic button and going through the initial setup (creating your account/signing in and connecting your button to the app), tap your button in the main screen of the app:
In the action selection screen, tap on the “Click” option to configure what happens when we do a single click with the button:
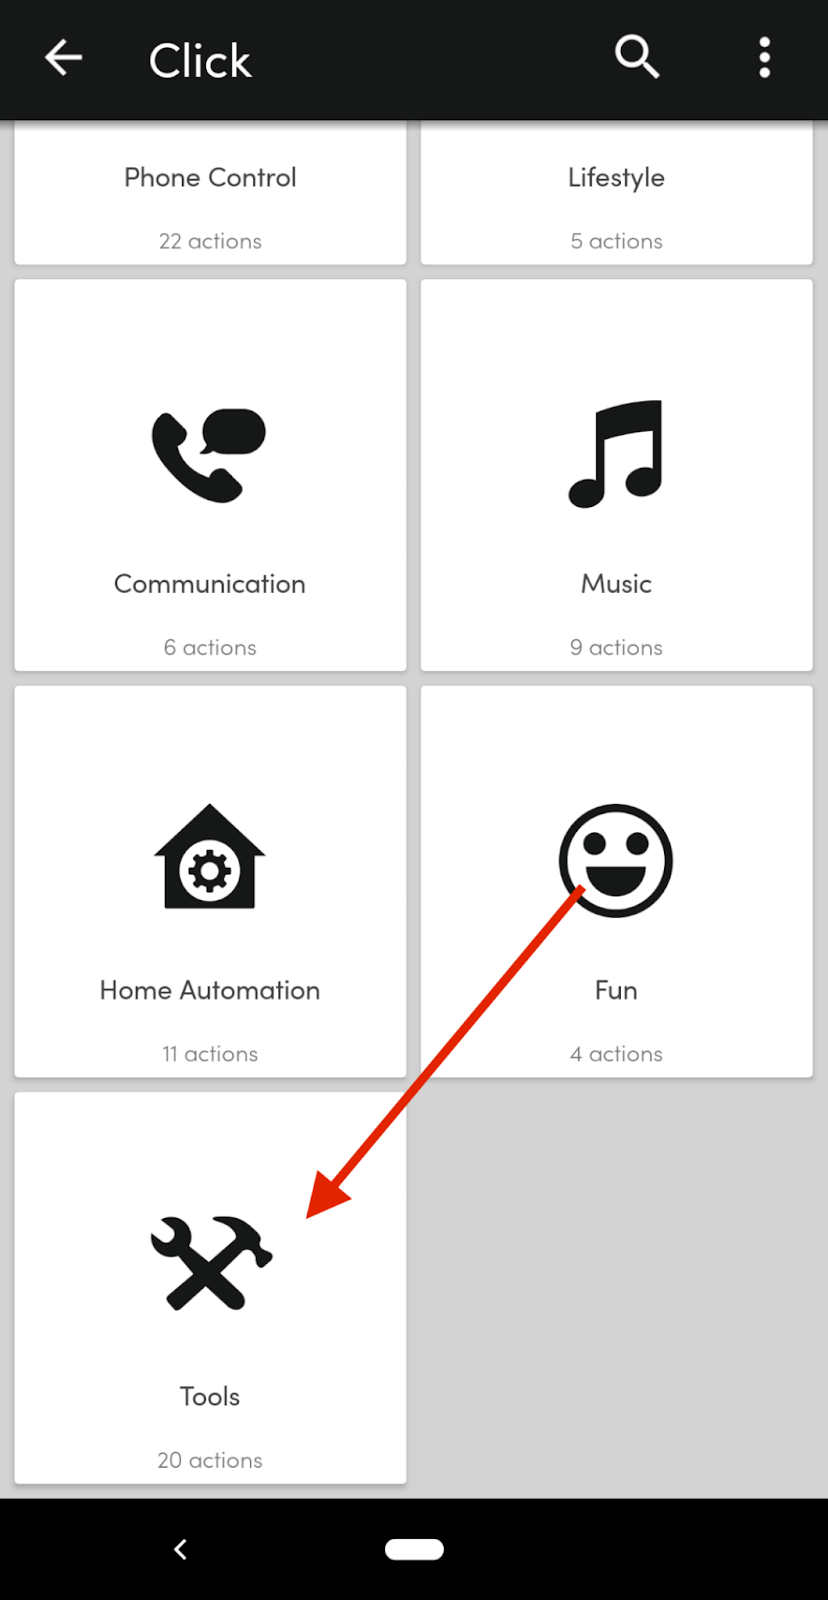
After selecting the single-click option and going to the configure action screen, scroll all the way down and select the “Tools” option:
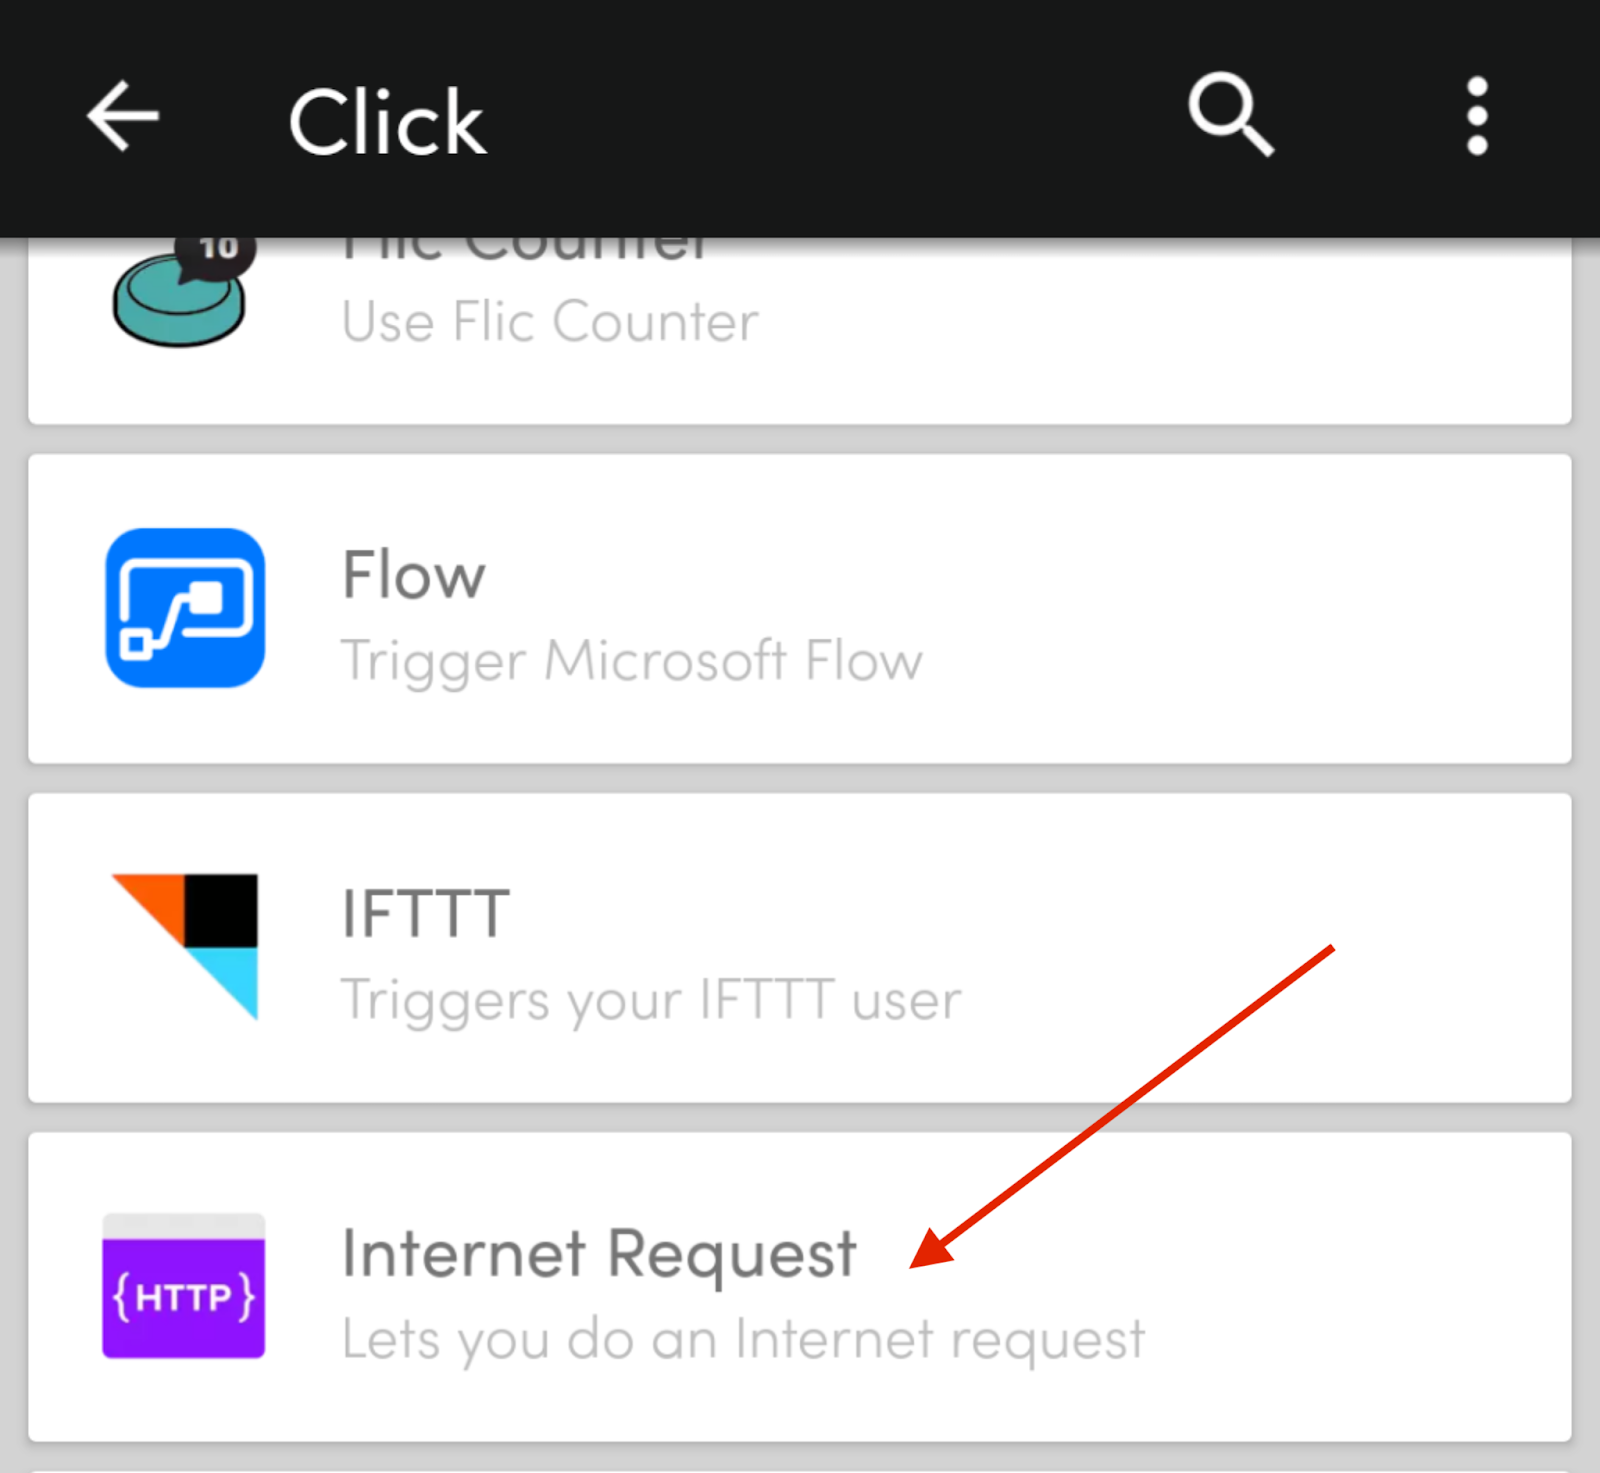
And in the tools list, scroll down until you find the “Internet Request” option and select it:
Now, you’ll need to configure two things in the “Internet Request” details screen:
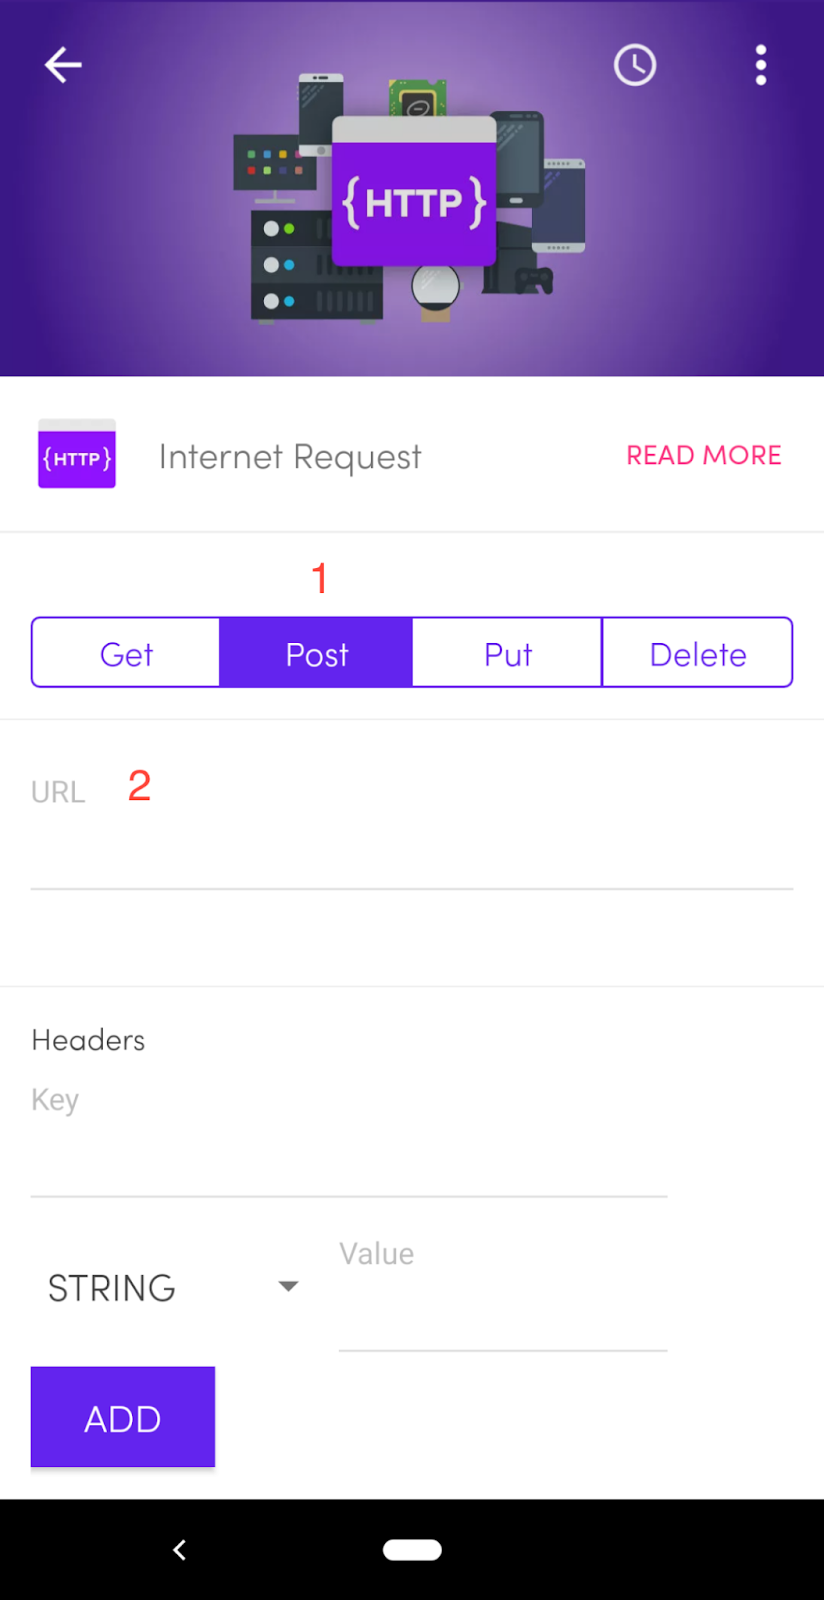
- The Method: Select POST here.
- URL: Here, you need to add the URL of the Twilio Function we created in the previous step.
After you fill those two options, scroll all the way down and tap the “Save Action” button:
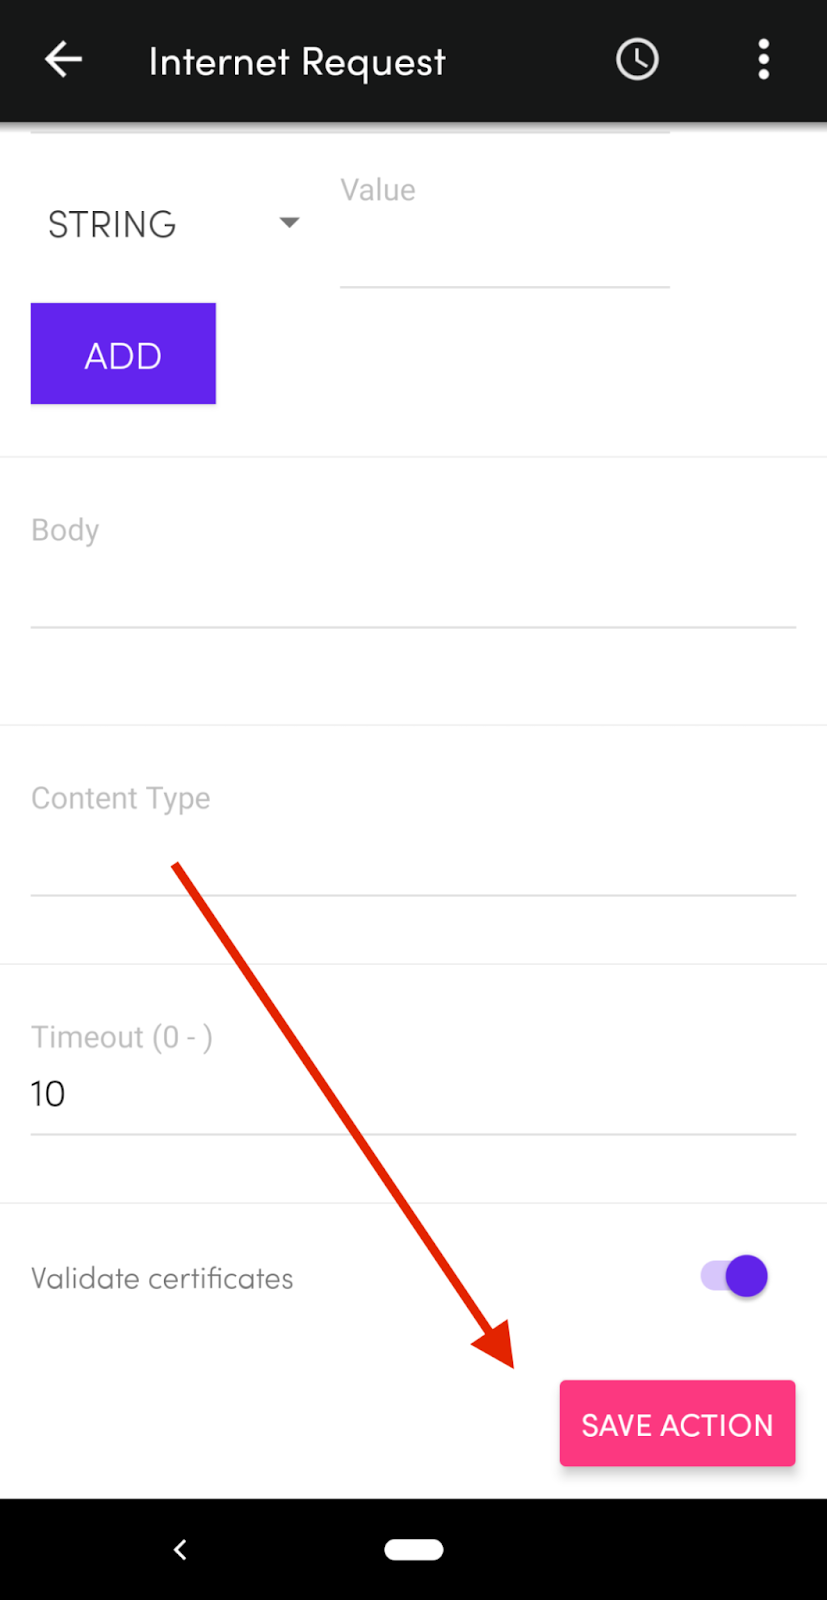
And with that, your Panic button should be all good and ready to go. Next step is to try it out and see if everything is working correctly, but before we do that, one thing to keep in mind:
Now, time for a demo!
Demo
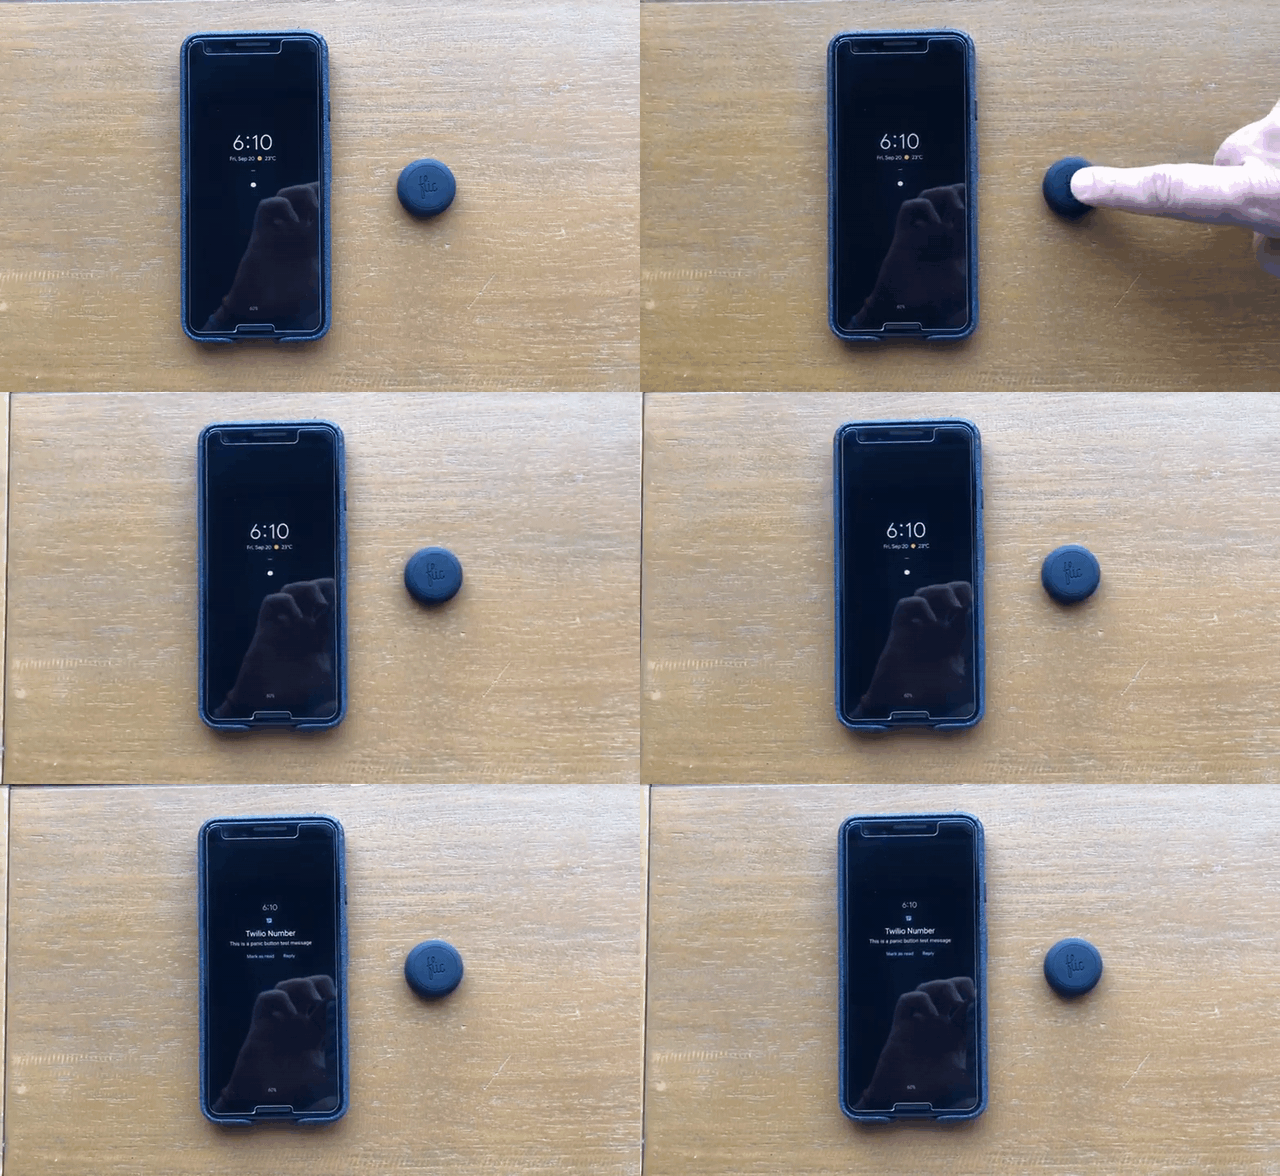
Have any ideas on how to extend this or make it even better? Let us know! We can't wait to see what you build!
Got any questions or comments? You can find me on:
- Email: flarranaga@twilio.com
- Twitter: @xabadu
- GitHub: Xabadu
Fernando is the stylin’, profilin’, ui buildin’, web codin’, community leadin’, son of a gun! He is the Developer Evangelist for Twilio.org, the social impact arm of Twilio ✌️
Related Posts
Related Resources
Twilio Docs
From APIs to SDKs to sample apps
API reference documentation, SDKs, helper libraries, quickstarts, and tutorials for your language and platform.
Resource Center
The latest ebooks, industry reports, and webinars
Learn from customer engagement experts to improve your own communication.
Ahoy
Twilio's developer community hub
Best practices, code samples, and inspiration to build communications and digital engagement experiences.


