Building an iOS App on Windows Azure
You can control a website, mobile backend and SendGrid all from within the Microsoft Azure management portal. We will cover all 3 of these in this tutorial.
To start, create a SendGrid account from the management portal:
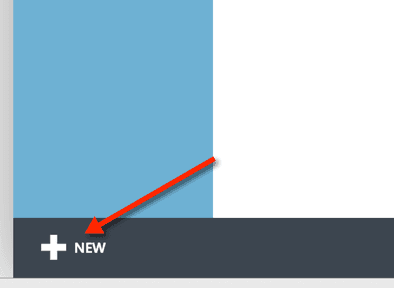
- Click New at the bottom left.
- Click Store to load up the list of Add-ons.
- Select SendGrid.
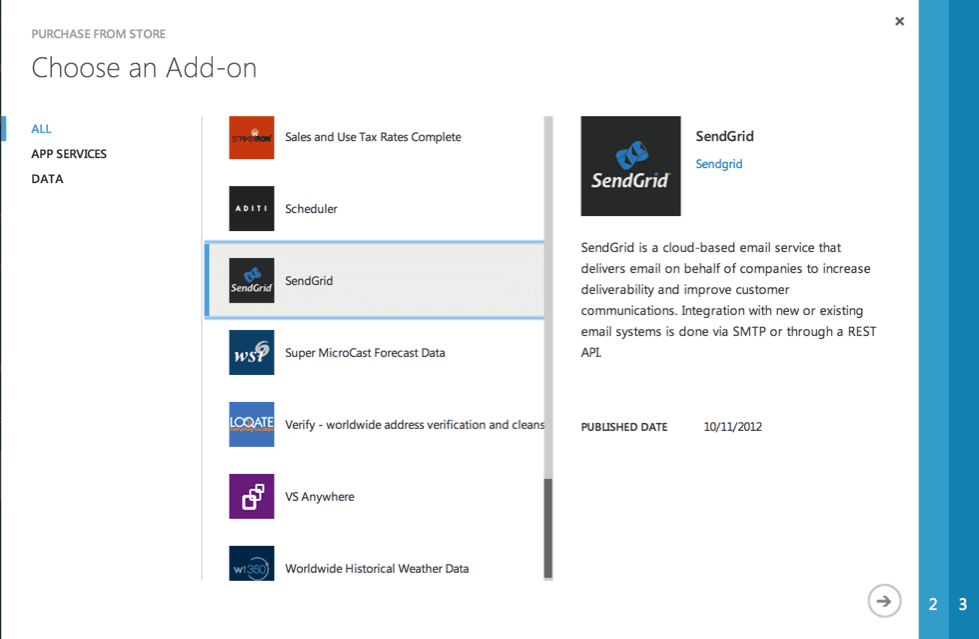
- Then click the arrow at the lower right to go to step 2.
- Choose the Free plan for now for 25,000 free emails per month.
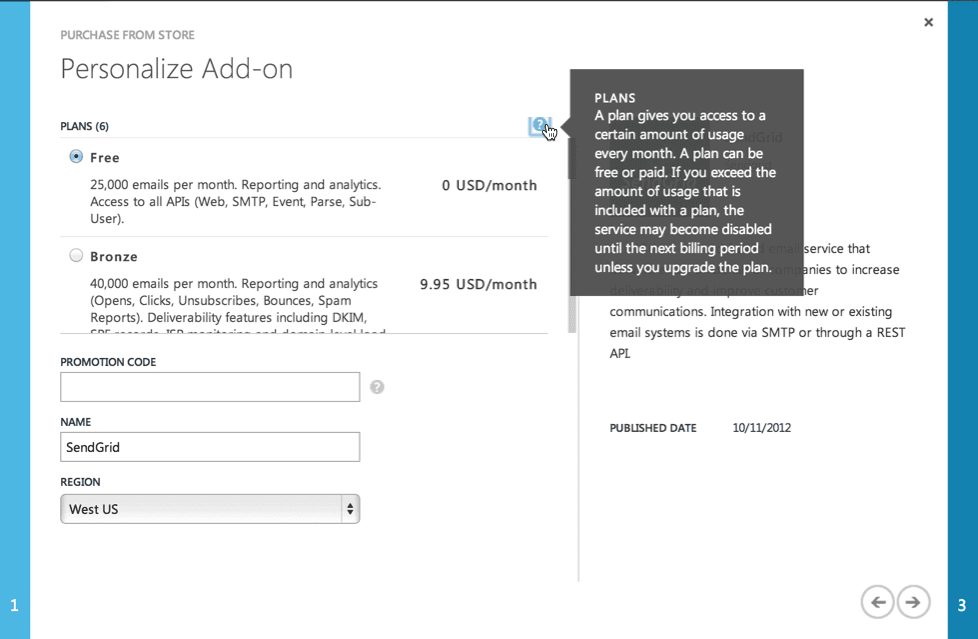
- Proceed to step 3 and click Purchase.
To create a Windows Azure Website:
- Click New at the bottom left.
- Select Website, then Quick Create.

- Set the URL, such as
website.azurewebsites.net. - Click Create Website on the bottom right.
That's it! You now have a website running on Azure. Now let's create something cool.
SendGrid can both send and receive an email for your domain name. The playlist app uses incoming mail, which means setting up DNS at your domain registrar or host. The process to do this is going to be different depending on who controls your DNS. This tutorial will walk through the Azure and SendGrid part of this process, but you may need to ask for help on changing DNS in your system.
It's a good idea to choose a subdomain like playlist.example.com, rather than a domain itself. That's because the Inbound Parse API must collect all mail and you don't want to interrupt another email for your domain. To use custom domains in Windows Azure, your website will need to run in either Shared mode or the Standard tier; however, Shared mode is currently not available.
Find your IP address and note the further instructions in the management portal:
- Select your website from the list and then click SCALE on the top menu bar.
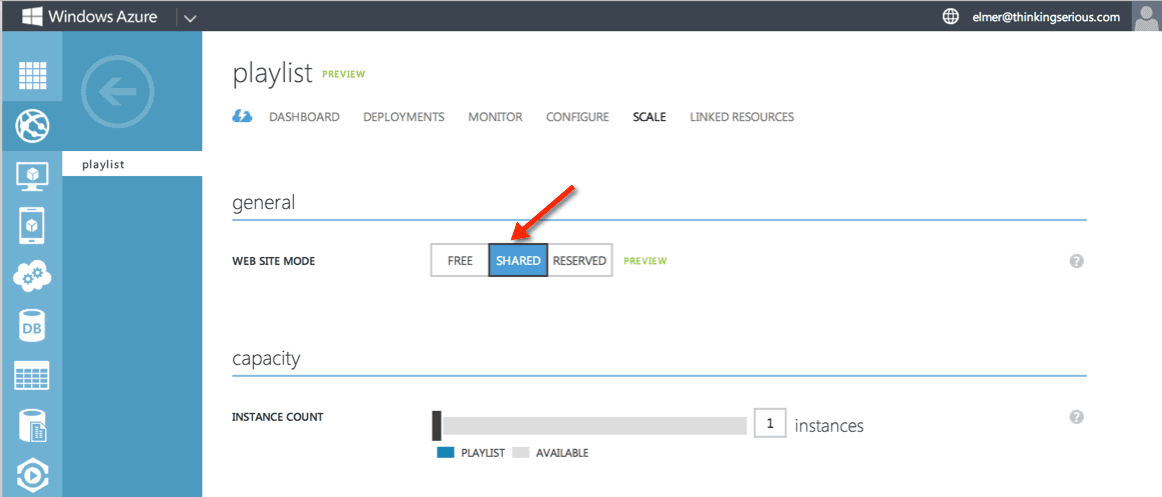
- Change the Website Mode to Shared, click Save, then select Yes.
- Click Configure at the top menu bar, then scroll down to click Manage Domains.
- Add your full subdomain plus domain, like playlist.example.com and click the check mark

- Note the IP address and the instructions on this page. You'll use these at your host or registrar when you modify your DNS settings.
Now you need to update your own DNS settings outside of the Windows Azure interface. This points your domain's web traffic to Microsoft Azure and your email to SendGrid. How you change your DNS depends on where your DNS is administered, which could be your host or domain registrar.
You'll need to make 3 updates to your DNS:
- Create an A record for playlist.example.com that points to the IP noted above
- Create a CNAME record according to the instructions on the screen where you obtained the IP Address
- Create an MX record pointing to mx.sendgrid.net.
DNS changes can take an hour or more to propagate. Back at Windows Azure's domain management page, wait for the red exclamation point to become a green checkmark.
While you're waiting for DNS to be ready, you can prepare your SendGrid Incoming Parse API webhook. From the Windows Azure interface:
- Click the SendGrid App Service from your all items list.
- In the management section, select Go to the SendGrid website for next steps.
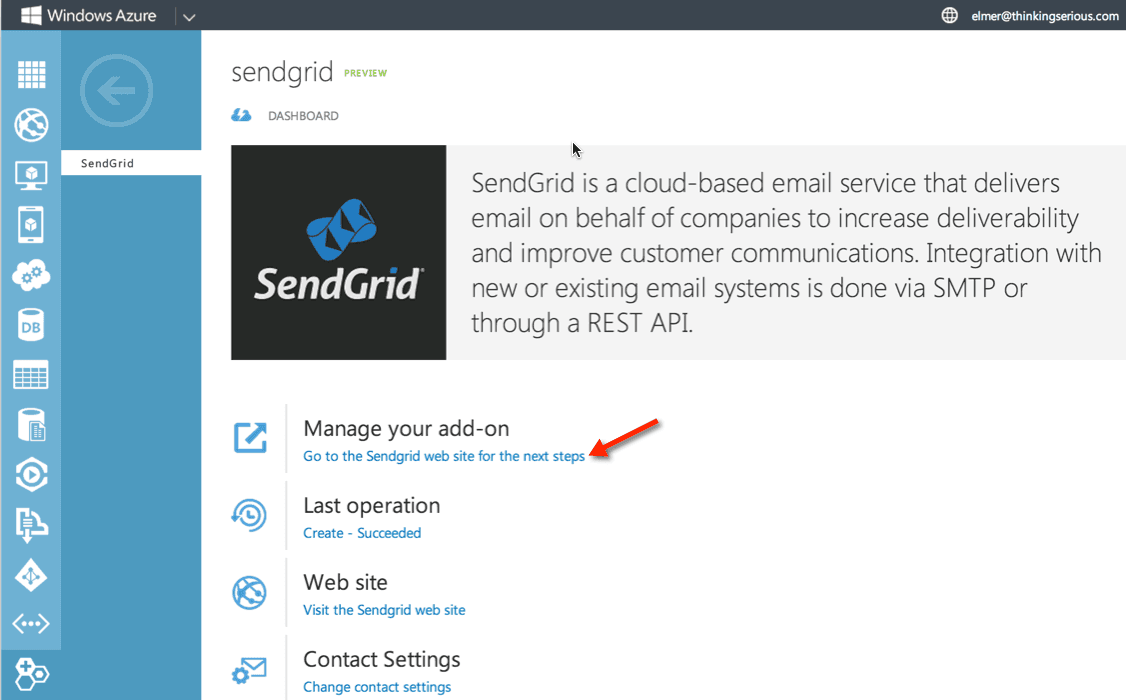
- Now you're looking at the SendGrid interface--click Developers at the top.
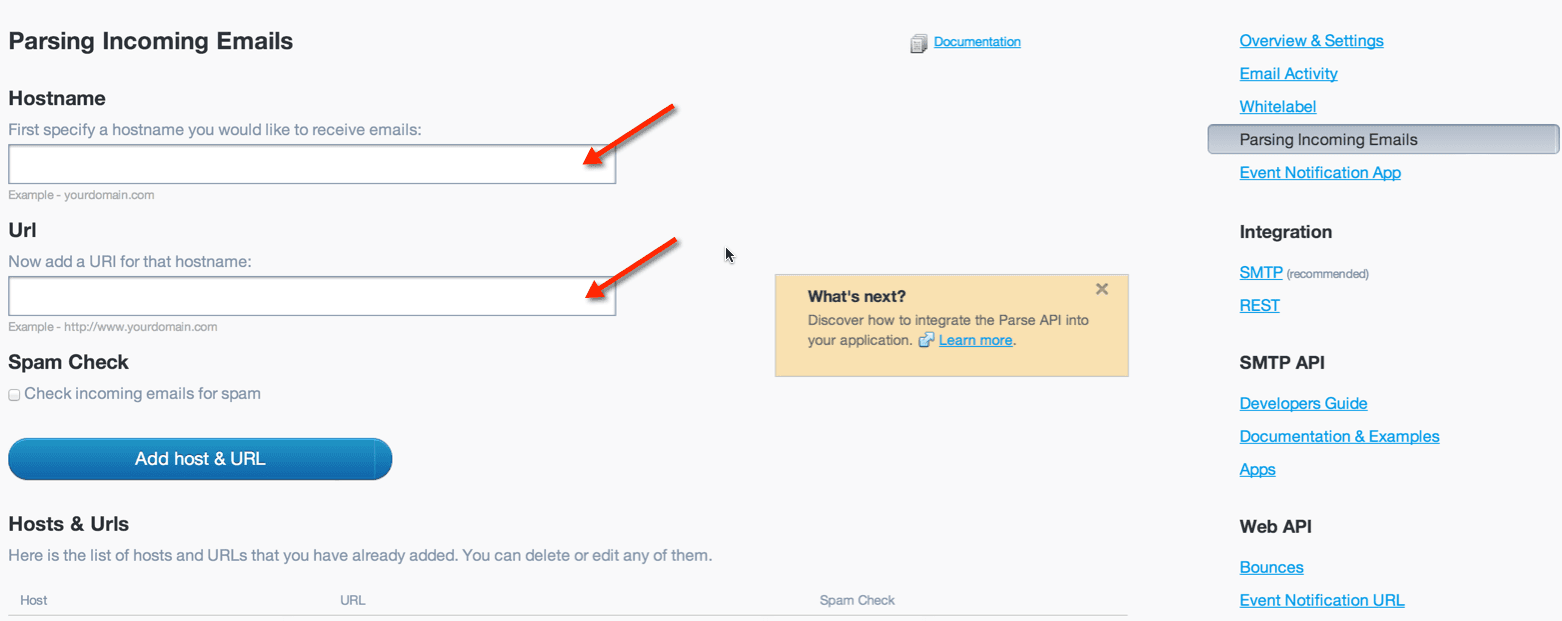
- Click PARSE INCOMING EMAILS on the right and you'll see some fields to fill out
-
Fill in the values you've used for your hostname and URL. For example:
- Hostname:
playlist.example.com - URL:
http://website.azurewebsites.net/email
- Hostname:
-
Click Add Host & URL.
Once the DNS has propagated, you'll be able to receive an email to any email address @playlist.example.com. In the next step, we'll make sure your website on Microsoft Azure is ready to accept those emails.
Before you can put the code in place, you need to prepare your source control system, which will be Git in this case. Make sure you have Git installed on your local machine before proceeding. There are downloads for Windows, Mac, Linux, and Solaris. Now set up your repository within the Windows Azure interface:
- Click the website name from your all items list.
- Under quick glance, click Set up deployment from source control.
- Choose local git repository.
- Copy the Git URL to your clipboard--you will need it later, and it should look similar to
https://username@subdomain.scm.azurewebsites.net/playlist.git
Now you need to set some environment variables, so you don't expose these credentials in your code. Follow these steps to find those credentials:
To find your SendGrid credentials within the Windows Azure management portal:
- Click SendGrid from the all items list.
- In the bar on the bottom, click Connection Info.
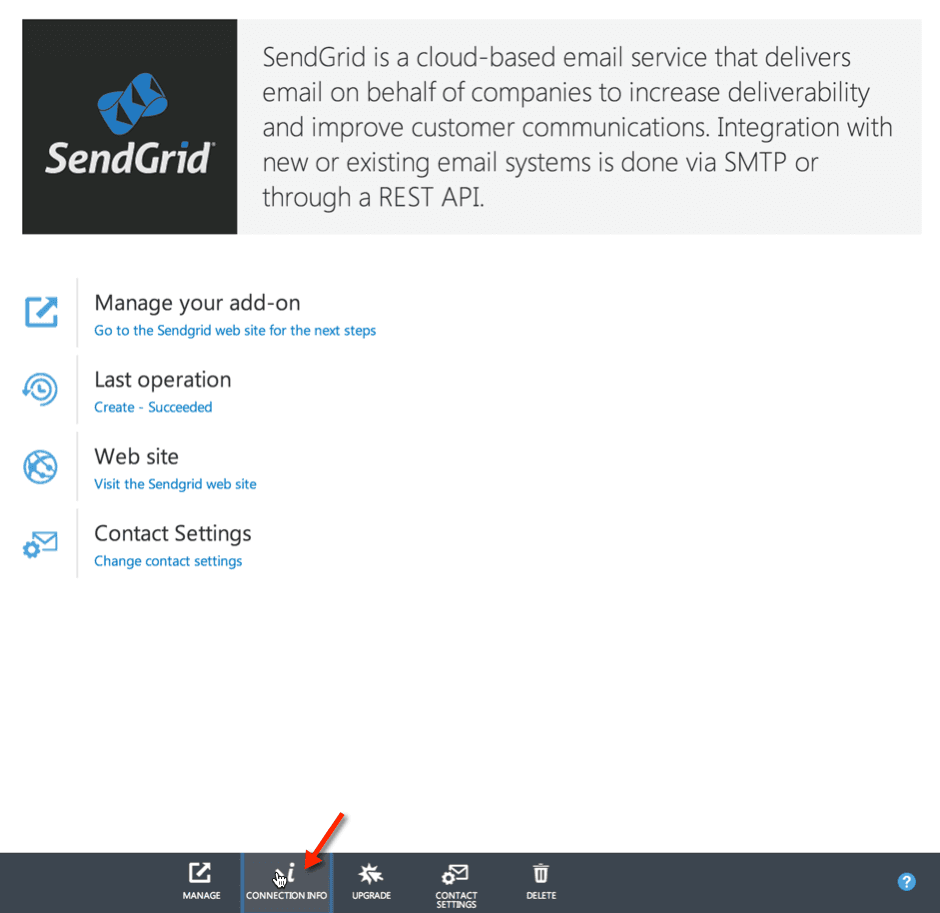
- A screen will pop up with your password, SMTP server, and username
To get your Spotify API Key, which you'll use to create your playlist, follow the instructions here: https://developer.spotify.com/documentation/general/guides/authorization/app-settings/.
With the credentials in hand, it's time to add them as environment variables within the Windows Azure management portal:
-
Choose your website from the all items list, then click Configure.
-
Under "app settings" set the following KEY VALUE pairs
SENDGRID_USER = usernameSENDGRID_PASS = passwordDOMAIN = playlist.example.comCLIENT_ID = your_keyCLIENT_SECRET = your_secretXHR_POLLING_ONLY = 1
-
Click SAVE at the bottom
With your source control and environment variables set, it's time to download the code that makes this app run. You will then upload that code to your Azure account.
Open up your command line on your local machine and prepare it for code:
-
Create a local folder to house the code (e.g.
mkdir playlist) -
Clone the code into that directory by executing this command:
git clone git://github.com/theycallmeswift/playlist.sendgriddemos.com.git -
cd playlist.sendgriddemos.com -
git remote add azure git_url- This is the long URL you saved from Microsoft Azure after setting up source control.
-
git push azure master- This is the command that pushes the code to Azure cloud
One last thing, you need to update the receiving email address:
-
Open up
public/index.html -
Change the email in
index.html(line 25) to the email address you want to use. Something likeplay@playlist.example.com -
git add .- This adds the modified file for upload
-
git commit -m "Updating email address" -
git push azure master- Again, this pushes the code to Azure cloud
With your changes pushed to Azure, you can restart the server with the button at the bottom of the web server's dashboard. Then click the BROWSE button within the same menu to see your website live. At this point, people can send in their song requests, assuming that the DNS has propagated.
Microsoft Azure can also run a backend-as-a-service for your app, which allows you to store data, authenticate users, send push notifications, and do other common mobile tasks. This backend can also be used for non-mobile applications.
Follow these steps to enable Mobile Services from the Microsoft Azure interface:
- Click NEW at the bottom left, select MOBILE SERVICE, then click Create.
- Choose a URL — this is up to you, it will be internal to your app
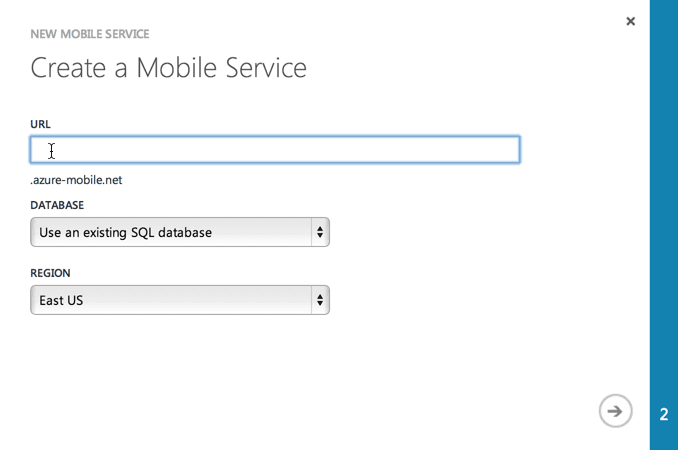
- Click Next.
- Choose a Server Login Name and Password
- Choose Configure advanced database settings.
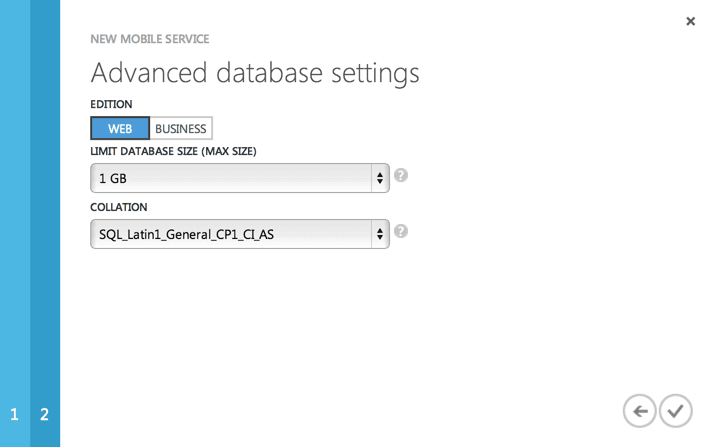
- Click Next, then review and click Complete.
To add a table to the database:
- Click on the name of your mobile service to access its settings
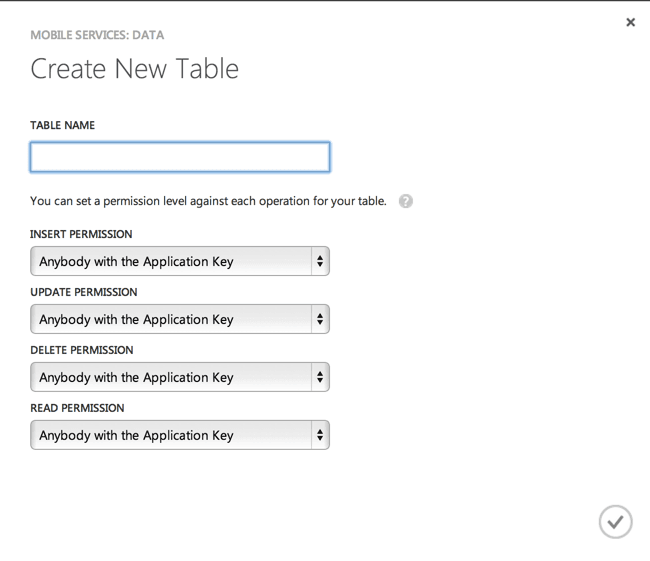
- Click Data, then Add a Table
- Choose a table name, update permissions and click Complete.
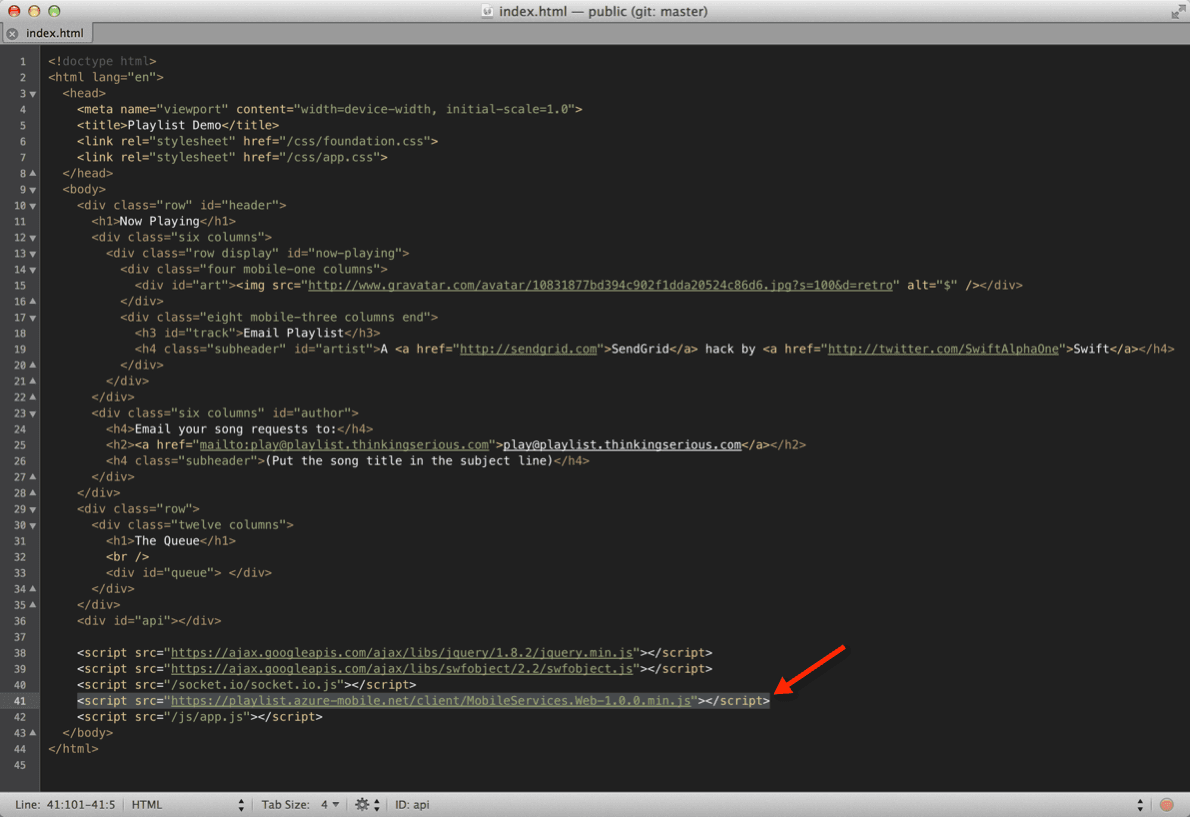
In your index.html file add the following code near the closing body tag to add the Windows Mobile Services library to your app:
<script src="https://website.azure-mobile.net/client/MobileServices.Web-1.0.0.min.js"></script>
In the js/app.js file, after the $("#queue").append… line, add the following code:
1var client = new WindowsAzure.MobileServiceClient("https://website.azure-mobile.net/", "<Password>");2var item = { request: data.name, song: data.track, user: data.user };3client.getTable("playlist_songs").insert(item);
To allow for your app to have access to the DB, add your URL to the cross-origin resource sharing (cors) setting.

Add your changes via git and push to Azure.
Now your website, mobile service, and SendGrid account are all in harmony on Microsoft Azure. You could stop here, but to see the real power of Mobile Services, you'll want to create a native mobile application.
The Microsoft Azure Mobile Services SDK simplifies the process of standing up a backend for your app in Microsoft Azure. The Microsoft Azure team also has SDKs for Android, HTML, Windows Store, and Windows Phone. For this example, we are going to use iOS.
We can download a pre-packaged mobile app from within the Microsoft Azure interface:
- Click the name of your mobile service from the all items menu.
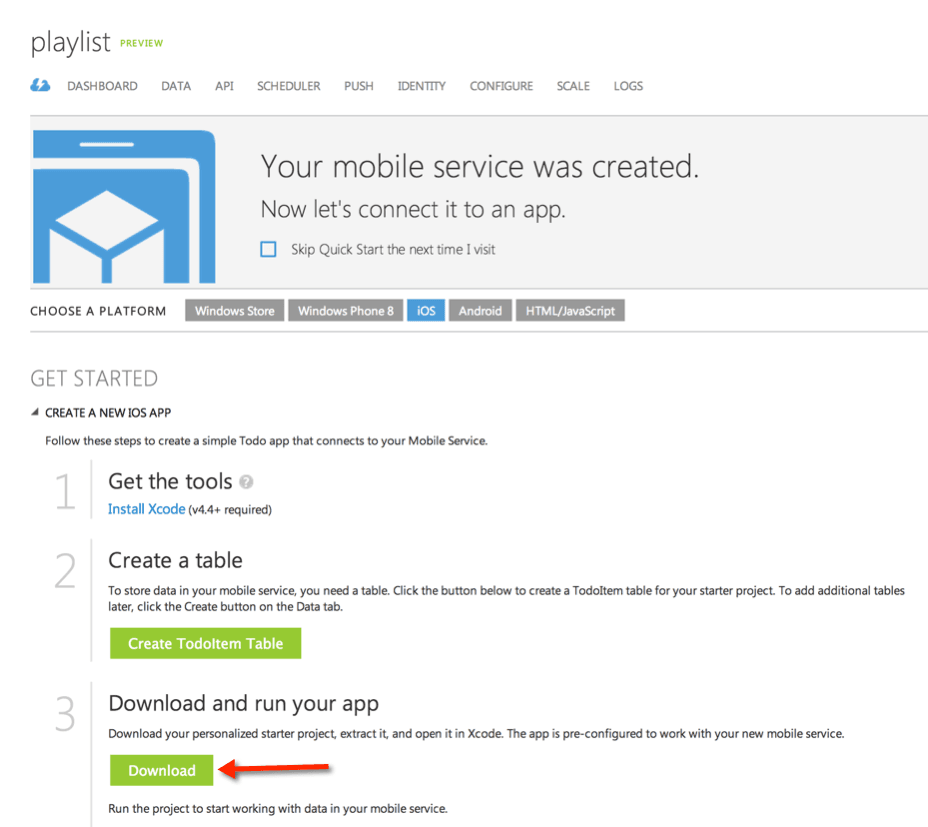
- You should see the quickstart tab. Click iOS then Create a new iOS app.
- Click Download to grab the source code.
To create a native iPhone app, you'll need to have Xcode installed on a Mac. It's a big download (over 1 GB), so find something to do while you wait.
Now you'll want to edit the sample app you downloaded from Microsoft Azure:
- Expand the files on your computer and open the project file using Xcode.
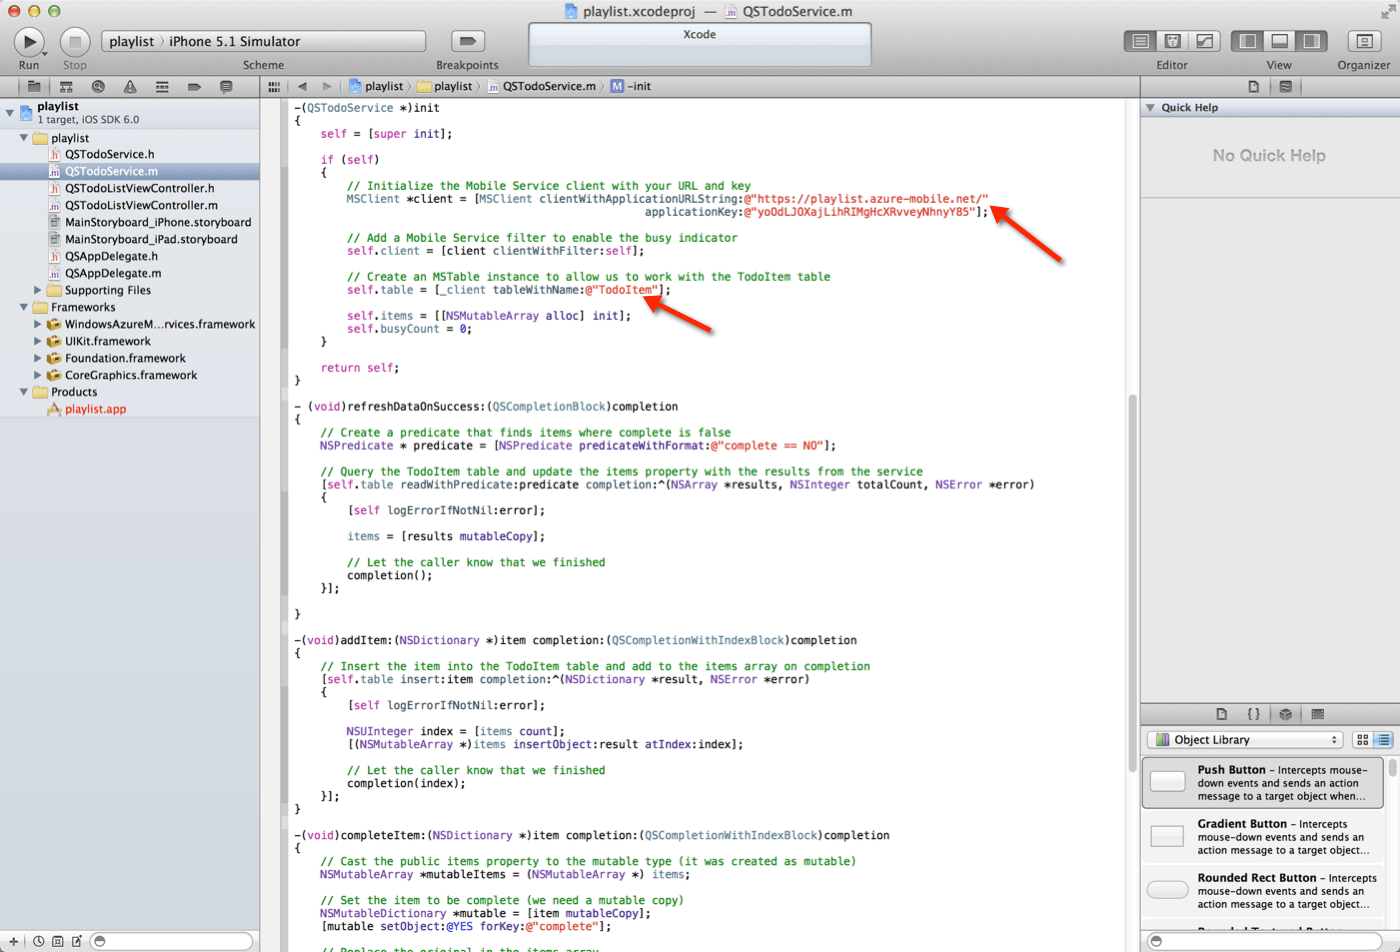
- Update the credentials and table name in
QSTodoService.mwith the ones you used when you created your mobile service.
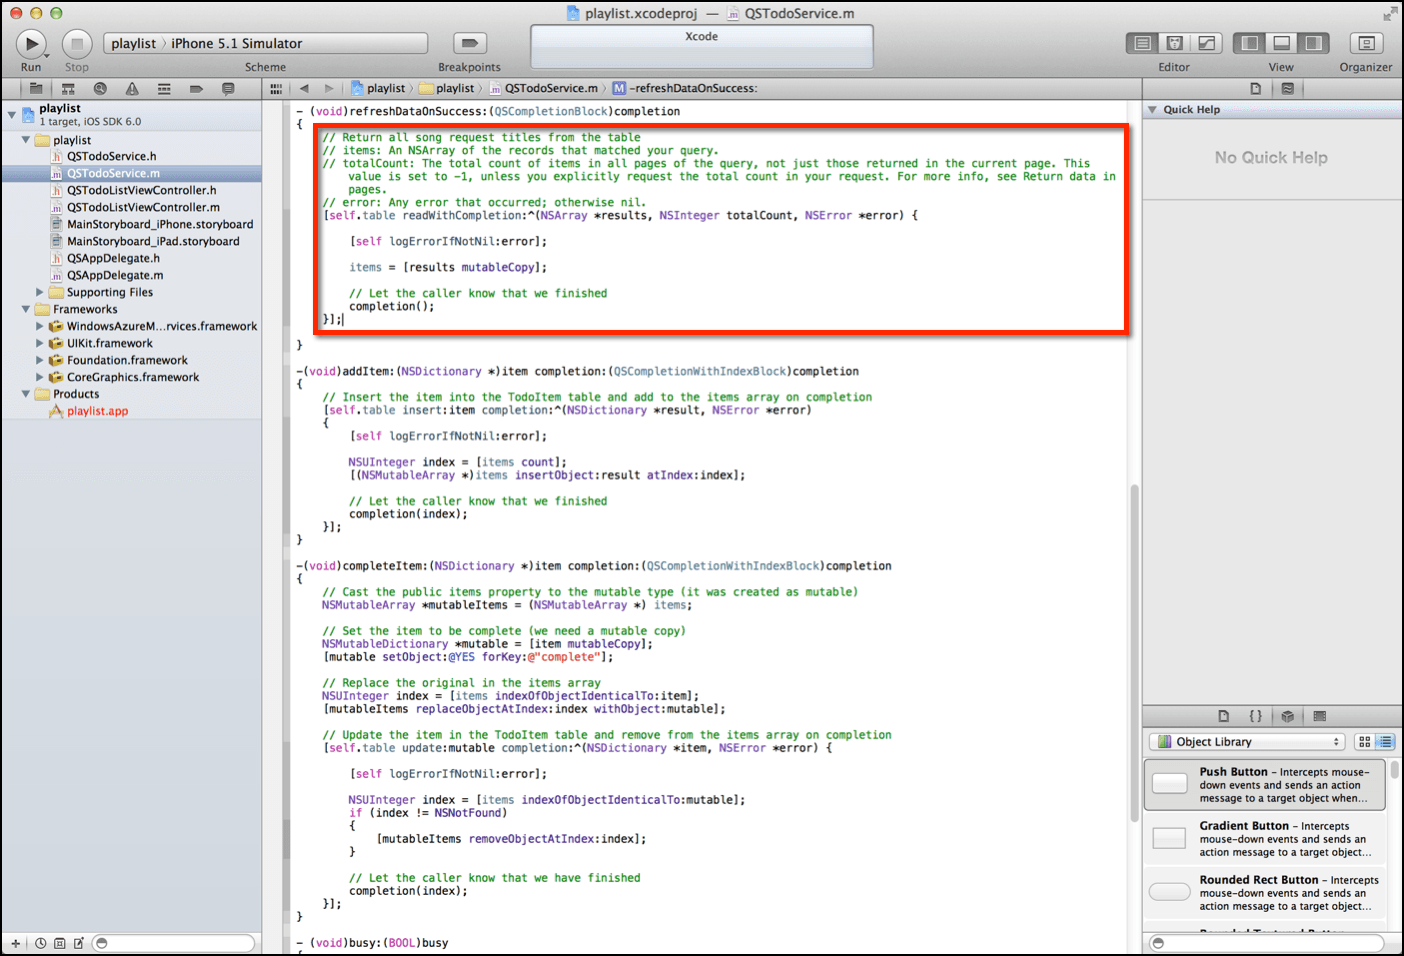
- Update the function refreshDataOnSuccess in
QSTodoService.mto return all from the queue. Remove the existing code there and replace it with:
1// Return all song request titles from the table2// items: An NSArray of the records that matched your query.3// totalCount: The total count of items in all pages of the query, not just those returned in the current page. This value is set to -1, unless you explicitly request the total count in your request. For more info, see Return data in pages.4// error: Any error that occurred; otherwise nil.5[self.table readWithCompletion:^(NSArray *results, NSInteger totalCount, NSError *error) {6[self logErrorIfNotNil:error];7items = [results mutableCopy];8// Let the caller know that we finished9completion();10}];
- Now, go to the file QSToDoListViewController.m, and replace the onAdd function's contents with:
1// Populate the parameters for the SendGrid Web API Call2// Find more details about the [Web API here](/api-reference/).3NSString *username = @"<Your SendGrid Username>";4NSString *apikey = @"<Your SendGrid Password>";5NSString *to = @"<Email to Playlist Service from Appendix A>";6NSString *from = @"<From Email Address>";7NSString *fromname = @"<Your Name>";8NSString *text = @"%20";910// Make sure the data received from the text field is formatted properly11NSString *subject = [itemText.text stringByAddingPercentEscapesUsingEncoding:NSUTF8StringEncoding];1213// Generate the Web API call14NSURL *url = [NSURL URLWithString:[NSString stringWithFormat:@"https://api.sendgrid.com/api/mail.send.json?to=%@&from=%@&fromname=%@&subject=%@&text=%@&api_user=%@&api_key=%@",to, from, fromname, subject, text, username, apikey]];1516// This writes the composed URL in the Xcode console for debugging purposes17NSLog(@"URL %@",url);1819// Create a request object using the URL20NSURLRequest *request = [NSURLRequest requestWithURL:url];2122// Prepare for the response back from the server23NSHTTPURLResponse *response = nil;24NSError *error = nil;2526// Send a synchronous request to the server27NSData *responseData = [NSURLConnection sendSynchronousRequest:request returningResponse:&response error:&error];2829// Error handling30if (error != nil) {31NSLog(@"%@", [error localizedDescription]);32UIAlertView *message = [[UIAlertView alloc] initWithTitle:@"Error"33message:@""34delegate:nil35cancelButtonTitle:@"OK"36otherButtonTitles:nil];37[message show];38}39itemText.text = @"";
- In the same file, replace this line:
label.text = [item objectForKey:@"text"];
with this line:
label.text = [item objectForKey:@"request"];
Now you can make some adjustments to the interface:
- Click on the storyboard, then the Text Input field.
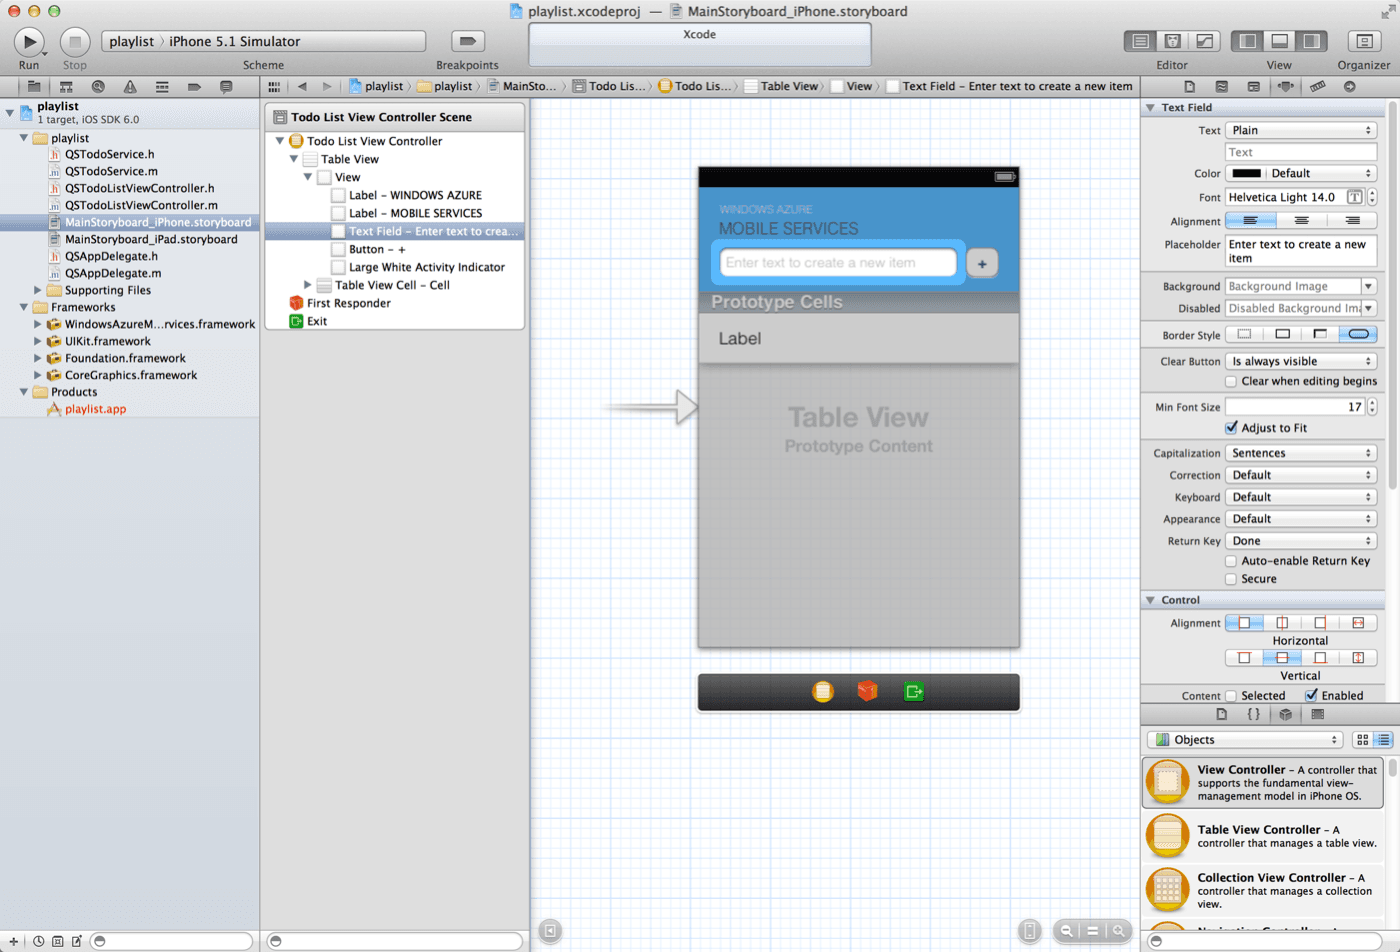
- On the right, change the placeholder text to read: "Enter your song request"
- Next, double click on the button and rename it to "Send". You will have to adjust the size of the text box and button by single clicking and adjusting.
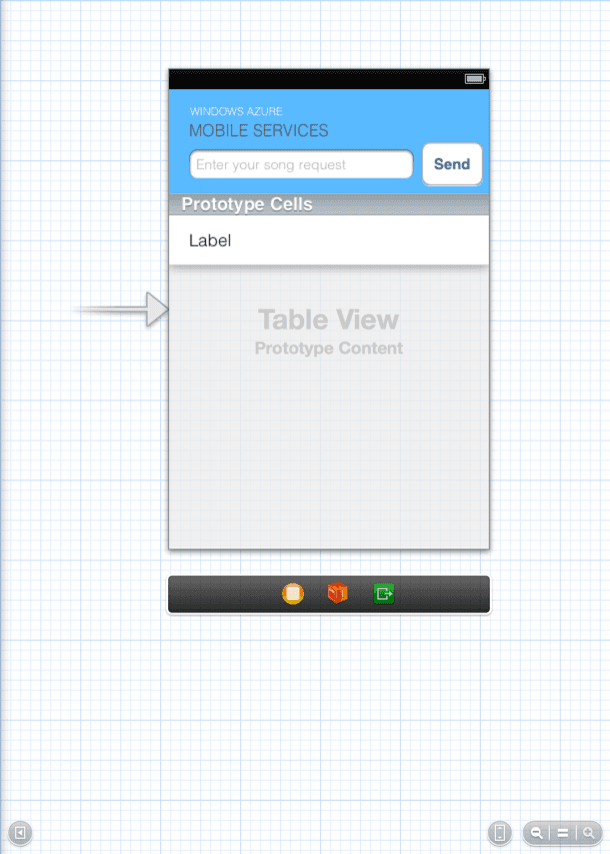
Your project in Xcode should look like the above screenshot. When you run the iPhone app, you should be able to see requested songs and add your own songs to the shared playlist.
The code for this tutorial is available at our GitHub page. Enjoy!