Customize your Flex-Salesforce Integration
The setup and configuration outlined in Create your Flex-Salesforce Integration and Manage Flex-Salesforce Call Flows describe how to get up and running with the default behavior in mind. However, you might want to customize both this integration experience as well as call flows.
Info
Do you still need to set up your Flex-Salesforce Integration? Check out our guide for configuring your Salesforce instance for Flex!
In this guide, we will walk through how to customize the default call flow in your Flex-Salesforce integration by
- Creating an IVR (Interactive Voice Response) to collect a case number from our caller
- Looking up an existing case, or
- Creating a new case from the caller's input if there is no pre-existing case
To accomplish this, we'll need to do the following:
- Create a Studio flow to introduce IVR and collect a Case Number from the caller
- Pass Salesforce's Case object to the Flex-Salesforce integration by using a custom Task attribute called
sfdcSearchString - Re-configure the Salesforce Softphone layout to point to the Case Object
Info
Remember: Flex is a Programmable Application Platform, so you can customize Flex to any extent using the Flex Plugin Model, and those changes will be reflected in your Salesforce integration as well. The customizations in this guide refer to the enhancements in both the integration and the call flow itself.
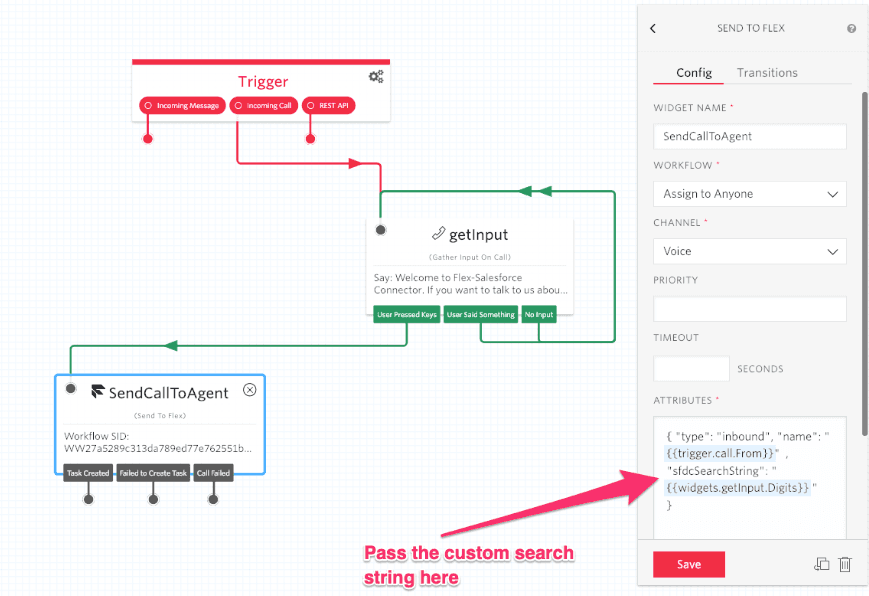
From your Twilio Console, create a Studio flow, or edit an existing studio flow by doing the following:
-
Add a Studio widget to
Gather input on a callto collect user input for a given Case ID (if one exists). Let's call this widgetgetInput. -
On the 'User Pressed Keys' transition, connect this widget to the
Send to Flexwidget. -
Pass
{{widgets.getInput.Digits}}to thesfdcSearchStringtask attribute, making sure that the defaulttypeandnameattributes exist. -
The final Studio Flow will look like this:

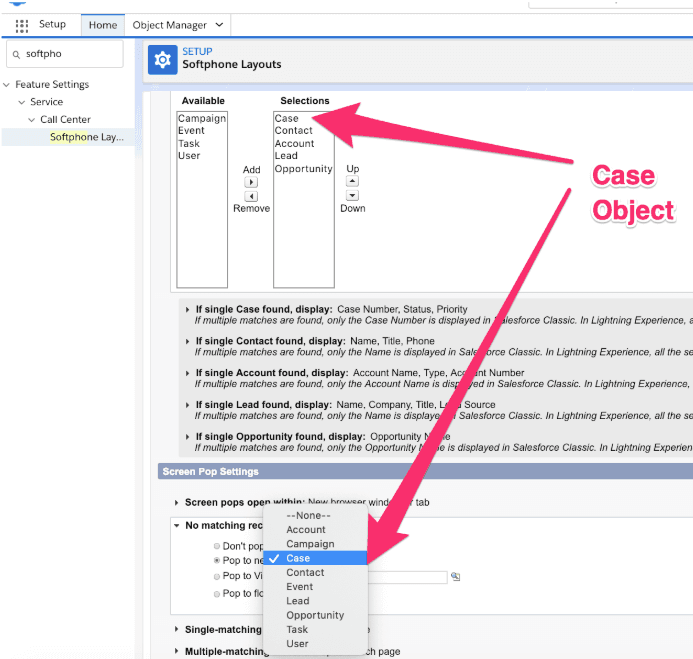
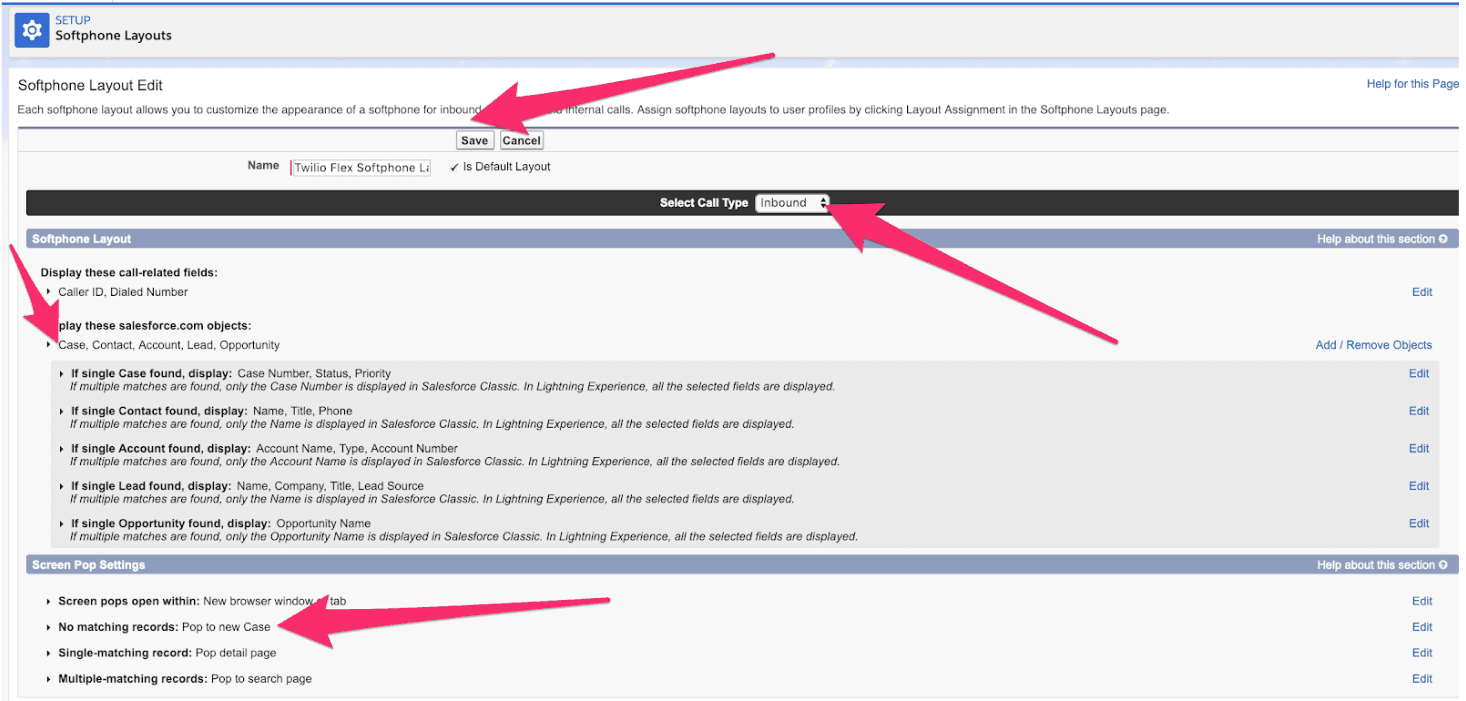
The way to tell Salesforce which object to use for Search and Screen Pop is through the Softphone layout.
We will configure the softphone layout to refer to the Case object instead of the default Contact object.
For inbound calls:
-
Change the order of objects to move Case to the top

-
Change the Screen Pop settings to point to Case object:

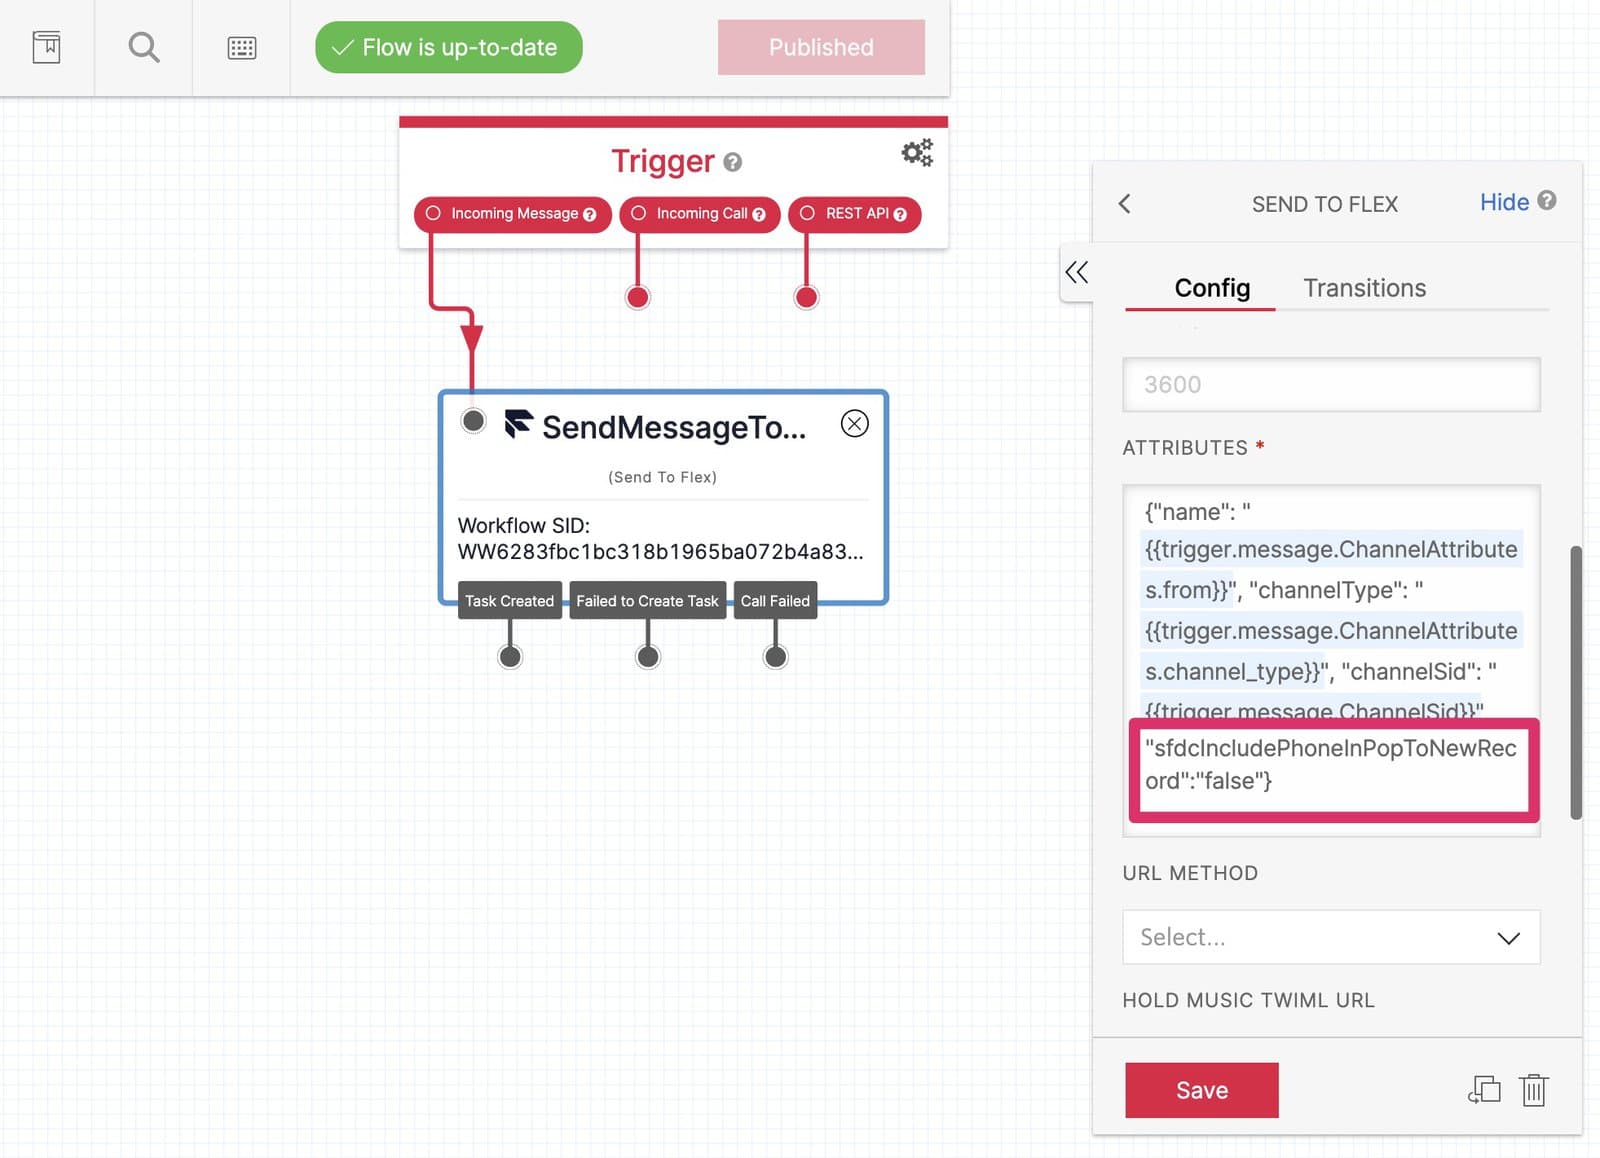
A Phone attribute is always sent from the Flex plugin to Salesforce when creating a new record. However, specific records like Cases are not linked to a given phone number.
Depending on your Softphone layout configuration, you can disable providing this information by adding an extra sfdcIncludePhoneInPopToNewRecord task attribute and setting that to false.

Now, when a caller provides a Case ID using their keypad upon being prompted by the IVR, that Case ID is used to search for the case and render the Screen Pop to the relevant Case record.